
Let me tell you about my secret weapon for every party I’ve ever hosted—mini cheesecake bites! One batch of these creamy little delights disappears faster than I can say “dessert table.” I learned this the hard way at my niece’s birthday last summer when I turned my back for two minutes and came back to an empty platter (though the guilty crumbs on my brother’s chin gave him away).
What makes these mini cheesecake bites so magical? They’re the perfect two-bite treat—no plates or forks needed—with that classic creamy texture we all love in cheesecake, minus the hassle of slicing. I’ve brought them to bridal showers, book club meetings, and even a last-minute potluck where they saved the day. The best part? You probably have all the ingredients in your kitchen right now.

Table of Contents
Why You’ll Love These Mini Cheesecake Bites
These little guys have become my go-to dessert for so many reasons:
- Speed: From bowl to table in about an hour (most of that’s just chilling time!)
- Customizable: Dress them up or down with whatever toppings you’ve got
- Party perfect: No slicing needed – just set them out and watch them disappear
- Creamy dreamy texture: All the richness of full-size cheesecake in bite form
Quick and Easy to Make
Honestly, the hardest part is waiting for them to chill! I’ve made these during commercial breaks (don’t judge my TV habits). Just mix a few simple ingredients, bake for 15 minutes, and pop them in the fridge. Even my baking-challenged nephew could make these without calling for backup.
Perfect for Any Occasion
I’ve served these at everything from fancy bridal showers to “Oops I forgot it’s my turn to bring snacks” moments. They work beautifully on dessert tables, as edible party favors, or just when you need a little something sweet with your afternoon coffee. Last Christmas, I did a red and green sprinkle version that had all my cousins fighting over the last one.
Ingredients for Mini Cheesecake Bites
Here’s everything you’ll need to make these little bites of heaven – I promise it’s nothing fancy! I’ve made this recipe so many times I could probably recite this list in my sleep.
- 8 oz cream cheese, softened (that’s one standard package – and yes, it must be softened or you’ll be fighting lumps)
- 1/4 cup granulated sugar (just enough sweetness without going overboard)
- 1 large egg (room temp works best for smooth mixing)
- 1 tsp vanilla extract (the good stuff if you’ve got it!)
- 6 vanilla wafer cookies, crushed (about 1/4 cup – Nilla Wafers are my fave)
- Optional toppings: fresh berries, chocolate sauce, caramel, lemon curd – go wild!
Ingredient Notes & Substitutions
Listen, we’ve all been in that “I’m missing one ingredient” panic. Here’s how to adapt:
Crust swaps: No vanilla wafers? Graham crackers work great (use 1/4 cup crumbs). For gluten-free folks, crushed gluten-free cookies or even almond flour mixed with a bit of butter does the trick.
Lighter option: Swap half the cream cheese for Greek yogurt if you’re feeling virtuous – the texture will be slightly less dense but still delicious.
Egg alternatives: Made these for my vegan friend using 1/4 cup unsweetened applesauce instead of egg – not quite the same richness but still tasty!
Flavor twists: Sometimes I add a teaspoon of lemon zest to the batter or swap vanilla for almond extract. The possibilities are endless!
Print
25 Irresistible Mini Cheesecake Bites That Steal Every Party
- Total Time: 1 hour 25 minutes (including chilling)
- Yield: 12 mini cheesecake bites 1x
- Diet: Vegetarian
Description
Delicious mini cheesecake bites perfect for parties or a sweet treat. These bite-sized desserts are creamy, easy to make, and customizable with your favorite toppings.
Ingredients
- 8 oz cream cheese, softened
- 1/4 cup granulated sugar
- 1 egg
- 1 tsp vanilla extract
- 6 vanilla wafer cookies, crushed
- Optional toppings: fresh berries, chocolate sauce, caramel
Instructions
- Preheat oven to 350°F (175°C).
- Line a mini muffin tin with liners.
- Place a small amount of crushed vanilla wafers at the bottom of each liner.
- In a bowl, beat cream cheese and sugar until smooth.
- Add egg and vanilla, mixing well.
- Spoon the mixture into the liners, filling each 3/4 full.
- Bake for 12-15 minutes or until set.
- Let cool, then chill in the fridge for 1 hour.
- Add toppings before serving.
Notes
- Use room temperature cream cheese for smoother mixing.
- For a firmer texture, chill longer before serving.
- Store leftovers in the fridge for up to 3 days.
- Prep Time: 10 minutes
- Cook Time: 15 minutes
- Category: Dessert
- Method: Baking
- Cuisine: American
Nutrition
- Serving Size: 1 mini cheesecake bite
- Calories: 80
- Sugar: 6g
- Sodium: 60mg
- Fat: 5g
- Saturated Fat: 3g
- Unsaturated Fat: 1.5g
- Trans Fat: 0g
- Carbohydrates: 7g
- Fiber: 0g
- Protein: 1g
- Cholesterol: 25mg
Keywords: mini cheesecake bites, easy dessert, party food, bite-sized cheesecake
Equipment You’ll Need
Don’t worry – you won’t need any fancy gadgets to make these mini cheesecake bites! I’ve made them with just the basics so many times. Here’s what should be in your baking arsenal:
- Mini muffin tin (standard size holds 24, but I often just bake in batches)
- Mini muffin liners (the pretty foil ones make them extra party-ready)
- Mixing bowl (my trusty glass one has seen hundreds of cheesecake batches)
- Electric mixer (hand mixer works great, though I’ve used a whisk in a pinch)
- Spoon or small cookie scoop (for neatly filling those tiny cups)
That’s it! No springform pans, water baths, or special equipment required. I’ve even used a regular muffin tin once when desperate – just filled the cups halfway and called them “jumbo bites.” Worked like a charm!
How to Make Mini Cheesecake Bites
Okay, let’s get to the fun part – making these adorable little cheesecakes! I promise it’s easier than you think. Just follow these steps and you’ll have perfect mini cheesecake bites every time. The first time I made these, I was shocked at how simple they were compared to a full-size cheesecake. No water bath, no cracking worries – just creamy, delicious results!
Step 1: Prepare the Crust
First things first – let’s tackle that crust. I like to put my vanilla wafers in a zip-top bag and crush them with a rolling pin (great stress reliever!). You want them finely crushed but not powder-fine – little bits add nice texture. About 1/4 cup of crumbs is perfect for 12 mini cheesecakes.
Line your mini muffin tin with those cute little liners – the foil ones are my favorite because they peel off so easily. Drop about 1/2 teaspoon of crumbs into each liner and gently press down with your fingers or the back of a spoon. Don’t pack it too tight – we want it to hold together but still be tender.
Step 2: Mix the Cheesecake Filling
Now for the magic! In your mixing bowl, beat the softened cream cheese until it’s completely smooth – no lumps allowed! This usually takes me about 1-2 minutes with my hand mixer. Scrape down the sides of the bowl – those sneaky lumps love to hide there.
Add the sugar and beat again until fully incorporated. The mixture should look creamy and slightly fluffy. Now add the egg and vanilla – mix just until combined. Overmixing after adding the egg can incorporate too much air and lead to cracking, so go easy here. The batter should be smooth and silky, like thick pancake batter.
Step 3: Bake and Chill
Time to fill those cups! I use a small cookie scoop or spoon to portion the batter, filling each liner about 3/4 full. They’ll puff up slightly while baking but won’t overflow – promise!
Bake at 350°F for 12-15 minutes. They’re done when the edges look set but the centers still have a slight jiggle (like Jell-O, not liquid). Don’t wait for them to brown – that means they’re overbaked!
Here’s the hardest part: patience. Let them cool completely at room temperature, then chill in the fridge for at least an hour. I know it’s tempting to skip this step, but trust me – chilling firms them up perfectly and makes the flavors meld beautifully. I usually make them the night before parties – they taste even better the next day!
Tips for Perfect Mini Cheesecake Bites
After making hundreds of these little guys (seriously, my neighbors now expect them whenever they see my kitchen light on), I’ve learned all the tricks for flawless mini cheesecake bites every time. These are the secrets I wish someone had told me when I first started!
Room Temperature is Your Friend
I can’t stress this enough – your cream cheese and egg MUST be at room temperature. Cold cream cheese equals lumpy batter, and nobody wants that. I usually set mine out on the counter about an hour before baking. If you’re in a hurry (we’ve all been there), cut the cream cheese into chunks and microwave at 50% power for 15-second bursts until just softened – not melted!
The Mixing Sweet Spot
Here’s where most first-timers go wrong: overmixing after adding the egg. Beat the cream cheese and sugar all you want, but once that egg goes in, mix just until combined. Too much air incorporation leads to cracks and puffiness. The batter should be smooth like melted ice cream – no streaks, but not whipped either.
Chill Out – Literally
I know, I know – waiting is the worst part. But skipping the chill time is like opening a present before it’s wrapped! That hour in the fridge lets the flavors develop and gives that perfect creamy-yet-firm texture. Pro tip: If you’re really pressed for time, pop them in the freezer for 20 minutes instead – just don’t forget about them!
The Jiggle Test
Ovens lie. Mine certainly does! The best way to check doneness is the jiggle test – gently shake the pan. The edges should look set while the centers move like Jell-O. They’ll firm up as they cool. If they’re completely firm in the oven, they’re overbaked and might turn rubbery.
Storage Smarts
These keep beautifully in the fridge for 3 days – just wait to add toppings until serving. For longer storage, freeze them plain (without toppings) in a single layer, then transfer to a freezer bag. Thaw overnight in the fridge – they taste just as fresh! I always keep a stash in my freezer for unexpected guests.
Variations for Mini Cheesecake Bites
Okay, here’s where the real fun begins – playing with flavors! I’ve experimented with so many twists on these mini cheesecake bites that my recipe notebook looks like a mad scientist’s journal. The basic recipe is like a blank canvas waiting for your personal touch. Here are my favorite ways to mix things up:
Lover of All Things Citrus
For my lemon-obsessed friends (you know who you are), try adding 1 teaspoon of lemon zest and 1 tablespoon of lemon juice to the batter. It brightens up the whole flavor profile beautifully. Last summer, I did a version with lime zest and a tiny dollop of mango puree on top that tasted like sunshine in bite form!
Chocolate Heaven
Two words: chocolate swirl. Melt 1/4 cup of chocolate chips with a teaspoon of butter, let it cool slightly, then drizzle it over the filled cups before baking. Use a toothpick to swirl it in for that gorgeous marbled effect. For serious chocoholics, replace the vanilla wafers with crushed Oreos – absolute game changer!
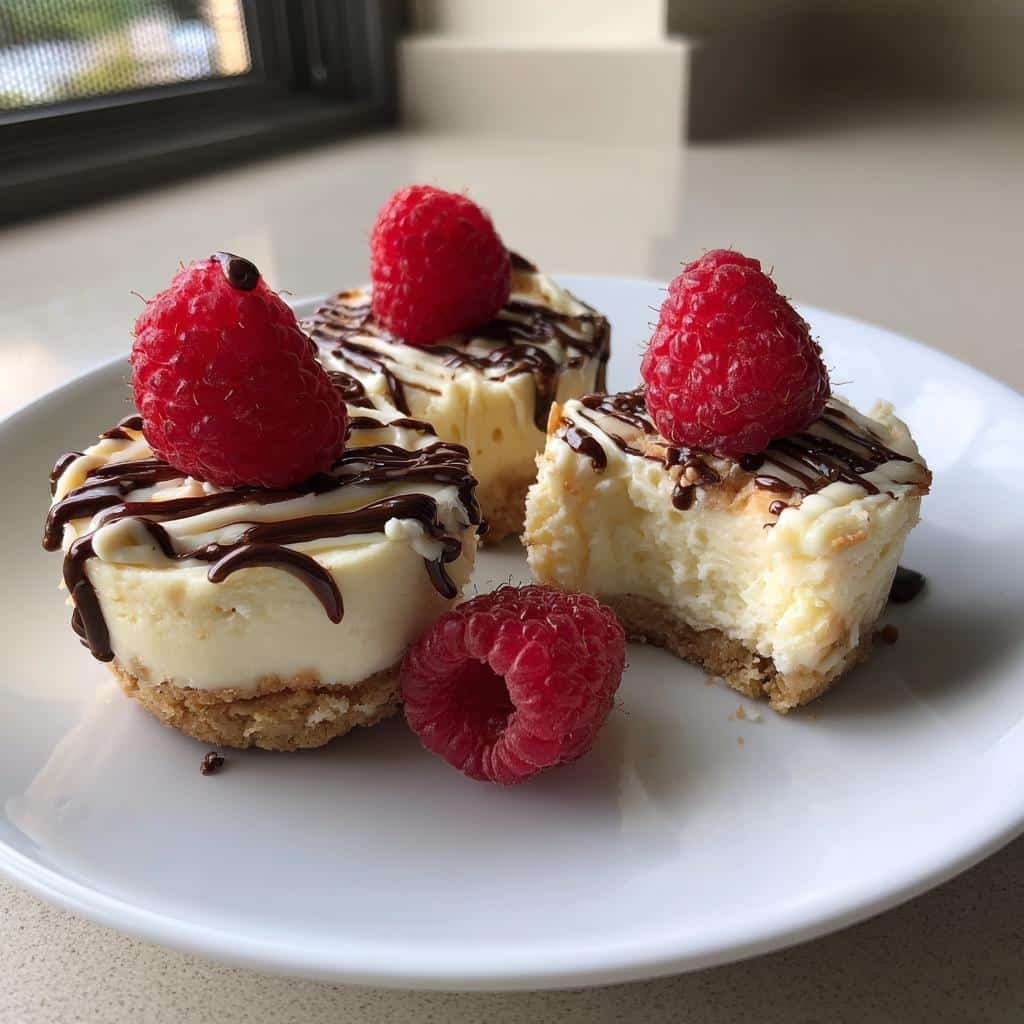
Berry Delicious
Fresh berries are my go-to when I want to impress. After baking, top each mini cheesecake with a single perfect raspberry or blueberry. Or get fancy with a quick berry sauce – just simmer 1 cup of mixed berries with a tablespoon of sugar until jammy, then spoon a bit on each bite.
Caramel Dream
Drizzle warm caramel sauce over the chilled cheesecakes and sprinkle with sea salt for that perfect sweet-salty combo. My cheat? Store-bought caramel sauce works just fine – no need to make your own unless you’re feeling ambitious!
Tropical Vacation
Mix 1/4 cup of crushed pineapple (well-drained) into the batter and top with toasted coconut flakes. Close your eyes and you’re practically on a beach somewhere!
The best part? You can mix and match these ideas to create your own signature version. Last Christmas, I did a peppermint-chocolate swirl that had everyone begging for the recipe. What will your flavor masterpiece be?
Serving Suggestions
Oh, the possibilities! These mini cheesecake bites are like little blank canvases waiting for your creative touch. My absolute favorite way to serve them? With a strong cup of coffee – the creamy richness pairs perfectly with that bitter kick. But that’s just the beginning!
For brunch parties, I arrange them on a platter with fresh berries scattered around – the colors look gorgeous and guests can mix and match flavors. Last girls’ night, we did a DIY topping bar with whipped cream, chocolate sauce, and crushed nuts that was a total hit. And when I’m feeling fancy, a tiny mint leaf on each one transforms them into something restaurant-worthy!
The best part? They’re perfectly portable. I’ve tucked them into lunchboxes, packed them for picnics (in a cooler, of course), and even served them on a stick as dessert kebabs at my nephew’s birthday. However you serve them, just be prepared for recipe requests – these little guys steal the show every time!
Storage & Reheating Instructions
Now here’s the beautiful thing about these mini cheesecake bites – they actually taste even better after some time in the fridge! I always make extra because they keep so well. Just pop them in an airtight container (I use my trusty glass storage with the snap lid) and they’ll stay fresh for up to 3 days. Pro tip: Store them without toppings if you can – the fresh berries or sauces are best added right before serving.
Freezing? Absolutely! These little guys freeze like champs. I like to arrange them in a single layer on a baking sheet, freeze until solid (about 2 hours), then transfer to a freezer bag. They’ll keep for up to 2 months this way. When the craving hits (or surprise guests arrive), just thaw overnight in the fridge. They come out perfect every time – no soggy crusts or weird textures!
As for reheating… well, you don’t really need to! These are meant to be enjoyed cold. But if you absolutely must have them slightly warm (maybe with that melty chocolate topping?), 5 seconds in the microwave does the trick. Just don’t overdo it or you’ll have mini cheesecake soup – and while that sounds delicious, it’s not quite the same experience!
Nutritional Information
Okay, let’s talk numbers – but remember, these are just estimates based on my standard recipe. Your actual numbers might dance around a bit depending on the exact brands you use and how generous you are with toppings (no judgment here – I’ve been known to go heavy on the chocolate drizzle!). Here’s the scoop per mini cheesecake bite:
- Calories: About 80
- Sugar: 6g
- Fat: 5g
- Protein: 1g
- Carbs: 7g
Now, here’s the thing – these numbers don’t account for any fancy toppings you add. Throw on some berries? Basically negligible. Drench them in caramel sauce? Well… let’s just say I don’t keep track when I’m in caramel mode! The vanilla wafer crust adds a bit of crunch without going overboard calorie-wise.
If you’re watching specific dietary needs, remember that substitutions will change these numbers. Using Greek yogurt instead of some cream cheese? You’ll save a few calories and fat grams. Going with sugar alternatives? That’ll tweak the carb count. My philosophy? Life’s too short not to enjoy good cheesecake – just balance it out with an extra walk around the block!
Frequently Asked Questions
I’ve gotten so many questions about these mini cheesecake bites over the years – seems like everyone wants to know the secrets to perfecting them! Here are the answers to the questions I hear most often (and trust me, I’ve made every mistake possible so you don’t have to!).
Can I Make Mini Cheesecake Bites Ahead of Time?
Absolutely! In fact, I almost always make them the day before. The flavors develop beautifully overnight in the fridge – that cream cheese magic needs time to work! Just hold off on adding any fresh fruit toppings until right before serving. They’ll keep perfectly for up to 3 days refrigerated, though in my house they never last that long!
How Do I Prevent Cracks?
Oh, the dreaded cracks! Here’s what I’ve learned: First, don’t overmix after adding the egg – too much air causes puffing and cracking. Second, avoid overbaking – remember that jiggle test! Finally, let them cool gradually in the turned-off oven with the door slightly ajar for about 15 minutes before moving to the counter. But hey, if cracks do happen? Just cover them with toppings – no one will ever know!
Can I Use a Different Sweetener?
You bet! I’ve successfully used honey and maple syrup – just reduce any other liquids slightly since these add moisture. For honey, use about 3 tablespoons instead of 1/4 cup sugar. Powdered erythritol works too if you’re watching sugar intake – same measurement as regular sugar. The texture might vary slightly, but the flavor will still be delicious. My aunt swears by coconut sugar for a caramel-like twist!
Final Thoughts
If you’ve made it this far, you’re officially ready to become the mini cheesecake bite hero of your next gathering! I can’t wait for you to experience that moment when your friends take their first bite and their eyes light up – it gets me every time. These little guys have saved my hosting reputation more times than I can count, and now the power is in your hands too.
The best part? Once you’ve mastered the basic recipe (which you totally will), you can start getting creative with all those fun variations we talked about. I’d love to hear what flavor combos you come up with – tag me on social or leave a comment if you try something wild! My current mission is perfecting a cookies-and-cream version for my nephew’s birthday.
So go grab that cream cheese from your fridge and get baking! Remember – even if they’re not perfect on your first try (though I bet they will be), they’ll still taste amazing. Because let’s be real – when has cream cheese and sugar ever tasted bad? Happy baking, and may your mini cheesecake bites disappear as quickly as mine always do!