
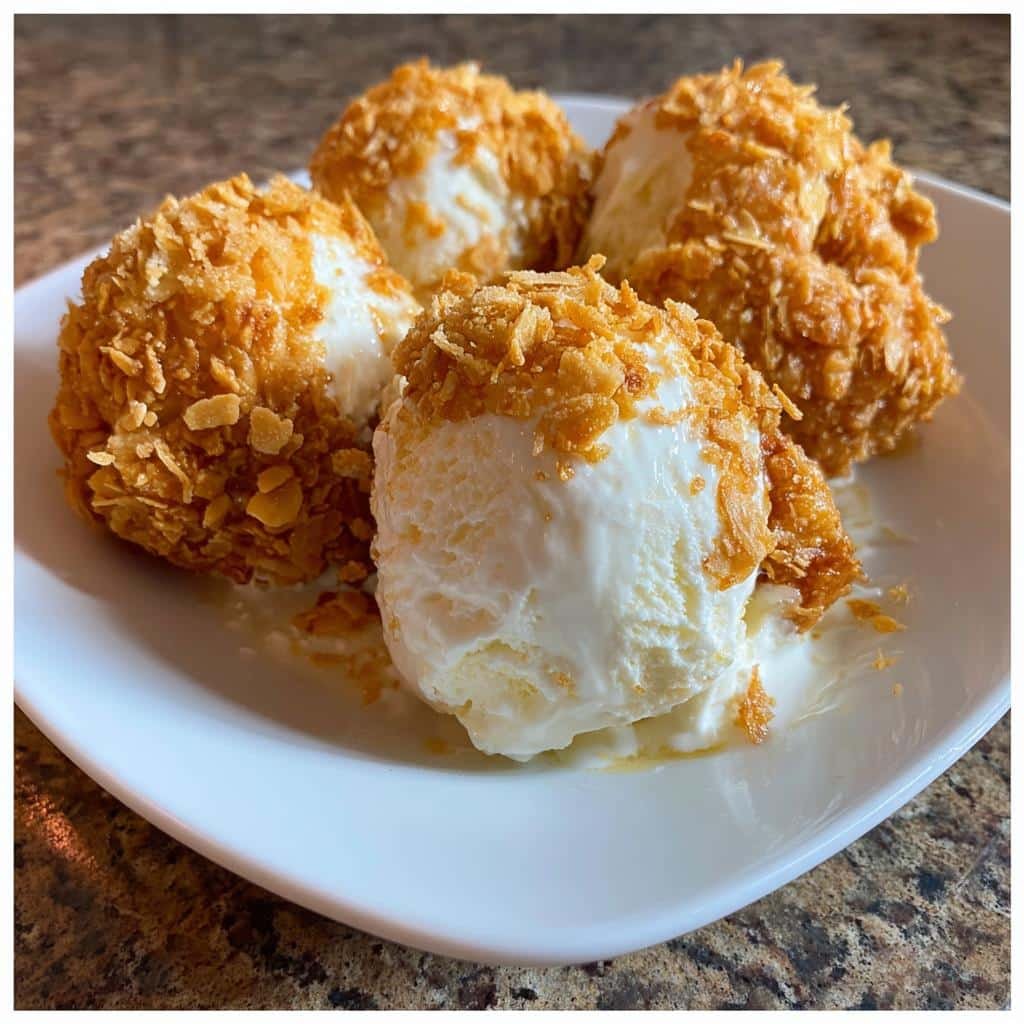
Wait until you see the looks on people’s faces when you serve them “fried chicken” for dessert! This Fried Chicken Ice Cream Illusion Dessert has been my go-to party trick for years—it’s hilarious watching guests do a double-take before realizing it’s actually sweet, creamy ice cream in disguise. The crunchy cornflake coating and golden-brown color fool everyone at first glance. My niece still giggles every time I bring it out, and honestly? It never gets old. The best part? This playful treat comes together in minutes with just a handful of ingredients and zero baking. Trust me, it’s the easiest way to add some magic (and laughter) to your dessert table.
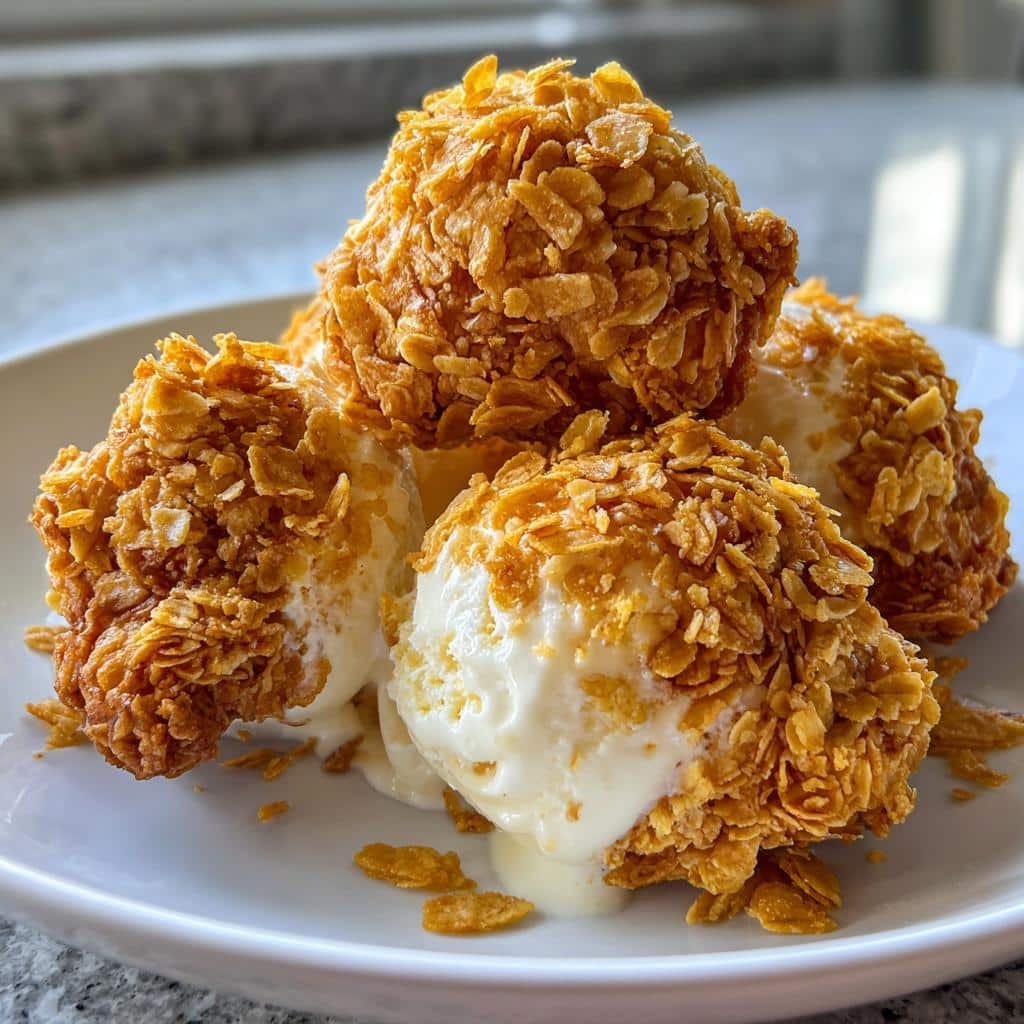
Table of Contents
Why You’ll Love This Fried Chicken Ice Cream Illusion Dessert
This dessert isn’t just delicious—it’s pure kitchen magic. Here’s why it’s my favorite trick up my sleeve:
- Instant conversation starter: The look of confusion-turned-delight on your guests’ faces is priceless
- No oven required: Just mix, roll, and freeze—perfect for hot days or lazy bakers
- Kid-approved fun: Little hands love helping coat the “chicken” pieces (and licking the spoon!)
- Endlessly customizable: Swap vanilla for chocolate ice cream or add cocoa powder to the coating for extra drama
- Foolproof: Even if your “chicken” shapes aren’t perfect, they’ll still taste amazing
This quirky Fried Chicken Ice Cream Illusion is the ultimate party trick—crispy on the outside, creamy on the inside, and ready in just minutes. For another fun frozen treat with a crunchy twist, try this Air Fryer Fried Ice Cream recipe that’s guaranteed to impress.
Ingredients for Fried Chicken Ice Cream Illusion Dessert
Here’s what you’ll need to create this magical sweet-and-crunchy illusion. I’ve learned through trial and error that these simple ingredients work best – and trust me, skipping any of them changes the whole experience!
For the “Fried Chicken” Coating
- 1 cup cornflakes – crushed finely (but not powdery! You want some texture for that authentic crispy look)
- 1/2 cup brown sugar – packed tightly for that caramel-like sweetness that balances the crunch
- 2 tbsp butter – melted and cooled slightly (it should be warm, not hot, when you mix it in)
- 1 tsp cinnamon – this is my secret for that golden-brown color and warm spice note
For the “Chicken” Base
- 2 cups vanilla ice cream – must be firm! I pop it out of the freezer just before scooping
- 1/2 tsp vanilla extract – optional, but I love the extra flavor boost it gives
Pro tip from my kitchen disasters: Measure everything before you start! Once that ice cream comes out, you’ll want to work quickly before it gets melty on you.
Print
Fried Chicken Ice Cream Illusion Dessert in 10 Minutes
- Total Time: 45 minutes
- Yield: 4 servings 1x
- Diet: Vegetarian
Description
A playful dessert that looks like fried chicken but is actually sweet ice cream.
Ingredients
- 2 cups vanilla ice cream
- 1 cup cornflakes, crushed
- 1/2 cup brown sugar
- 2 tbsp butter, melted
- 1 tsp cinnamon
- 1/2 tsp vanilla extract
Instructions
- Mix crushed cornflakes, brown sugar, cinnamon, and melted butter in a bowl.
- Scoop vanilla ice cream into small oval shapes.
- Roll each ice cream scoop in the cornflake mixture to coat it.
- Freeze for 30 minutes to set.
- Serve chilled.
Notes
- Use gluten-free cornflakes if needed.
- For a richer taste, add a pinch of salt to the coating.
- Serve immediately to prevent melting.
- Prep Time: 15 minutes
- Cook Time: 0 minutes
- Category: Dessert
- Method: No-Bake
- Cuisine: American
Nutrition
- Serving Size: 1 piece
- Calories: 250
- Sugar: 20g
- Sodium: 150mg
- Fat: 12g
- Saturated Fat: 7g
- Unsaturated Fat: 4g
- Trans Fat: 0g
- Carbohydrates: 32g
- Fiber: 1g
- Protein: 3g
- Cholesterol: 35mg
Keywords: fried chicken illusion, ice cream dessert, no-bake sweet treat
How to Make Fried Chicken Ice Cream Illusion Dessert
Ready for the fun part? Here’s exactly how to create this mind-bending dessert. I’ve made this so many times I could do it in my sleep – follow these steps and you’ll have perfect “fried chicken” ice cream every time!
Step 1: Prepare the Coating
First, grab a medium bowl and toss in your crushed cornflakes, brown sugar, and cinnamon. Pour in that melted butter and mix like crazy with a fork – you want every single crumb coated in that sweet, buttery goodness. When it looks like wet sand that clumps together slightly, you’re golden (pun totally intended).
Step 2: Shape and Coat the Ice Cream
Here’s where speed matters! Scoop firm ice cream with a tablespoon dipped in warm water (my grandma’s trick for perfect ovals) and immediately roll in the coating. Press gently so the crumbs stick – if your hands get too sticky, rinse them in cold water and keep going. Work in batches of 2-3 scoops to prevent melting disasters.
Step 3: Freeze to Set
Don’t even think about skipping this part! Arrange your “chicken pieces” on a parchment-lined tray and pop them in the freezer for at least 30 minutes – I set a timer because impatient taste-testing leads to sad, melty blobs. This chill time lets the coating set and the flavors marry into something magical.
Tips for the Perfect Fried Chicken Illusion Dessert
After making this dessert more times than I can count (and yes, there have been some hilarious fails along the way), here are my absolute must-know tricks for foolproof “fried chicken” magic every single time:
Keep Everything Cold, Cold, Cold
I learned this the hard way when my first batch turned into a melty puddle! Now I keep my mixing bowl in the freezer for 10 minutes before starting. For extra insurance, I’ll even freeze the shaped ice cream scoops for 5 minutes before coating – just until they’re firm but not rock hard.
The Scooping Secret
That tablespoon dipped in warm water? Game changer. But here’s my next-level tip – run your ice cream scoop under hot water first, then dry it quickly. The slight warmth helps create those perfect oval shapes without sticking. Just don’t let it get too hot or you’ll have soup instead of scoops!
When the Coating Won’t Stick
Panic moment: You’re rolling and the crumbs just slide right off. Been there! My quick fix? Lightly pat the ice cream with a paper towel to remove any moisture, then gently press a thin layer of coating with your fingers before rolling. If all else fails, a 30-second freezer break usually does the trick.
Assembly Line Magic
Set up your station like a pro – coating bowl on the left, ice cream in the middle, parchment-lined tray on the right. Keep a damp towel nearby for sticky fingers. Work with 2-3 scoops at a time, moving quickly but not frantically. And whatever you do, don’t answer your phone mid-process!
Ingredient Substitutions and Variations
Listen, I know we don’t always have every ingredient on hand (my pantry is proof!), so here are my tried-and-true swaps that keep the magic alive when you need to improvise. These are all variations I’ve personally tested at least twice – no kitchen experiments gone wrong here!
When You Need Gluten-Free
Regular cornflakes are out? No problem! Use gluten-free cornflakes – they work exactly the same. For something different, crushed gluten-free crispy rice cereal gives an awesome texture too. Just avoid anything too sweet, or your “fried chicken” might taste more like dessert cereal (which, okay, isn’t the worst problem to have).
Sweetener Swaps
If brown sugar’s not your thing or you’re all out, try these:
- Coconut sugar: Gives a similar caramel note but with a slightly earthier flavor – use the same amount as brown sugar
- Maple syrup: Mix 1/4 cup with the dry ingredients and reduce butter to 1 tablespoon (the texture will be stickier but still delicious)
- White sugar + 1/2 tsp molasses: My hack when I ran out of brown sugar last Thanksgiving – works in a pinch!
Dairy-Free Magic
For my lactose-intolerant friends, you’ve got options:
- Ice cream: Any high-quality dairy-free vanilla works – just make sure it’s scoopable but firm (I like coconut milk-based best)
- Butter: Use vegan butter sticks or coconut oil – both melt perfectly for the coating
Fun Flavor Twists
Once you’ve mastered the basic recipe, try these playful variations that always impress:
- Chocolate “fried chicken”: Swap vanilla ice cream for chocolate and add 1 tbsp cocoa powder to the coating
- PB&J version: Use strawberry ice cream and add 2 tbsp crushed peanuts to the coating
- Caramel apple: Mix 1/2 tsp apple pie spice into the coating and drizzle with caramel after freezing
Remember: The key is keeping the ratios similar so your coating still sticks and your “chicken” holds its shape. Happy experimenting!
Serving Suggestions for Fried Chicken Ice Cream Illusion Dessert
Here’s where you can really have fun with the presentation! I love watching guests’ reactions when I serve these “fried chicken” pieces with unexpected pairings. My go-to moves:
- Drizzle deception: Warm caramel sauce makes perfect “gravy” – serve it in a little pitcher for dipping (the sweet-salty contrast is amazing!)
- Berry “side dishes”: Pile fresh strawberries or blueberries around the “chicken” like coleslaw – the red and blue against the golden brown looks gorgeous
- Whipped cream clouds: A fluffy dollop on the side mimics mashed potatoes, especially if you sprinkle it with cinnamon “pepper”
For parties, I sometimes arrange them in a fast-food style basket with parchment paper – complete with mini dessert forks as “chicken bones” sticking out. Gets laughs every time!
Storage and Reheating
Okay, let’s talk about keeping your “fried chicken” ice cream looking and tasting its best! First things first – do not try to reheat this dessert (trust me, I learned this the messy way). That beautiful crunchy coating turns into a sad, soggy mess at room temperature.
For storage, pop any leftovers (if you’re lucky enough to have any!) in an airtight container with parchment between layers. They’ll keep in the freezer for up to 3 days without losing their magic. Any longer and the coating starts to lose its crispness – though the ice cream still tastes great.
Pro tip from my many trials: Write the date on the container! These treats are so good they tend to disappear quickly, but you’ll want to remember when you made them. If the coating seems less crisp after storing, a quick 5-minute freeze after plating helps restore some crunch.
Nutritional Information
Now, I know we’re not exactly eating salad here – this is dessert, after all! But if you’re curious about what’s in each golden-brown “fried chicken” piece, here’s the scoop (pun intended). Remember, these values are estimates and will vary based on your specific ingredients – especially if you tweak the recipe like I often do!
- Calories: 250 per piece (but who stops at just one?)
- Fat: 12g (that butter and ice cream working their magic)
- Saturated Fat: 7g (the good stuff that makes it creamy)
- Sugar: 20g (mostly from that sweet brown sugar coating)
- Protein: 3g (surprise protein from the cornflakes!)
- Carbs: 32g (worth every delicious gram)
My philosophy? Life’s too short not to enjoy playful desserts like this sometimes. Just balance it out with some actual vegetables at dinner – that’s what I tell myself anyway! The joy (and laughter) this treat brings is worth every calorie in my book.
Want more playful desserts and creative foodie hacks? Check out our boards on Pinterest where unique recipes and viral sweets are always trending.
Frequently Asked Questions
Over the years, I’ve gotten the same excited questions from friends trying this crazy dessert. Here are the answers to everything you might wonder before making your own “fried chicken” ice cream magic!
Can I Make This Ahead?
Absolutely! In fact, I often prep these the morning of a party. Just store them airtight in the freezer until serving – they’ll keep their crunch beautifully as long as they stay chilled.
Is This Dessert Gluten-Free?
Only if you use gluten-free cornflakes (regular ones contain malt flavoring). The rest of the ingredients are naturally GF – just double-check your ice cream labels if you’re super sensitive.
Can I Use Other Cereals?
Totally! Crushed frosted flakes add extra sweetness, while bran flakes give a nuttier taste. Avoid anything too light (like rice crispies) – they won’t give that “fried” look we’re going for.
How Do I Prevent Melting?
Work fast with cold hands! I keep a bowl of ice water nearby to dip my fingers in between scoops. If your kitchen’s warm, work in batches of just 2-3 pieces at a time.
Can Kids Help Make This?
Oh my gosh, yes! Little hands love rolling the “chicken” pieces. Just supervise the coating step – it gets messy fast (in the best way).