
There’s nothing quite like biting into a warm, crispy-on-the-outside, airy-on-the-inside biscoito de polvilho straight from the air fryer. I still remember my first taste of these magical Brazilian cheese puffs at a street market in Rio – the way they crackled between my fingers before practically melting in my mouth. Now I make them at home in minutes using this foolproof air fryer method. No deep frying, no mess, just golden perfection every time. Trust me, once you try these addictive little bites, you’ll be hooked just like I was!
Why You’ll Love This biscoito de polvilho na air fryer recipe
Listen, I know you’re going to fall head over heels for these little cheese puffs – I see it happen every time I serve them! Here’s why this recipe will become your new obsession:
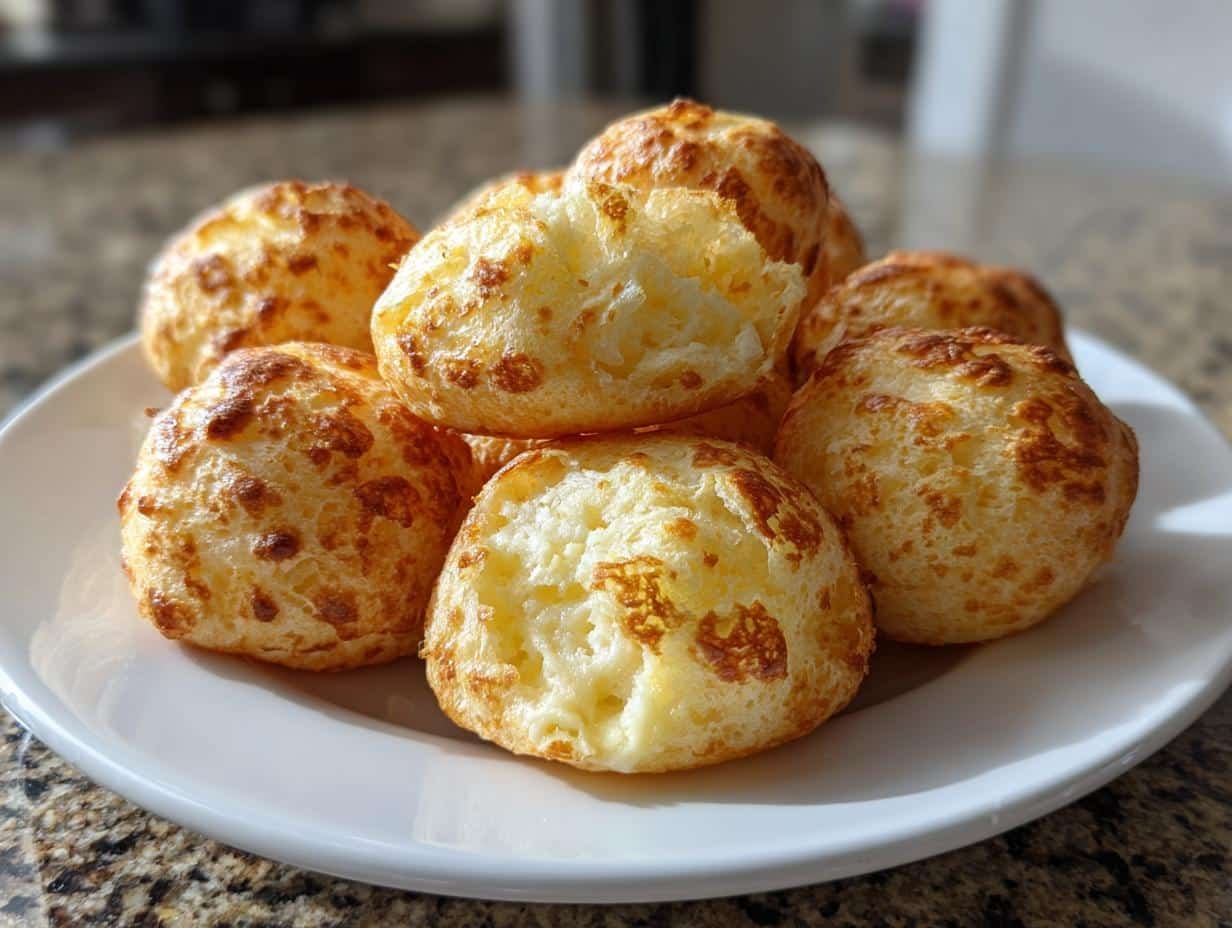
- That magical texture – crisp golden shells that shatter when you bite in, revealing a cloud-like, cheesy interior that’s somehow both light and satisfying
- Faster than ordering takeout – from mixing bowl to table in under 25 minutes (yes, really!), with most of that being hands-off air fryer time
- No deep fryer mess – just a quick spritz of oil in the air fryer means no greasy kitchen or that lingering fried-food smell
- Endlessly snackable – warm from the basket, these disappear faster than you can say “mais um!” (that’s “one more!” in Portuguese)
My neighbor Maria claims she can eat a whole batch by herself – and after you taste that first warm, cheesy bite, you’ll understand why we have to hide them when guests come over!
Ingredients for biscoito de polvilho na air fryer recipe
Gather these simple ingredients – I promise you probably have most in your kitchen already! But let me warn you, there’s one superstar here that absolutely cannot be substituted (I learned this the hard way after a disastrous baking experiment).
- 2 cups tapioca starch (polvilho doce) – This is the magic flour that creates those signature air pockets! Don’t even think about using regular flour or polvilho azedo – they’ll give you dense little hockey pucks instead of light, crispy clouds.
- 1/2 cup milk – Whole milk works best for richness, but 2% will do in a pinch. I’ve tried almond milk when I was out of dairy – not terrible, but the texture suffers slightly.
- 1/4 cup vegetable oil – Any neutral oil works. My tia swears by avocado oil, but I usually just grab whatever’s on hand.
- 1/2 cup grated Parmesan cheese – Freshly grated makes all the difference! The pre-shredded stuff has anti-caking agents that can make your dough gritty. Pro tip: I sometimes mix in a tablespoon of sharp cheddar for extra flavor.
- 1 egg – Room temperature blends in smoother. If you forget to take it out early, just pop it in warm water for 5 minutes.
- 1 tsp salt – Sounds basic, but don’t skip it! The salt balances the cheese flavor beautifully.
See? Nothing fancy – just pantry staples that transform into something magical. The real trick is in how we handle these ingredients, which we’ll get to next!
Equipment Needed for biscoito de polvilho na air fryer recipe
Here’s the beautiful part – you don’t need any fancy gadgets to make these cheesy wonders! Just grab these basic kitchen tools (I bet you already have them all):
- Air fryer – Any model works, but I love my basket-style for easy shaking (though I rarely need to with this recipe)
- Medium saucepan – For warming the milk and oil mixture. Nothing special – that slightly scorched one from college will do just fine!
- Mixing bowl – Big enough to hold all your ingredients with room to stir without making a floury mess everywhere (speaking from experience)
- Baking sheet – Just for shaping the dough balls. Line it with parchment paper if you’re fancy, but honestly, a quick wipe with oil works too
That’s it! No stand mixer, no special attachments – just good old-fashioned arm power and that trusty air fryer. Now let’s get to the fun part – making the dough!
How to Make biscoito de polvilho na air fryer recipe
Okay, let’s get to the good stuff! Making these cheesy puffs is easier than you think – just follow these simple steps and you’ll be snacking in no time. I’ve made this recipe dozens of times (okay, maybe hundreds), and these are the tricks that guarantee perfect results every single time.
Mixing the Dough
First, preheat your air fryer to 350°F (180°C) – this gives it time to get nice and toasty while we prepare the dough. Now, in that saucepan we talked about, combine the milk and oil over medium heat. You don’t want it boiling – just warm enough that you see little bubbles forming around the edges (about 2 minutes).
Here’s the fun part: pour this warm mixture over your tapioca starch in the mixing bowl. It’ll look like a gloopy mess at first – totally normal! Keep stirring until it comes together into a sticky dough. Now add the egg, cheese, and salt. This is where the magic happens – keep mixing until you’ve got a smooth, slightly elastic dough that holds together when you pinch it. If it’s too sticky, add a teaspoon more tapioca starch. Too dry? A splash of milk will fix it right up.
Shaping and Cooking
Time to get your hands dirty! Roll the dough into 1-inch balls – about the size of a walnut. Pro tip: lightly oil your hands to prevent sticking. Arrange them in your air fryer basket with some breathing room (I do about 6 at a time in my 5-quart model). They need space to puff up properly – overcrowding leads to sad, flat biscoitos!
Cook for 10-12 minutes until they’re gloriously golden and puffed up like little balloons. No peeking for the first 8 minutes – that rush of cold air can make them deflate. When they’re done, they should sound hollow when tapped. Let them cool for just a minute (if you can resist!) – that’s when the outside gets perfectly crisp while staying tender inside.
Tips for Perfect biscoito de polvilho na air fryer recipe
After burning through more batches than I’d care to admit (my smoke detector knows this recipe by heart now), I’ve picked up some foolproof tricks to make sure your biscoitos come out perfect every time. Here are my hard-earned lessons from the kitchen trenches:
- The milk should feel like a warm bath – Not hot enough to burn your finger, but warmer than room temp. If it’s too cool, the tapioca starch won’t absorb properly and you’ll end up with lumpy dough. Too hot and it’ll cook the egg when you add it later – trust me, scrambled egg biscoitos aren’t a thing you want to try!
- Dough texture is everything – It should feel like soft playdough – soft enough to shape easily but not sticking to your fingers. If it sticks, add a sprinkle more tapioca starch. If it cracks when rolled, dab your hands with water or a touch more oil. This is the difference between airy clouds and dense hockey pucks!
- Set that timer for 10 minutes – All air fryers run differently, and these go from golden to burnt surprisingly fast. At 10 minutes, do the tap test – they should sound hollow. If they need more time, add it in 1-minute increments. My cousin Carla learned this the hard way when she walked away “just to check Instagram” – we’re still finding charcoal briquettes in her backyard!
- Let them breathe after cooking – I know it’s tempting to eat them straight from the basket (ouch!), but giving them just 1-2 minutes to cool lets the outside crisp up perfectly. They’ll deflate slightly – that’s normal! The magic is in that crispy-chewy contrast.
Follow these simple tips, and you’ll be turning out batch after batch of these addictive little cheese puffs. Just don’t blame me when your family starts requesting them weekly – this recipe has a way of becoming a household addiction!
Serving Suggestions for biscoito de polvilho
Oh, the possibilities with these little cheese clouds! I’ve served them a hundred different ways over the years, but these are my absolute favorite ways to enjoy them – each one a guaranteed crowd-pleaser:
- Breakfast of champions – Pair them with strong Brazilian coffee (or espresso if you’re feeling fancy) for the perfect morning combo. The saltiness balances the coffee’s bitterness beautifully – my tio Rafael swears it’s the only way to start the day!
- Dip them! – While they’re incredible plain, a bowl of chimichurri or spicy mayo takes them to another level. For parties, I set out small bowls of different sauces – the green herbiness of chimichurri cuts through the richness so well.
- Party perfect – Arrange them on a wooden board with sliced cured meats and olives for an instant appetizer spread. They disappear faster than you can say “saudade” – I always make a double batch when guests are coming!
- Soup’s best friend – Crumble them over black bean soup or feijoada instead of crackers. The way they soak up the broth while staying slightly crisp? Pure magic.
Really though, they rarely last long enough to make it to any fancy presentation in my house – my kids start snatching them the moment they’re cool enough to handle. And honestly? Straight from the basket, still warm with that irresistible cheese pull? That might just be the best way of all.
Storing and Reheating biscoito de polvilho
Now, I know what you’re thinking – “Why would I need to store these when they disappear the second they’re cool enough to eat?” But just in case you manage to save a few (or, you know, accidentally make a double batch like I always do), here’s how to keep them tasting fresh and crispy:
First, let them cool completely on a wire rack – no stacking them warm or you’ll end up with a sad, soggy pile. Once cooled, tuck them into an airtight container with a piece of paper towel at the bottom to absorb any lingering moisture. They’ll stay delicious for about 2 days this way, though in my house they rarely make it past lunchtime!
When you’re ready to revive them, here’s my secret: skip the microwave (it turns them rubbery) and pop them back in the air fryer at 350°F for just 2-3 minutes. It’s like magic – they come out nearly as crispy as when they were first made! I’ve even frozen them successfully – just thaw at room temperature first before reheating. My neighbor swears by freezing the raw dough balls and cooking from frozen (add 1-2 extra minutes), but I prefer the texture when freshly mixed.
Pro tip: If you’re planning ahead for a party, you can shape all the dough balls and keep them covered in the fridge for a few hours before cooking. This way you can bake them fresh in batches as needed – nothing beats that just-made crispness and that incredible cheesy aroma filling your kitchen!
Nutritional Information
Now, I’m no dietitian, but I know some of you like to keep track of these things (looking at you, my carb-counting sister-in-law!). Here’s the scoop on what’s in these cheesy little clouds of joy. Just remember – these are estimates based on my exact ingredients, so your mileage may vary depending on the brands you use.
- Serving Size: 2 pieces (because let’s be real, who stops at one?)
- Calories: 120 – A steal for that crispy-chewy satisfaction!
- Carbs: 16g (all from that magical tapioca starch)
- Protein: 2g (thank you, Parmesan!)
- Fat: 5g (mostly from the cheese and oil – the good stuff!)
- Sodium: 150mg (that’s why the salt matters so much!)
A quick disclaimer from my kitchen to yours: These numbers are ballpark figures based on standard ingredients. If you use different cheeses or oils, your nutritional values might dance around a bit. And hey – when something tastes this good, sometimes it’s okay not to overthink the numbers. Life’s too short to count every carb when there’s warm, cheesy biscoitos to enjoy!
Common Questions About biscoito de polvilho na air fryer recipe
After sharing this recipe with countless friends (and fielding all their frantic texts mid-baking), I’ve heard every question imaginable about these cheesy puffs. Here are the answers to the ones that pop up most often – straight from my trial-and-error kitchen experiments!
Can I use polvilho azedo instead of polvilho doce?
Oh honey, I learned this one the hard way! Polvilho azedo (sour tapioca starch) gives a completely different texture – denser, chewier, and lacking those magical air pockets. Stick with polvilho doce (sweet tapioca starch) for the authentic light-and-crispy result. My tia once tried to substitute when she ran out, and let’s just say we now call those “biscoitos de pedra” (stone biscuits) as a family joke!
Can I freeze the dough for later?
Absolutely! Shape the dough into balls and freeze them on a baking sheet first (this prevents sticking). Once frozen solid, transfer to a zip-top bag. They’ll keep beautifully for up to a month. When ready to bake, no need to thaw – just add 1-2 extra minutes to the cooking time. My freezer always has a batch ready for unexpected guests (or, you know, Tuesday nights).
Why did my biscoitos deflate after cooking?
Ah, the heartbreak of flat biscoitos! Usually it’s one of two culprits: either the dough was overmixed (which develops too much gluten), or they needed another minute in the air fryer. Next time, mix just until combined, and do the tap test – they should sound hollow when done. And whatever you do, resist the urge to open that air fryer early – that rush of cold air is a guaranteed deflater!
Can I make these without cheese?
Technically yes, but… why would you want to? The cheese adds flavor and helps with browning. That said, I’ve successfully made dairy-free versions for my lactose-intolerant niece using nutritional yeast and a touch more salt. They’re not quite the same, but still pretty darn good!
Why are mine burning on the outside before cooking through?
This usually means your air fryer runs hot (they all have personalities!). Try lowering the temperature to 325°F and adding a couple minutes. Also, make sure your dough balls aren’t too big – keep them walnut-sized for even cooking. My first batch looked like little charcoal briquettes until I figured this out!
Got more questions? Slide into my DMs anytime – I love troubleshooting biscoito emergencies! After all, the road to perfect cheese puffs is paved with… well, mostly delicious mistakes.
Print
Crispy 10-Minute Biscoito de Polvilho na Air Fryer Recipe
- Total Time: 22 minutes
- Yield: 20 pieces 1x
- Diet: Vegetarian
Description
Crispy and airy Brazilian cheese bread made easily in the air fryer.
Ingredients
- 2 cups tapioca starch (polvilho doce)
- 1/2 cup milk
- 1/4 cup vegetable oil
- 1/2 cup grated Parmesan cheese
- 1 egg
- 1 tsp salt
Instructions
- Preheat your air fryer to 350°F (180°C).
- In a saucepan, heat milk and oil until warm.
- Pour the warm mixture over tapioca starch in a bowl.
- Add egg, cheese, and salt. Mix until smooth.
- Shape dough into small balls and place in the air fryer basket.
- Cook for 10-12 minutes until golden and puffed.
Notes
- Use polvilho doce for best texture.
- Dough should be soft but not sticky.
- Do not overcrowd the air fryer basket.
- Prep Time: 10 minutes
- Cook Time: 12 minutes
- Category: Snack
- Method: Air Fryer
- Cuisine: Brazilian
Nutrition
- Serving Size: 2 pieces
- Calories: 120
- Sugar: 0g
- Sodium: 150mg
- Fat: 5g
- Saturated Fat: 1.5g
- Unsaturated Fat: 3g
- Trans Fat: 0g
- Carbohydrates: 16g
- Fiber: 0g
- Protein: 2g
- Cholesterol: 15mg
Keywords: biscoito de polvilho, air fryer cheese bread, Brazilian snack