
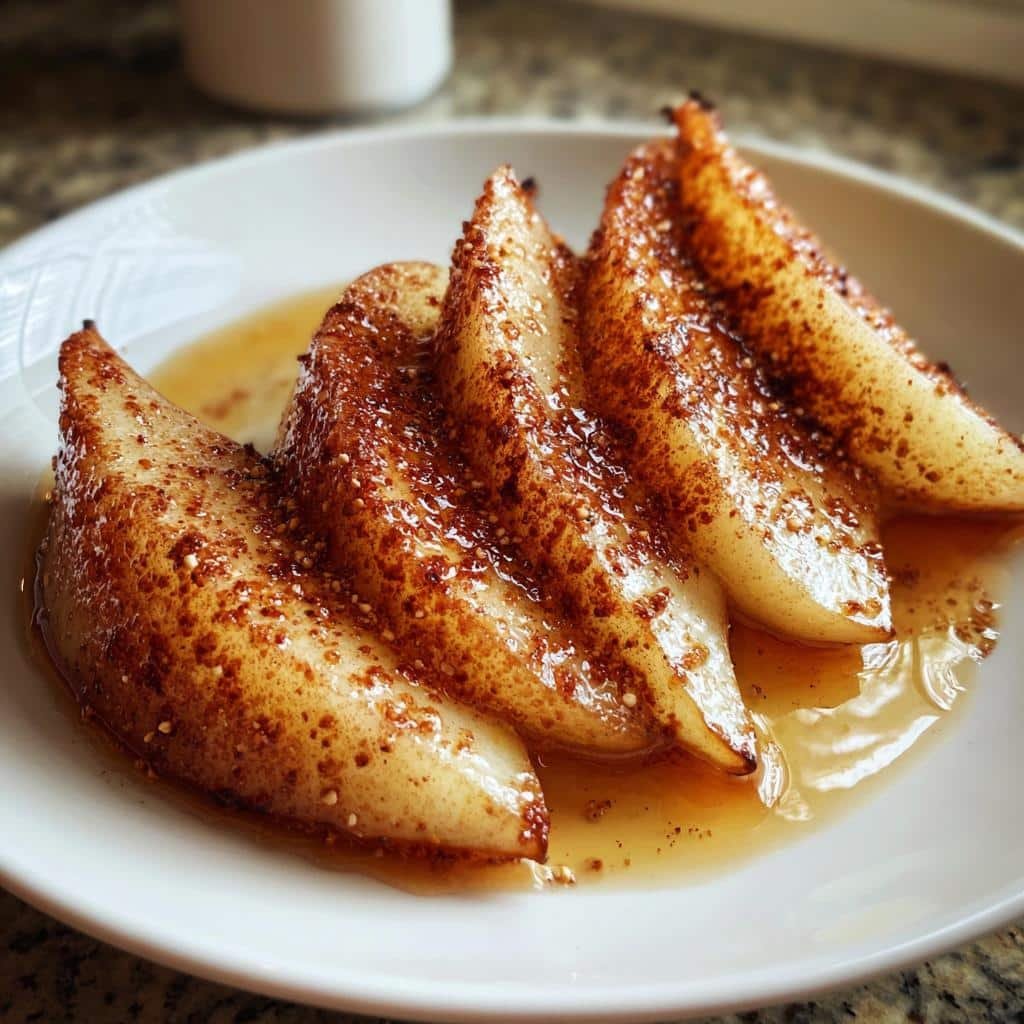
Oh my gosh, you have to try these air fryer baked pear slices! They’re my latest obsession – sweet, crispy, and ridiculously easy to make. I stumbled onto this recipe one night when I desperately wanted dessert but didn’t feel like turning on the oven. Two pears, some cinnamon, and ten minutes later? Magic.
What I love most is how these satisfy my sweet tooth without any guilt. The natural sugars caramelize beautifully in the air fryer, creating these gorgeous golden edges that crunch when you bite into them. My kids go crazy for them too – though I have to admit, I sometimes hide the last few slices for myself!
Seriously, if you’ve got an air fryer sitting on your counter, you’re just minutes away from the perfect healthy snack. The pears get all warm and jammy inside while staying crisp outside – it’s like nature’s version of apple pie filling but way easier. Trust me, once you try these, you’ll be making them weekly like I do!
Why You’ll Love These Air Fryer Baked Pear Slices
Let me tell you why these pear slices have become my go-to snack—they’re basically magic in the air fryer! Here’s what makes them so special:
- Quick & easy: Ready in under 15 minutes—perfect for sudden dessert cravings!
- Healthy but indulgent: Just pears, cinnamon, and a touch of honey—no refined sugar needed.
- That irresistible texture: Crispy edges with soft, jammy centers—like a healthier version of pie filling.
- Kid-approved: My picky eaters gobble these up (and I don’t feel guilty letting them).
- Endlessly adaptable: Toss in nuts, drizzle with yogurt, or serve warm over ice cream—they’re delicious every way.
Honestly? The hardest part is waiting for the air fryer to ding!
Ingredients for Air Fryer Baked Pear Slices
Here’s all you need for this magical snack—I promise your pantry probably has everything already! The key is using ripe but firm pears (my favorites are Bartlett or Anjou) so they hold their shape while cooking. Here’s the simple lineup:
- 2 medium pears – washed, cored, and sliced into 1/4-inch wedges (no need to peel!)
- 1 tablespoon honey – the good, runny kind that drizzles beautifully
- 1 teaspoon lemon juice – fresh squeezed if you’ve got it
- 1 teaspoon cinnamon – because everything’s better with cinnamon, right?
That’s it! Four ingredients standing between you and pear perfection. I told you it was simple!
How to Make Air Fryer Baked Pear Slices
Okay, let’s get cooking! This is where the magic happens—turning those simple ingredients into golden, crispy pear slices that’ll make your kitchen smell like heaven. Follow these easy steps, and you’ll be snacking in no time!
Step 1: Prep the Pears
First things first—give those pears a good rinse under cool water. No need to peel them (the skins add nice texture and nutrients!). Cut them in half from stem to bottom, then scoop out the cores with a spoon or melon baller. Now slice them into even 1/4-inch wedges—this thickness gives you that perfect balance of crispy edges and soft centers. Pro tip: If you slice them too thin, they’ll turn into chips (still tasty, but not what we’re going for here!).
Step 2: Season and Coat
Grab a big bowl and toss those pear slices with the lemon juice—this keeps them from browning and adds a nice little zing. Sprinkle the cinnamon evenly over them (I like to do this with my fingers so I can really control the distribution). Then drizzle the honey over everything and gently toss until each slice is lightly coated. Don’t go crazy mixing—you want them coated, not drowning in honey!
Step 3: Air Fry to Perfection
Here’s the secret to getting them perfectly crispy: preheat your air fryer to 350°F (175°C) for about 3 minutes while you’re prepping the pears. This gives you that instant sizzle when the pears hit the basket! Arrange the slices in a single layer—no overlapping or they’ll steam instead of crisp up. Cook for 8-10 minutes, checking at the 8-minute mark. You want them golden with slightly caramelized edges but still tender when pierced with a fork. And that’s it—your perfect pear slices are ready!
Warning: They smell so good you might eat them straight from the basket like I always do!
Tips for Perfect Air Fryer Baked Pear Slices
After making these dozens of times (okay, maybe hundreds—I’m obsessed!), I’ve learned a few tricks for pear perfection every time:
- Pear pickiness pays off: Choose pears that yield slightly at the stem but feel firm everywhere else—overripe ones turn mushy.
- Slice with purpose: Keep those wedges even! I aim for 1/4-inch—thicker than apple slices since pears soften more.
- No overcrowding! Give each slice breathing room in the basket—I cook in batches if needed. Crowding = steaming = sadness.
- Watch like a hawk: Check at 8 minutes—some air fryers run hotter. You want golden edges, not charcoal!
- Sweetness swap: Out of honey? Maple syrup works beautifully too.
Follow these, and you’ll get that magical crisp-tender balance every single time!
Variations for Air Fryer Baked Pear Slices
One of my favorite things about this recipe is how easily you can dress it up! Here are my go-to twists when I’m feeling fancy:
- Crunchy upgrade: Toss in chopped walnuts or pecans before air frying—they toast beautifully alongside the pears.
- Creamy dream: Dollop with Greek yogurt or vanilla ice cream while still warm (the contrast is heavenly!).
- Caramel delight: Drizzle with warm caramel sauce and a pinch of sea salt for dessert-worthy indulgence.
Honestly? Sometimes I just eat them plain—they’re that good!
Serving Suggestions
Oh, the possibilities! These pear slices shine brightest served warm—that’s when the honey-cinnamon magic really sings. My absolute favorite way? Piled high over a scoop of vanilla ice cream (the melty-cold-hot combo is life-changing!). For breakfast vibes, try them with Greek yogurt and granola. Or just grab a fork and eat them straight—no judgment here!
Storage and Reheating
Okay, confession time—these rarely last long enough to store at my house! But if you’ve got leftovers (lucky you!), pop them in an airtight container for up to 2 days. When you’re ready for round two, reheat in the air fryer at 350°F for just 2-3 minutes to bring back that perfect crispiness. They won’t be quite as magical as fresh, but still pretty darn tasty!
Air Fryer Baked Pear Slices FAQs
I get asked about these pear slices all the time—here are the questions that pop up most often in my kitchen (and my honest answers!):
Can I use other fruits besides pears?
Absolutely! Apples work beautifully—just slice them slightly thinner since they’re firmer. Bananas get amazing caramelization too, but watch them closely as they cook faster.
How do I prevent sogginess?
Two secrets: 1) Don’t skip preheating your air fryer, and 2) Never overcrowd the basket! That instant heat and good airflow are what give you those crispy edges.
Do I need to peel the pears?
Nope! The skins add nice texture and fiber. Just give them a good wash first. (Though if you prefer peeled, go for it!)
Can I make these ahead?
They’re best fresh, but if you must, store them uncovered at room temperature for an hour or two—the air fryer’s crispiness holds up surprisingly well!
Nutritional Information
Here’s the scoop on what you’re enjoying with each serving (because yes, you should absolutely feel good about eating these!): About 120 calories, packed with 5g of fiber from those pear skins, and just a touch of natural sweetness from the honey. Remember, these values are estimates—your exact pears and honey might vary slightly. But honestly? When something tastes this good and makes your kitchen smell like cinnamon heaven, who’s counting?
Share Your Results
I’d love to hear how your pear slices turn out! Did they get those perfect crispy edges? Did your family go crazy for them like mine does? Snap a pic and tag me—seeing your creations absolutely makes my day. Happy air frying, friends!
Print
10-Minute Air Fryer Baked Pear Slices: Irresistibly Crispy
- Total Time: 15 mins
- Yield: 2 servings 1x
- Diet: Vegetarian
Description
Crispy and sweet air fryer baked pear slices make a healthy dessert or snack.
Ingredients
- 2 ripe pears
- 1 tsp cinnamon
- 1 tbsp honey
- 1 tsp lemon juice
Instructions
- Wash and slice pears into thin wedges.
- Toss pear slices with lemon juice.
- Sprinkle cinnamon evenly over the slices.
- Drizzle honey on top.
- Preheat air fryer to 350°F (175°C).
- Arrange pear slices in a single layer in the air fryer basket.
- Cook for 8-10 minutes until golden and tender.
- Serve warm.
Notes
- Use firm pears for best results.
- Adjust cooking time based on pear thickness.
- Add nuts or yogurt for extra texture.
- Prep Time: 5 mins
- Cook Time: 10 mins
- Category: Dessert
- Method: Air Fryer
- Cuisine: American
Nutrition
- Serving Size: 1/2 recipe
- Calories: 120
- Sugar: 22g
- Sodium: 2mg
- Fat: 0.3g
- Saturated Fat: 0g
- Unsaturated Fat: 0.1g
- Trans Fat: 0g
- Carbohydrates: 32g
- Fiber: 5g
- Protein: 1g
- Cholesterol: 0mg
Keywords: air fryer pears, baked pear slices, healthy dessert