
Oh my gosh, you have to try these air fryer buffalo chickpea wraps! I swear, they’re my new obsession for busy weeknights. Picture this: crispy, spicy chickpeas with that perfect buffalo kick, all wrapped up with cool, crunchy veggies and creamy dressing. And the best part? They come together in just 20 minutes flat!
I’ll admit, I was skeptical about chickpeas in the air fryer at first – I mean, beans as a sandwich filling? But trust me, once those little guys get all crispy and coated in buffalo sauce, they’re downright addictive. My kids go crazy for these wraps, and I love that they’re getting protein and fiber without even realizing it. Plus, cleanup is a breeze since the air fryer does most of the work. Game changer!
Whether you’re vegetarian, just trying to eat more plants, or simply craving something quick and satisfying, these wraps are about to become your new go-to. Let me show you how easy they are!
Why You’ll Love These Air Fryer Buffalo Chickpea Wraps
Listen, these wraps are absolute magic, and here’s why:
- Crazy fast: 20 minutes from fridge to table – faster than waiting for takeout!
- Perfect crunch: The air fryer makes chickpeas crispier than any oven ever could
- Healthy-ish: Packed with protein and fiber but still feels like a treat
- Totally customizable: Like it spicy? Extra sauce. Want it lighter? Swap Greek yogurt for ranch
- No sad leftovers: The chickpeas stay crispy even when packed for lunch tomorrow
Seriously, what’s not to love? Even my meat-loving husband gets excited when these are on the menu.
Ingredients for Air Fryer Buffalo Chickpea Wraps
Okay, let’s gather our goodies! Here’s everything you’ll need for these flavor-packed wraps (and yes, I’ve learned the hard way – don’t skip rinsing those chickpeas!):
- 1 can (15 oz) chickpeas – drained and rinsed really well (those starchy juices can make them soggy)
- 2 tbsp olive oil – the good stuff that helps them crisp up
- 2 tbsp buffalo sauce – I use Frank’s, but grab your favorite brand
- 1/2 tsp garlic powder – trust me, it makes all the difference
- 1/2 tsp paprika – for that subtle smoky depth
- 4 large tortillas – flour or whole wheat, whatever you’ve got
- 1 cup shredded lettuce – I like romaine for extra crunch
- 1/2 cup diced tomatoes – cherry tomatoes work great too
- 1/4 cup thinly sliced red onions – soak them in cold water for 5 minutes if you want less bite
- 1/4 cup ranch or blue cheese dressing – go with your heart on this one!
That’s it! Simple, fresh ingredients that come together in the most magical way. Now let’s make some noise with that air fryer!
How to Make Air Fryer Buffalo Chickpea Wraps
Alright, let’s get cooking! These wraps are so simple, but I’ve got a few tricks to make sure they turn out perfect every time. Follow these steps, and you’ll be biting into crispy, spicy goodness before you know it.
Step 1: Prepare the Chickpeas
First things first—preheat that air fryer to 375°F (190°C). While it’s heating up, grab a bowl and toss your drained chickpeas with olive oil, buffalo sauce, garlic powder, and paprika. Don’t be shy—get in there with your hands and make sure every single chickpea is coated. That spice mix is where the magic happens!
Transfer them to the air fryer basket in a single layer—no overcrowding! That’s key for maximum crispiness. Cook for 10 minutes, shaking the basket halfway through. You’ll hear them sizzling away, and by the end, they’ll be golden brown and crispy on the outside but still tender inside. Perfect.
Step 2: Assemble the Wraps
While the chickpeas are cooking, warm your tortillas. A quick 10 seconds in the microwave or 30 seconds per side in a dry skillet makes them pliable and less likely to tear. Spread a thin layer of dressing down the center—ranch if you like it cool, blue cheese if you’re feeling fancy.
Now, layer on the goodies: lettuce first (it acts like a little moisture barrier), then tomatoes, red onions, and finally, those glorious buffalo chickpeas. Fold the sides in first, then roll tightly from the bottom up. If you’re packing these for lunch, wrap them in parchment paper—they’ll hold together better, and it looks cute too!
That’s it! Slice in half if you want, or just dive right in. The combo of spicy, crispy chickpeas with the cool veggies and dressing? Absolute heaven.
Tips for Perfect Air Fryer Buffalo Chickpea Wraps
Want to take these wraps from good to unreal? Here are my tried-and-true tricks:
- Heat control: Start with 2 tbsp buffalo sauce and add more after cooking if you want extra kick (I usually do!)
- Wrap smart: Whole wheat tortillas add fiber but can tear easier – warm them well before assembling
- Serve immediately: The chickpeas stay crispy for about 30 minutes – any longer and they’ll soften from the dressing
- Extra crunch: Toss in some shredded cabbage or carrot sticks for bonus texture
- Batch prep: Cook double the chickpeas – they’re amazing on salads the next day!
Variations for Air Fryer Buffalo Chickpea Wraps
Oh, the possibilities! These wraps are like a blank canvas – here’s how I love to mix them up:
- Dressing swap: Use Greek yogurt mixed with a squeeze of lemon instead of ranch for extra protein
- Add creaminess: Sliced avocado or a schmear of hummus takes these next-level
- Veggie variations: Swap in shredded purple cabbage or crunchy bell peppers instead of lettuce
- Extra protein: Add crumbled feta or blue cheese for my cheese-loving friends
- Wrap alternatives: Try collard greens or butter lettuce leaves for a low-carb version
Honestly? I’ve never met a version of these wraps I didn’t like. Get creative with what’s in your fridge!
Serving Suggestions
These wraps shine with simple sides! I love pairing them with carrot sticks and celery for extra crunch, or a light cucumber salad. They’re also perfect for meal prep—just pack the components separately and assemble when you’re ready to eat. Game day snack? Cut them into pinwheels for easy sharing!
Storage and Reheating
Here’s the deal—these wraps taste best fresh, but if you’ve got leftovers, store the chickpeas and veggies separately in airtight containers in the fridge for up to 2 days. When you’re ready for round two, toss the chickpeas back in the air fryer at 350°F for 3-4 minutes to revive that perfect crunch. The tortillas? A quick 10 seconds in the microwave with a damp paper towel keeps them soft. Pro tip: assemble just before eating so nothing gets soggy. Trust me, it’s worth the extra minute!
Nutritional Information
Nutrition varies based on brands and ingredients, but here’s the gist per wrap: about 320 calories, 12g fat, and 8g fiber. Not too shabby for a meal that tastes this good! Keep in mind, these are just estimates—your wraps might be a little different depending on what you use.
FAQ
Can I bake instead of air fry?
Absolutely! If you don’t have an air fryer, bake the chickpeas at 400°F on a parchment-lined baking sheet for 20-25 minutes, shaking halfway. They’ll still get crispy, just keep an eye on them.
How do I make these wraps gluten-free?
Super easy—just swap in gluten-free tortillas or use large lettuce leaves as wraps. Double-check that your buffalo sauce and dressing are gluten-free too (most are, but it’s worth a peek at the label).
Can I use dried chickpeas instead of canned?
Yes, but it’ll take longer. Soak 1/2 cup dried chickpeas overnight, then cook until tender (about 1 hour). Drain and let them cool before tossing with the buffalo sauce and spices. It’s worth the effort if you’ve got time!
What if I don’t like spicy food?
No problem! Use a mild buffalo sauce or cut it with a little melted butter to tone down the heat. You can also skip the sauce entirely and season the chickpeas with garlic powder, paprika, and a squeeze of lemon instead.
Can I make these ahead for meal prep?
Totally! Cook the chickpeas and chop the veggies ahead of time, but keep everything separate. Assemble the wraps just before eating to keep the tortillas from getting soggy and the chickpeas crispy.
Final Thoughts
There you have it—my foolproof recipe for the crispiest, most satisfying buffalo chickpea wraps. I’d love to hear how yours turn out! Tag me if you make them or drop a comment with your favorite twist. Happy air frying!
Print
20-Minute Air Fryer Buffalo Chickpea Wraps: Irresistible & Crispy
- Total Time: 20 mins
- Yield: 4 wraps 1x
- Diet: Vegetarian
Description
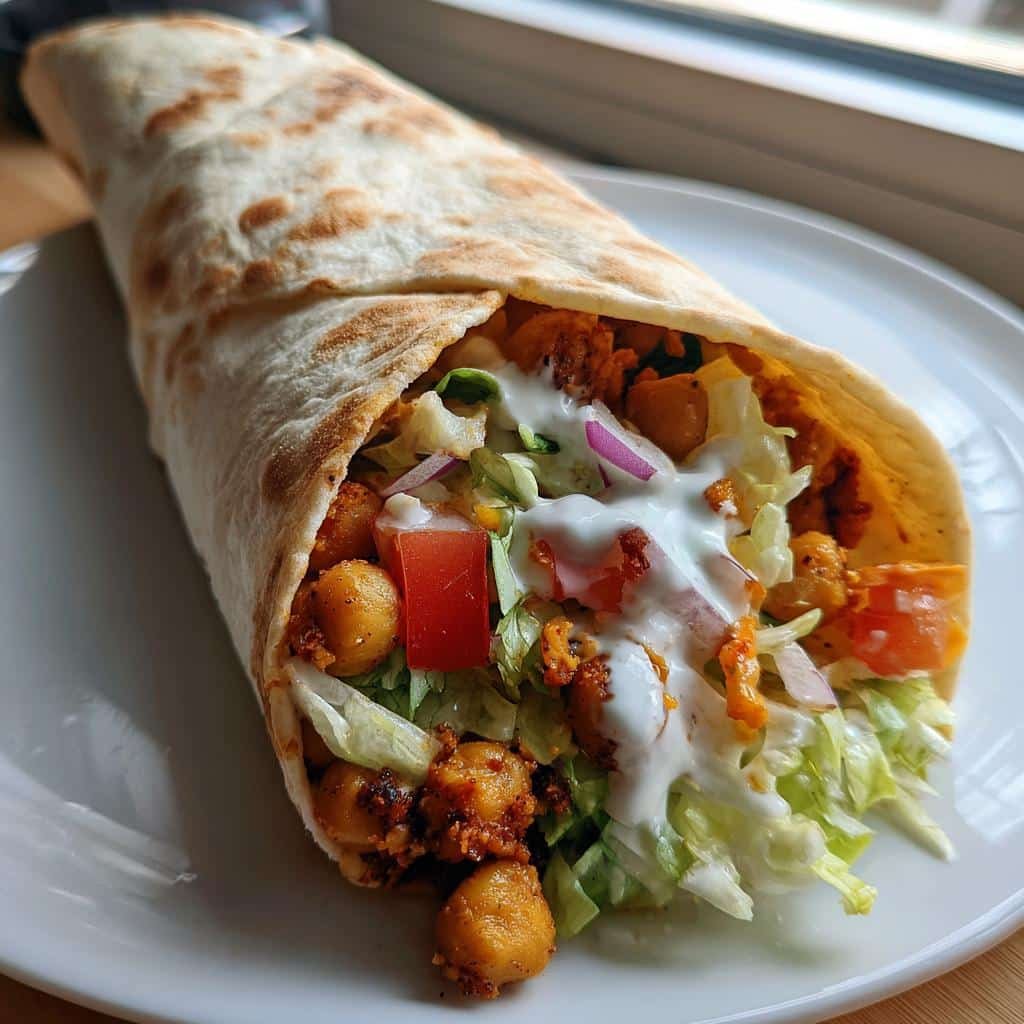
Crispy buffalo chickpeas wrapped in a soft tortilla with fresh veggies and a creamy sauce.
Ingredients
- 1 can (15 oz) chickpeas, drained and rinsed
- 2 tbsp olive oil
- 2 tbsp buffalo sauce
- 1/2 tsp garlic powder
- 1/2 tsp paprika
- 4 large tortillas
- 1 cup shredded lettuce
- 1/2 cup diced tomatoes
- 1/4 cup sliced red onions
- 1/4 cup ranch or blue cheese dressing
Instructions
- Preheat air fryer to 375°F.
- Toss chickpeas with olive oil, buffalo sauce, garlic powder, and paprika.
- Air fry chickpeas for 10 minutes, shaking halfway.
- Warm tortillas in a dry skillet or microwave.
- Spread dressing on tortillas, then add lettuce, tomatoes, red onions, and chickpeas.
- Fold and serve immediately.
Notes
- Use whole wheat tortillas for extra fiber.
- Adjust buffalo sauce for more or less heat.
- Store leftovers in the fridge for up to 2 days.
- Prep Time: 10 mins
- Cook Time: 10 mins
- Category: Main Dish
- Method: Air Fryer
- Cuisine: American
Nutrition
- Serving Size: 1 wrap
- Calories: 320
- Sugar: 4g
- Sodium: 620mg
- Fat: 12g
- Saturated Fat: 2g
- Unsaturated Fat: 8g
- Trans Fat: 0g
- Carbohydrates: 42g
- Fiber: 8g
- Protein: 10g
- Cholesterol: 5mg
Keywords: air fryer, buffalo chickpeas, wraps, vegetarian, quick meal