
You know that perfect duck breast you get at fancy restaurants? Crispy, golden skin with juicy pink meat inside? I used to think it was impossible to make at home without a professional kitchen – until I discovered the magic of my air fryer. Now, I can whip up restaurant-quality air fryer duck breast in under 20 minutes with minimal mess. The first time I tried it, I couldn’t believe how the skin crisped up perfectly while the meat stayed tender and flavorful. My husband still talks about that dinner! It’s become our go-to for date nights at home when we want something special without the fuss.
The secret is in the air fryer’s intense, even heat that renders the fat beautifully while keeping all those delicious juices locked in. Forget complicated techniques or splattering oil everywhere – this method is foolproof. I’ve made this air fryer duck breast dozens of times now, tweaking the seasoning and timing until it’s absolutely perfect every single time. Trust me, once you try this method, you’ll never go back to the stovetop struggle again!
Why You’ll Love This Air Fryer Duck Breast
Oh, where do I even start? This method is a total game-changer for duck lovers like us. Here’s why it’s become my go-to:
- That perfect crispiness – The air fryer gives you that dreamy, shatteringly crisp skin we all crave, without any fuss. No more splattered stovetop!
- Juicy every time – Somehow it keeps the meat so tender and pink inside while getting that skin golden. Magic, I tell you.
- Quick & easy cleanup – From fridge to plate in 20 minutes flat. And just one basket to wash? Yes please.
- Impressive results – It looks and tastes like you spent hours, when really you just set it and forgot it.
Honestly, I feel like I’ve cracked the code to fancy dinners without the stress. My friends always ask for this recipe after they try it!
Ingredients for Air Fryer Duck Breast
You won’t believe how simple the ingredient list is for something this impressive. Just a handful of pantry staples transform duck breasts into something magical:
- 2 duck breasts (skin-on, about 6-8 oz each) – Look for ones with nice thick skin (that’s where the crispiness comes from!)
- 1 tsp kosher salt – I swear by Diamond Crystal, but use what you’ve got
- 1/2 tsp freshly ground black pepper – Trust me, fresh makes a difference
- 1 tsp garlic powder – The secret flavor booster
- 1 tsp smoked paprika – Adds that gorgeous color and subtle smoky note
See? Nothing fancy, but together they create absolute magic. Make sure to pat those duck breasts really dry with paper towels – that’s the key to getting that skin extra crispy!
Equipment You’ll Need
Okay, let’s talk tools! Here’s what you’ll want to grab before you start:
- Air fryer – Obviously! Any size works, but make sure the basket fits your duck breasts without crowding.
- Sharp knife – A paring knife works wonders for scoring that skin just right.
- Meat thermometer – For checking that perfect 165°F internal temp (I’ve learned this the hard way!).
That’s seriously it – no fancy gadgets needed. Just these three trusty kitchen buddies and you’re golden!
How to Make Air Fryer Duck Breast
Okay, let’s get cooking! I promise this is way easier than you think. Just follow these simple steps, and you’ll have the most incredible duck breast ready before you know it.
Step 1: Prep the Duck Breast
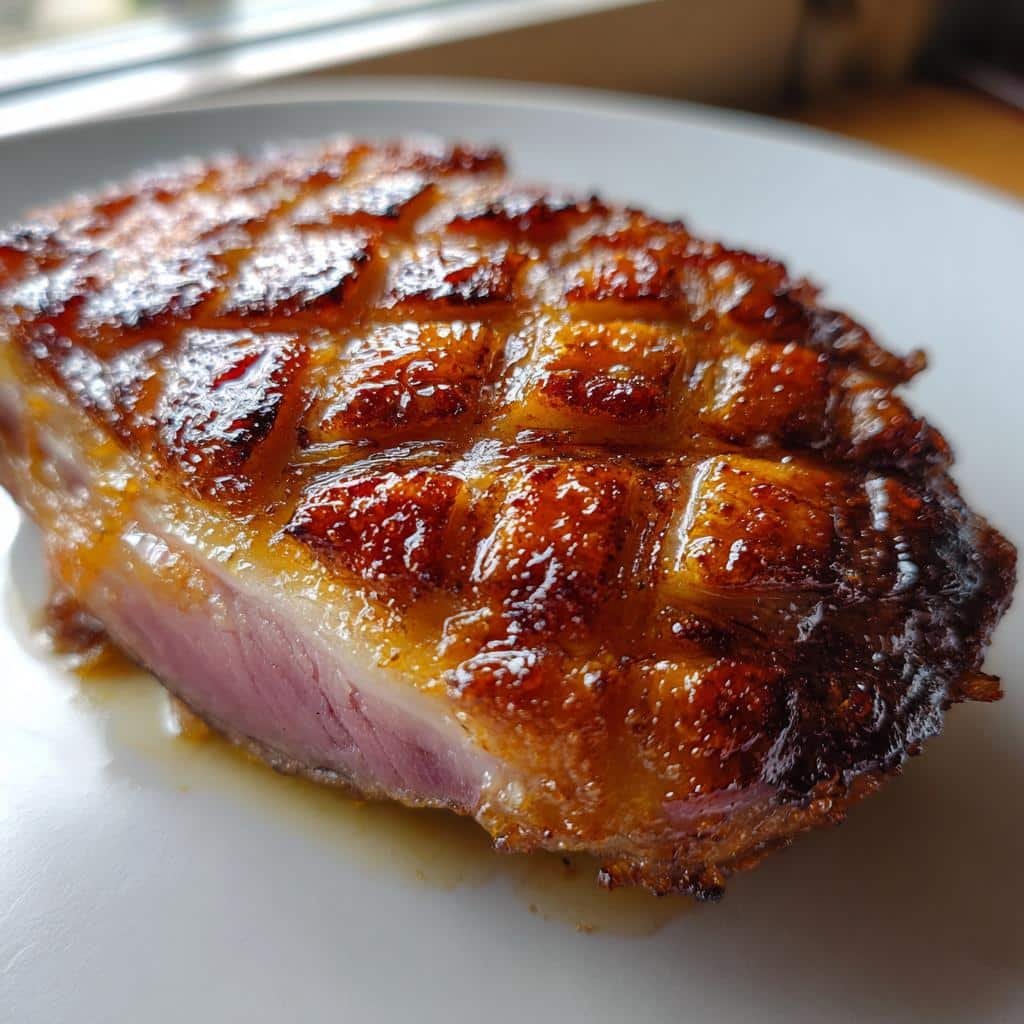
First things first – grab that sharp knife! Lay your duck breast skin-side up on a cutting board, and make shallow diagonal cuts across the skin about 1/4 inch apart, being careful not to cut into the meat. Then make another set of cuts going the opposite way to create a criss-cross pattern. This helps all that glorious fat render out perfectly. Oh! And don’t skip patting it dry with paper towels – dry skin means extra crispiness!
Step 2: Seasoning
Here’s where the flavor magic happens. Mix your salt, pepper, garlic powder, and paprika in a little bowl first – trust me, this makes for more even seasoning. Then rub that mixture all over both sides of the duck, really working it into those score marks. The skin side should look like it’s wearing a beautiful spice jacket when you’re done.
Step 3: Air Frying
Preheat your air fryer to 375°F (190°C) for about 3 minutes – this helps get that skin crispy right away. Place the duck breasts skin-side down in the basket (no oil needed!). Cook for 10 minutes, then flip and do another 5 minutes skin-side up. The skin should be golden and crispy, and the internal temp should read 165°F. Most important step? Let it rest for 5 minutes before slicing – this keeps all those delicious juices inside where they belong!
Tips for Perfect Air Fryer Duck Breast
After making this dozens of times (and yes, a few oops moments!), I’ve learned some tricks that guarantee perfect duck every single time:
- Thermometer is key – 165°F internal temp means juicy perfection. I learned this after one sad, overcooked batch. Never again!
- Size matters – Thicker breasts? Add 1-2 minutes per side. Skinny ones? Start checking at 8 minutes.
- Don’t crowd the basket – Leave space between breasts for that crispy magic to happen evenly.
- Rest time is non-negotiable – I know it’s tempting, but those 5 minutes make ALL the difference for juicy slices.
Oh, and if the skin isn’t quite crispy enough? Just pop it back in for 1-2 minutes – the air fryer forgives nearly everything!
Serving Suggestions
Now for the fun part – what to serve with your gorgeous duck! My absolute favorite is simple roasted Brussels sprouts (tossed in that glorious duck fat, of course). But honestly, anything works:
- Buttery mashed potatoes to soak up those juices
- A crisp green apple and arugula salad for contrast
- Sweet potato puree with a drizzle of balsamic glaze
Keep it simple – that duck is the star! My go-to? Just slice it thick and let everyone ooh and ahh over your masterpiece.
Storing and Reheating
Okay, confession time – I rarely have leftovers because we gobble this up! But if you do find yourself with extra duck breast, here’s how to keep it fabulous: Store slices in an airtight container in the fridge for up to 3 days. To reheat, pop it back in the air fryer at 350°F for just 1-2 minutes – that’ll revive the crispiness without drying it out. Pro tip: If the skin needs extra love, place it skin-side down for that final minute. Works like a charm every time!
Air Fryer Duck Breast FAQs
I get so many questions about this recipe – here are the ones that pop up most often from friends and readers who’ve tried it:
Can I use frozen duck breast?
Absolutely! Just thaw it completely in the fridge overnight first. Pat it extra dry – frozen duck tends to release more moisture. You might need to add 1-2 minutes cooking time since it starts colder.
Why is my skin not crispy enough?
Two likely culprits: not drying the skin well enough before cooking, or overcrowding the air fryer basket. Give those duck breasts space to breathe! If it’s still not crisp after cooking, pop it back in for another minute or two.
Can I make this without scoring the skin?
You can, but I don’t recommend it. Scoring helps the fat render properly and gives you that perfect crisp texture. It takes 30 seconds and makes all the difference – promise!
What if I don’t have a meat thermometer?
The 10+5 minute timing usually works perfectly, but if you’re unsure, make a small cut to peek inside. The meat should be pink but not red. Invest in a cheap thermometer though – it’s a game-changer!
Can I use different seasonings?
Of course! This is your duck adventure. I’ve done everything from Chinese five-spice to herbes de Provence. Just keep the salt – that’s non-negotiable for crispy skin. Have fun experimenting! Learn more about cooking duck breast.
Nutritional Information
Here’s the breakdown per serving (1 duck breast): 350 calories, 25g fat (8g saturated), 30g protein, 1g carbs, 0g fiber, 500mg sodium. Remember, nutrition varies based on ingredients/brands – these are estimates!
Now go try this recipe and share your results! I can’t wait to hear how your air fryer duck breast turns out.
Print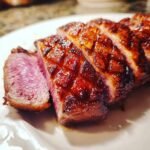
“20-Minute Air Fryer Duck Breast: Irresistibly Crispy Perfection”
- Total Time: 20 minutes
- Yield: 2 servings 1x
- Diet: Low Carb
Description
Crispy and juicy duck breast cooked perfectly in an air fryer.
Ingredients
- 2 duck breasts
- 1 tsp salt
- 1/2 tsp black pepper
- 1 tsp garlic powder
- 1 tsp paprika
Instructions
- Preheat the air fryer to 375°F (190°C).
- Score the duck breast skin in a criss-cross pattern.
- Season both sides with salt, pepper, garlic powder, and paprika.
- Place the duck breasts skin-side down in the air fryer basket.
- Cook for 10 minutes, then flip and cook for another 5 minutes.
- Let rest for 5 minutes before slicing.
Notes
- Pat the duck breasts dry before seasoning for crispier skin.
- Adjust cooking time based on the thickness of the duck breasts.
- Prep Time: 5 minutes
- Cook Time: 15 minutes
- Category: Main Dish
- Method: Air Fryer
- Cuisine: International
Nutrition
- Serving Size: 1 duck breast
- Calories: 350
- Sugar: 0g
- Sodium: 500mg
- Fat: 25g
- Saturated Fat: 8g
- Unsaturated Fat: 15g
- Trans Fat: 0g
- Carbohydrates: 1g
- Fiber: 0g
- Protein: 30g
- Cholesterol: 100mg
Keywords: air fryer duck breast, crispy duck, easy duck recipe