
There’s something about the holidays that just calls for a dessert that feels indulgent, creamy, and packed with festive flavor—without spending hours in the kitchen. Enter this air fryer eggnog cheesecake! It’s my go-to December treat because it gives you that rich, velvety cheesecake texture with a punch of cozy eggnog spice, all while cutting down on baking time thanks to the magic of the air fryer. I first stumbled onto this recipe during a last-minute holiday potluck panic (you know the kind—where you realize you signed up to bring dessert but forgot to plan ahead). One bite, and my family declared it a new tradition. The best part? It tastes like you fussed over it for hours, when really, you’re just about 25 minutes away from cheesecake bliss.
Why You’ll Love This Air Fryer Eggnog Cheesecake
This isn’t just any cheesecake—it’s your new holiday secret weapon. Here’s why it’s about to become your go-to dessert:
- Air fryer magic: Skip the oven and get perfect results in just 25 minutes (yes, really!)—no water bath needed.
- Holiday in every bite: Real eggnog and nutmeg make it taste like December on a fork, with that signature creamy-cheesecake hug.
- Impressively easy: It looks fancy, but the steps are simpler than wrapping presents (and way more rewarding).
- Crowd-pleaser: Serve it at parties and watch people hover near the dessert table for “just one more sliver.”
Ingredients for Air Fryer Eggnog Cheesecake
Here’s everything you’ll need to make this holiday-worthy cheesecake—and trust me, every ingredient plays a special role in creating that perfect creamy texture and festive flavor. I’ve learned through trial and error (and one memorable cheesecake flop) that these details really matter!
- 1 cup graham cracker crumbs (packed firmly—this makes all the difference for a sturdy crust)
- 3 tablespoons melted butter (salted works great, but unsalted is fine too)
- 16 oz cream cheese (full-fat, softened at room temperature for at least 2 hours—don’t rush this!)
- 1/2 cup granulated sugar (regular white sugar blends perfectly with the eggnog)
- 2 large eggs (room temperature—cold eggs can make the batter lumpy)
- 1/2 cup eggnog (full-fat gives the richest flavor, but low-fat works in a pinch)
- 1 teaspoon vanilla extract (pure vanilla makes all the difference)
- 1/2 teaspoon ground nutmeg (freshly grated if you can—it’s worth the extra effort)
A quick tip from my kitchen disasters: measure everything before you start mixing. There’s nothing worse than realizing your cream cheese is still cold when you’re ready to bake! Also, if you’re using store-bought eggnog, give it a quick taste—some brands are sweeter than others, so you might want to adjust the sugar slightly.
How to Make Air Fryer Eggnog Cheesecake
This might just be the easiest cheesecake you’ll ever make—no oven, no stress, and it comes out perfectly creamy every time. Follow these steps, and you’ll have a holiday showstopper that tastes like it took all day (but secretly didn’t).
Preparing the Crust
The crust is your cheesecake’s foundation, and we want it just right—not too thick, not too crumbly. Here’s how to nail it:
- Mix the graham cracker crumbs and melted butter in a bowl until it looks like wet sand (if it doesn’t hold together when squeezed, add another teaspoon of butter).
- Press firmly into a 7-inch springform pan (or any oven-safe dish that fits your air fryer). I line the bottom with parchment paper first—it makes removal SO much easier later.
- Use the bottom of a glass to really compact it—this prevents the dreaded “crumbling crust syndrome” when slicing.
Making the Cheesecake Filling
This is where the magic happens! The key is patience—don’t rush the mixing, or you’ll end up with lumps.
- Beat the softened cream cheese and sugar for a full 2 minutes until it’s completely smooth (scrape the bowl halfway through—hidden lumps love to lurk there).
- Add eggs one at a time, beating well after each (this prevents a grainy texture).
- Gently fold in the eggnog, vanilla, and nutmeg—pour slowly to avoid splatters. The batter should be silky with no streaks.
Air Frying and Chilling
Here’s where the air fryer works its holiday magic—no babysitting required!
- Preheat your air fryer to 320°F for 3 minutes (this helps prevent cracks).
- Pour the filling over the crust and smooth the top. Cover loosely with foil if your air fryer tends to brown things quickly.
- Cook for 25 minutes—it’s done when the edges are set but the center still jiggles slightly. A toothpick inserted near the edge should come out clean.
- Let it cool at room temperature for an hour, then refrigerate for at least 4 hours (overnight is even better—the flavors deepen beautifully).
Pro tip from my many tests: Resist cutting into it early! That chilling time is what gives you that perfect creamy-sliceable texture. If you can wait, it’ll be worth it—promise.
Tips for the Perfect Air Fryer Eggnog Cheesecake
After testing this recipe more times than I’d like to admit (all in the name of science, of course), I’ve learned a few tricks to guarantee cheesecake success every single time. Trust me—these little tips make all the difference!
- Room temperature is non-negotiable – Take your cream cheese and eggs out at least 2 hours before baking. Cold ingredients = lumpy batter = sad cheesecake. If you’re in a hurry, microwave the cream cheese for 15-second bursts (but don’t let it melt!).
- Don’t overmix after adding eggs – Once those eggs go in, mix just until combined. Overbeating incorporates too much air, which leads to cracks. I speak from experience—my first attempt looked like the Grand Canyon!
- Check early, check often – Air fryers vary wildly, so start checking at 20 minutes. The edges should be set with just a slight wobble in the center. If it’s browning too fast, tent with foil.
- Chill like you mean it – I know it’s tempting, but that 4-hour chill isn’t optional. The cheesecake needs time to firm up properly. For the creamiest texture, I actually prefer making it the day before serving.
- Use full-fat everything – This is holiday dessert, not diet food! Low-fat cream cheese or eggnog makes the texture grainy. Save the light versions for January resolutions.
One last secret? If you do get cracks (it happens to the best of us), call it rustic and cover them with whipped cream and a sprinkle of nutmeg. No one will ever know—and they’ll be too busy eating to notice anyway!
Ingredient Substitutions and Variations
Got dietary needs or just want to mix it up? Here are my favorite ways to tweak this eggnog cheesecake while keeping that magical texture and flavor:
- Crust alternatives: Swap graham crackers for gluten-free cookies, gingersnaps (holiday twist!), or even crushed vanilla wafers. Just keep that 1:3 butter-to-crumb ratio.
- Dairy swaps: Low-fat cream cheese works in a pinch, but add 1 tbsp flour to stabilize it. For homemade eggnog lovers, use your favorite recipe—just reduce any added sugar in the filling.
- Spice adjustments: Not a nutmeg fan? Try cinnamon or pumpkin pie spice instead. For extra warmth, add a pinch of cardamom—my secret holiday touch!
- Boozy version: Replace 1 tbsp eggnog with rum or bourbon (adults-only dessert!). Just don’t overdo it—too much liquid affects the texture.
Remember: some substitutions change baking time slightly. Start checking 5 minutes early until you know how your version behaves!
Serving and Storing Air Fryer Eggnog Cheesecake
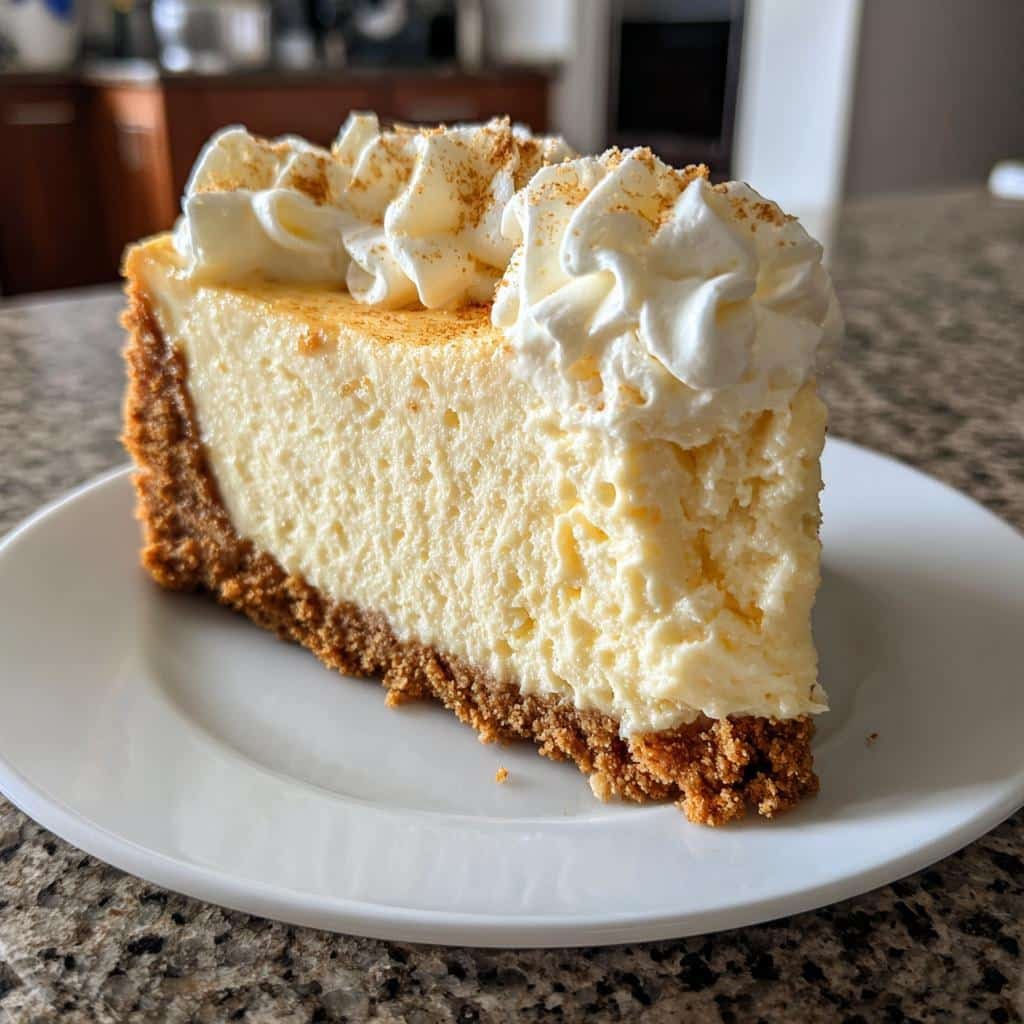
Okay, here’s where the real fun begins—making your cheesecake look as incredible as it tastes! My go-to move? A big ol’ dollop of freshly whipped cream right in the center, a dusting of cinnamon or nutmeg (or both, no judgment here), and maybe a drizzle of caramel if I’m feeling fancy. Pro tip: Let guests add their own toppings—it’s more fun that way!
Now, about storage—because let’s be honest, this cheesecake rarely lasts long in my house. If by some miracle you have leftovers (who are you, and what’s your secret?), here’s what to do:
- Fridge life: Cover tightly with plastic wrap or transfer to an airtight container. It’ll stay perfect for 3 days—if you can resist it that long! The flavors actually deepen overnight, so day two might be even better.
- Freezing: Yes, you can freeze it! Slice first, then wrap individual pieces in plastic and foil. They’ll keep for up to 2 months. Thaw overnight in the fridge—never microwave, or you’ll get a sad, weepy mess.
- Room temp rule: Take slices out of the fridge 15 minutes before serving. Cold cheesecake hides its flavors—letting it warm slightly makes all the spices and eggnog goodness really sing.
One last thing: Don’t even think about reheating this beauty. The air fryer already worked its magic—just enjoy that creamy, dreamy texture straight from the fridge. Trust me, I learned the hard way with a melted slice that shall not be spoken of again… *shudders*
Air Fryer Eggnog Cheesecake FAQs
I’ve gotten so many questions about this recipe since I started making it—here are the ones that pop up most often, along with my hard-earned answers after many (many) test batches!
Can I use a different crust?
Absolutely! Graham crackers are classic, but shortbread cookies make a buttery-rich alternative. Gingersnaps add festive spice, or go gluten-free with almond flour mixed with butter and sugar (about 1 1/4 cups to 3 tbsp butter). Just press it firmly—no crust left behind!
What if I don’t have an air fryer?
No problem—bake it traditionally at 325°F in a water bath for 45-50 minutes. The water bath keeps the temperature gentle, preventing cracks. Just tent with foil if the top browns too fast.
Why did my cheesecake crack?
Usually from overmixing (too much air) or cooling too fast. Always mix just until combined after adding eggs. And never skip the gradual cooldown—room temp first, then fridge. If it cracks anyway, call it “rustic” and cover with whipped cream!
Can I double this recipe?
Yes, but bake in two separate pans. Stacking layers in the air fryer blocks airflow. For a taller cheesecake, use a 5-inch pan and add 5-10 minutes to the bake time (check often!).
How do I know it’s done?
The edges should look set with a slight jiggle in the center—like barely set Jell-O. A toothpick near the edge comes out clean. Remember, it keeps cooking as it cools, so pull it before it looks fully firm!
Nutritional Information
Okay, let’s talk numbers—but don’t let them scare you! This is holiday dessert, after all. Keep in mind these values are estimates (your exact eggnog brand or cookie crumbs might tweak them slightly). Here’s the breakdown per generous slice:
- Calories: 320 (worth every single one!)
- Fat: 22g (12g saturated—that’s the good, creamy stuff)
- Sugar: 22g (mostly from the eggnog and crust—but hey, ’tis the season!)
- Protein: 6g (cheesecake for breakfast? Maybe…)
- Sodium: 280mg
Now, my philosophy? When the air fryer shaves off baking time, you’ve earned that extra dollop of whipped cream. But if you’re watching specific dietary needs, you can tweak the recipe (see my substitutions section) or just savor smaller slices—though good luck stopping at just one! If you are interested in other quick air fryer desserts, check out my easy air fryer dessert recipes.
Remember: These values can vary based on your exact ingredients. Store-bought eggnog tends to be sweeter than homemade, and different cream cheese brands have slightly different fat contents. But honestly? When that first bite of creamy, spiced perfection hits your tongue, I doubt you’ll be thinking about numbers anyway.
Share Your Experience
I’d love to hear how your air fryer eggnog cheesecake turns out—did you stick to the classic recipe or put your own spin on it? Drop a comment below telling me your favorite part (was it the creamy filling? The festive spice? The fact that it was ready so fast?). And if you snapped a photo of your masterpiece, tag me on Instagram—I live for those golden crust shots with whipped cream swirls! Nothing makes me happier than seeing your holiday dessert wins. Now go enjoy that cheesecake—you’ve earned every delicious bite!
Print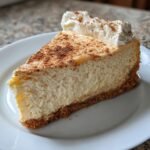
25-Minute Air Fryer Eggnog Cheesecake – Irresistible Holiday Bliss
- Total Time: 4 hours 40 minutes
- Yield: 8 servings 1x
- Diet: Vegetarian
Description
A creamy cheesecake with eggnog flavor, cooked in an air fryer for a quick dessert.
Ingredients
- 1 cup graham cracker crumbs
- 3 tbsp melted butter
- 16 oz cream cheese, softened
- 1/2 cup sugar
- 2 eggs
- 1/2 cup eggnog
- 1 tsp vanilla extract
- 1/2 tsp nutmeg
Instructions
- Mix graham cracker crumbs and melted butter. Press into a pan.
- Beat cream cheese and sugar until smooth.
- Add eggs one at a time, then eggnog, vanilla, and nutmeg.
- Pour over crust. Air fry at 320°F for 25 minutes.
- Chill for 4 hours before serving.
Notes
- Use room temperature cream cheese for smoother texture.
- Check doneness with a toothpick.
- Prep Time: 15 minutes
- Cook Time: 25 minutes
- Category: Dessert
- Method: Air Fryer
- Cuisine: American
Nutrition
- Serving Size: 1 slice
- Calories: 320
- Sugar: 22g
- Sodium: 280mg
- Fat: 22g
- Saturated Fat: 12g
- Unsaturated Fat: 8g
- Trans Fat: 0g
- Carbohydrates: 26g
- Fiber: 0g
- Protein: 6g
- Cholesterol: 110mg
Keywords: air fryer cheesecake, eggnog dessert, holiday cheesecake