
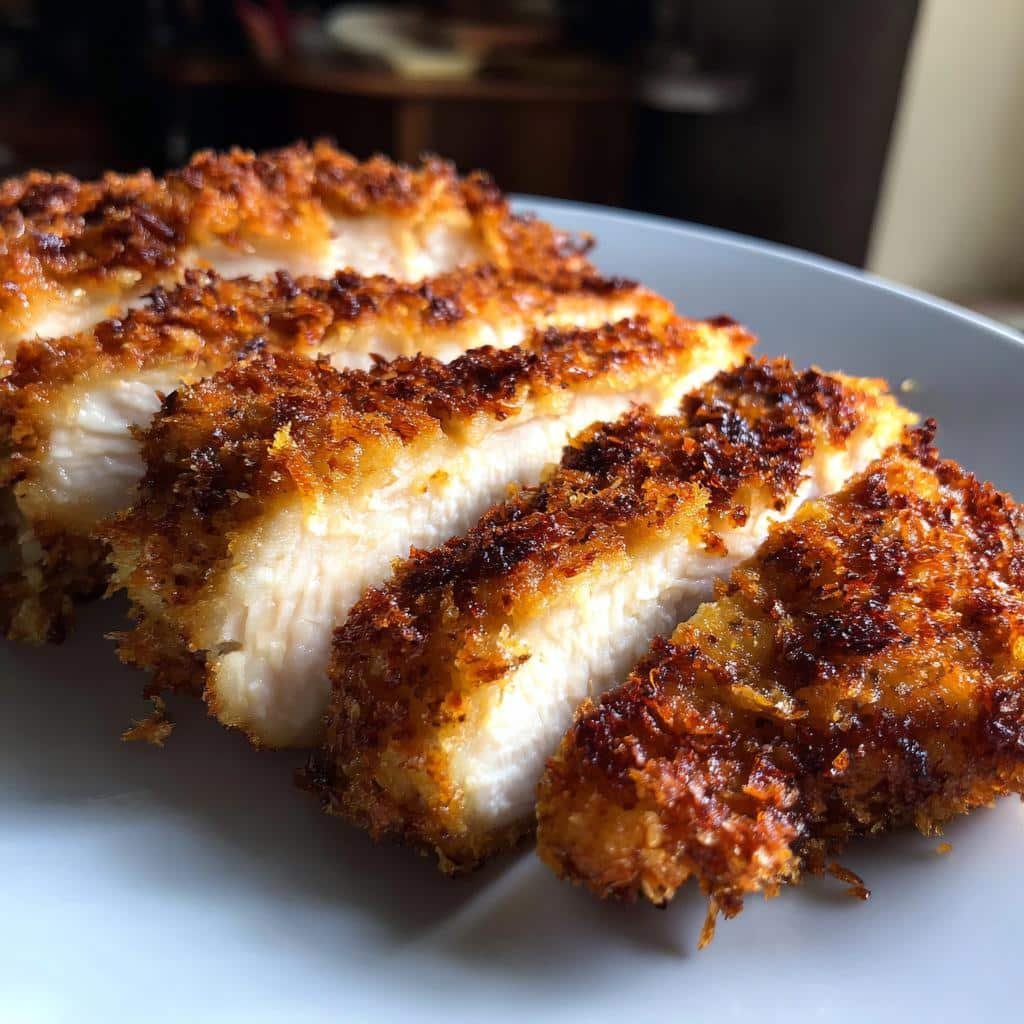
You know that craving for crispy, golden fried chicken but without the oil-soaked guilt? My air fryer katsu chicken comes to the rescue every time! I still remember the first time I tried this – I couldn’t believe how perfectly crisp the panko crust got without deep frying. What I love most is how the chicken stays unbelievably juicy inside while getting that satisfying crunch we all crave. And the best part? It’s ready in under 30 minutes with minimal mess. This recipe has become my go-to when I’m craving something comforting yet light – it’s like having my favorite takeout but knowing exactly what’s going into it!
Why You’ll Love This Air Fryer Katsu Chicken
Oh my goodness, where do I even start with why this recipe is a total game-changer? Let me count the ways:
- Crazy crispy without the oil bath: That golden panko crust gets perfectly crunchy without deep frying – I swear it’s just as good as the restaurant version!
- Juicy chicken every single time: The air fryer locks in moisture so well – no more dry, sad chicken here.
- Ready before your rice cooker dings: Seriously, about 25 minutes from fridge to plate. Perfect for those “I need dinner NOW” nights.
- Almost no cleanup: One basket to wash instead of a whole oil-splattered kitchen? Yes please!
- Kid-approved magic: My picky eater actually begs for this – that crispy crunch wins them over every time.
Ingredients for Air Fryer Katsu Chicken
Okay, let’s gather our simple but mighty ingredients – I promise you probably have most of these already! The magic happens when these basic items come together just right:
- The Chicken: 2 boneless, skinless chicken breasts (pounded to ½-inch thickness – trust me, this step matters!)
- The Crispy Coating: 1 cup panko breadcrumbs (not seasoned – we’ll add our own flavors), ½ cup all-purpose flour, 1 egg (beaten)
- The Flavor Boosters: ½ tsp salt, ¼ tsp black pepper, ½ tsp garlic powder, ½ tsp paprika
- The Helper: Cooking spray (just a quick spritz makes all the difference)
See? Nothing fancy – just pantry staples transformed into something extraordinary. Now let’s make some magic!
How to Make Air Fryer Katsu Chicken
Alright, let’s get cooking! I’ve made this so many times I could do it in my sleep, but I’ll walk you through each step carefully. The key is taking your time with the breading – that’s what gives us that perfect golden crunch we’re after.
Step 1: Prep the Chicken
First things first – grab those chicken breasts and place them between two sheets of plastic wrap or parchment paper. Now, pound them to an even ½-inch thickness using a meat mallet or rolling pin. Don’t skip this! Even thickness means even cooking.
Next, season both sides generously with that salt, pepper, garlic powder, and paprika mixture. Let it sit for a minute while you set up your breading station: one bowl with flour, one with beaten egg, and one with panko. Here’s my golden rule: always go flour → egg → panko. The flour helps the egg stick, and the egg helps the panko stick. Miss a step and your breading might fall off!
Step 2: Air Fry to Perfection
Preheat your air fryer to 375°F (190°C) – this is crucial for that instant crispiness! While it heats, lightly spray the basket with cooking spray. Place your breaded chicken in the basket, making sure they’re not touching (air flow is everything here!). Give the tops a quick spray of oil too – this helps them brown beautifully.
Cook for 12-15 minutes, flipping halfway through. You’ll know it’s done when the crust is deep golden brown and the internal temp hits 165°F (74°C). If you’re making more than two cutlets, cook in batches – overcrowding leads to soggy breading (and we can’t have that!). Let them rest for 5 minutes before slicing – the patience pays off in juiciness!
Tips for the Best Air Fryer Katsu Chicken
After making this recipe more times than I can count, I’ve learned a few tricks that take it from good to “oh-my-goodness-is-this-really-homemade?” amazing. Here are my can’t-live-without tips:
- Chill before cooking: After breading, pop the chicken in the fridge for 10 minutes. This helps the coating stick better and gives you that perfect crisp texture. I know it’s hard to wait when you’re hungry, but trust me – it makes all the difference!
- Parchment is your friend: Cut a piece of parchment to fit your air fryer basket with plenty of holes punched in it. No more breading sticking to the basket, and cleanup becomes a total breeze. My lazy Sunday self thanks me every time.
- The gentle shake: About halfway through cooking, when you flip the chicken, give the basket a gentle shake. This helps redistribute any loose panko and ensures even browning on all sides. Just don’t go wild – we want the coating to stay put!
- Check early: All air fryers run a little differently. Start checking at 10 minutes – better to peek early than end up with overcooked chicken. That perfect golden brown color is what we’re aiming for, not dark brown!
These little tricks might seem small, but together they create that restaurant-quality katsu we all crave. Now go forth and make some crispy magic!
Serving Suggestions for Air Fryer Katsu Chicken
Oh, the possibilities! My absolute favorite way to serve this is over steaming hot rice with a generous drizzle of tonkatsu sauce – that sweet-savory combo is pure magic. For a light crunch, add some quick-pickled cucumbers or shredded cabbage. Feeling fancy? Pack it in a bento box with some edamame and sesame seeds – instant Japanese takeout vibes at home!
Air Fryer Katsu Chicken Variations
One of the best things about this recipe is how easily it adapts to different tastes and dietary needs. I’ve experimented with all sorts of twists over the years – some intentional, some happy accidents! Here are my favorite ways to mix things up when I’m feeling creative (or just need to use what’s in my fridge):
Protein Swaps That Work Like Magic
Don’t have chicken breasts? No problem! Turkey cutlets make an amazing substitute – they cook up just as juicy and take to the panko crust beautifully. For my pork-loving friends, thin pork chops work wonders too (just adjust cooking time based on thickness). And once, in a pinch, I even used firm tofu pressed extra-dry – not traditional, but surprisingly delicious with extra seasoning!
Breadcrumb Alternatives for Every Diet
Need gluten-free? Simply swap the flour for your favorite GF blend and use gluten-free panko (I like the ones made from rice – they get extra crispy!). For a low-carb version, crushed pork rinds mixed with parmesan create an unbelievably crunchy coating. Feeling fancy? Try mixing regular panko with Japanese breadcrumbs (tenkasu) for extra texture – it’s like katsu meets tempura!
Spice It Up (Or Down!)
The basic seasoning blend is perfect as-is, but sometimes I love playing with flavors. Add ¼ teaspoon cayenne to the flour for a gentle heat, or mix in some curry powder with the panko for a Japanese curry twist. For kids or sensitive palates, skip the paprika and garlic powder – the chicken still tastes amazing with just salt and pepper. My secret? A pinch of msg in the panko makes it taste just like my favorite Tokyo street food!
The beauty of katsu is how forgiving it is – once you master the basic technique, the flavor possibilities are endless. What variations will you try first? Try these turkey meatballs next time you want a different protein!
Storing and Reheating
Let’s talk leftovers – not that you’ll have many with how delicious this katsu is! But if you’re smart like me and make extra (because why wouldn’t you?), here’s how to keep that crispy magic alive for round two:
Fridge storage: Place cooled chicken in an airtight container with parchment between pieces. It’ll stay perfect for 3-4 days – any longer and the breading starts to get sad. Pro tip: Don’t slice it until you’re ready to eat! Whole pieces stay juicier.
Freezer hack: For longer storage, freeze the cooked (but unsliced) katsu on a baking sheet first, then transfer to freezer bags. It’ll keep for 2-3 months. When the craving hits, no need to thaw – just go straight to reheating!
Reheating like a pro: Whatever you do, resist the microwave! That’s how you end up with soggy, rubbery chicken. Instead, pop it in the air fryer at 350°F for 4-5 minutes until piping hot and crisp again. If it was frozen, add an extra minute or two. The crust won’t be quite as perfect as fresh, but it’s darn close – way better than takeout leftovers! Check out this roast chicken for another great air fryer meal!
See? Now you’ve got tomorrow’s lunch sorted too. This chicken’s gift that keeps on giving!
Air Fryer Katsu Chicken FAQs
I get so many questions about this recipe – seems like everyone wants to make their katsu perfect on the first try! Here are the answers to the questions I hear most often:
Can I use chicken thighs instead of breasts?
Absolutely! Thighs actually stay extra juicy thanks to their higher fat content. Just remember they’re usually thicker – pound them to an even ½-inch and add 2-3 extra minutes cooking time. The extra crispiness against that rich thigh meat? Chef’s kiss!
Is the cooking spray really necessary?
Okay, confession time – I’ve tried skipping it “just this once” and regretted it every time. That quick spritz makes all the difference in getting that golden, restaurant-style crunch. But don’t go overboard – we’re not deep frying! Just a light mist on both sides does the trick.
How do I keep my chicken from drying out?
Three words: thermometer, thermometer, thermometer! Overcooking is the #1 culprit for dry chicken. Pull it at 165°F (74°C) and let it rest – the temp will rise a few degrees while it sits. Also, pounding evenly means no thin parts overcook while thick parts finish. My grandma would say “listen to the chicken” – when it’s juicy, it’s done! For more on safe food temperatures, check out official guidelines from the U.S. Food and Drug Administration.
Why does my breading sometimes fall off?
Been there! Usually it’s because we rushed the breading steps. Make sure to: 1) Pat chicken dry before starting, 2) Follow the flour→egg→panko sequence exactly, and 3) Press the panko on firmly. That 10-minute chill in the fridge before cooking helps glue everything together too.
Can I make this ahead for meal prep?
You bet! I often bread extra chicken and freeze it raw (separate with parchment). Cook straight from frozen, adding 5-7 minutes. For pre-cooked, reheat in the air fryer as mentioned earlier. Just avoid refrigerating breaded raw chicken – it gets soggy. Learned that the hard way!
Still have questions? Drop them in the comments – I’m happy to help troubleshoot your katsu adventures!
Nutritional Information
Okay, let’s talk numbers – but remember, these are estimates that can vary based on your exact ingredients and portion sizes. Here’s the breakdown per serving (that’s one beautiful chicken breast):
- Calories: 320
- Protein: 35g (hello, muscle fuel!)
- Fat: 8g (only 2g saturated – way better than deep-fried!)
- Carbs: 25g
- Sugar: Just 1g
- Sodium: 450mg
Not too shabby for something that tastes this indulgent, right? The air fryer magic means we get all the crunch with a fraction of the oil. Now go make some crispy katsu magic tonight – and don’t forget to tag us with your golden-brown masterpieces! If you want to try another crispy air fryer favorite, check out this air fryer mozzarella chips recipe.
Print
Crispy Air Fryer Katsu Chicken Recipe in 25 Minutes
- Total Time: 25 minutes
- Yield: 2 servings 1x
- Diet: Low Lactose
Description
Crispy and juicy katsu chicken made easy in the air fryer.
Ingredients
- 2 boneless, skinless chicken breasts
- 1 cup panko breadcrumbs
- 1/2 cup all-purpose flour
- 1 egg, beaten
- 1/2 tsp salt
- 1/4 tsp black pepper
- 1/2 tsp garlic powder
- 1/2 tsp paprika
- Cooking spray
Instructions
- Preheat the air fryer to 375°F (190°C).
- Season chicken breasts with salt, pepper, garlic powder, and paprika.
- Dredge each chicken breast in flour, dip in beaten egg, then coat with panko breadcrumbs.
- Lightly spray the air fryer basket with cooking spray.
- Place chicken in the air fryer basket without overcrowding.
- Cook for 12-15 minutes, flipping halfway, until golden and internal temperature reaches 165°F (74°C).
- Let rest for 5 minutes before slicing.
Notes
- For extra crispiness, lightly spray the breaded chicken with oil before air frying.
- Serve with tonkatsu sauce, rice, and shredded cabbage.
- Use gluten-free flour and breadcrumbs if needed.
- Prep Time: 10 minutes
- Cook Time: 15 minutes
- Category: Main Dish
- Method: Air Fryer
- Cuisine: Japanese
Nutrition
- Serving Size: 1 chicken breast
- Calories: 320
- Sugar: 1g
- Sodium: 450mg
- Fat: 8g
- Saturated Fat: 2g
- Unsaturated Fat: 5g
- Trans Fat: 0g
- Carbohydrates: 25g
- Fiber: 1g
- Protein: 35g
- Cholesterol: 140mg
Keywords: air fryer katsu chicken, crispy chicken, Japanese katsu, easy chicken recipe