
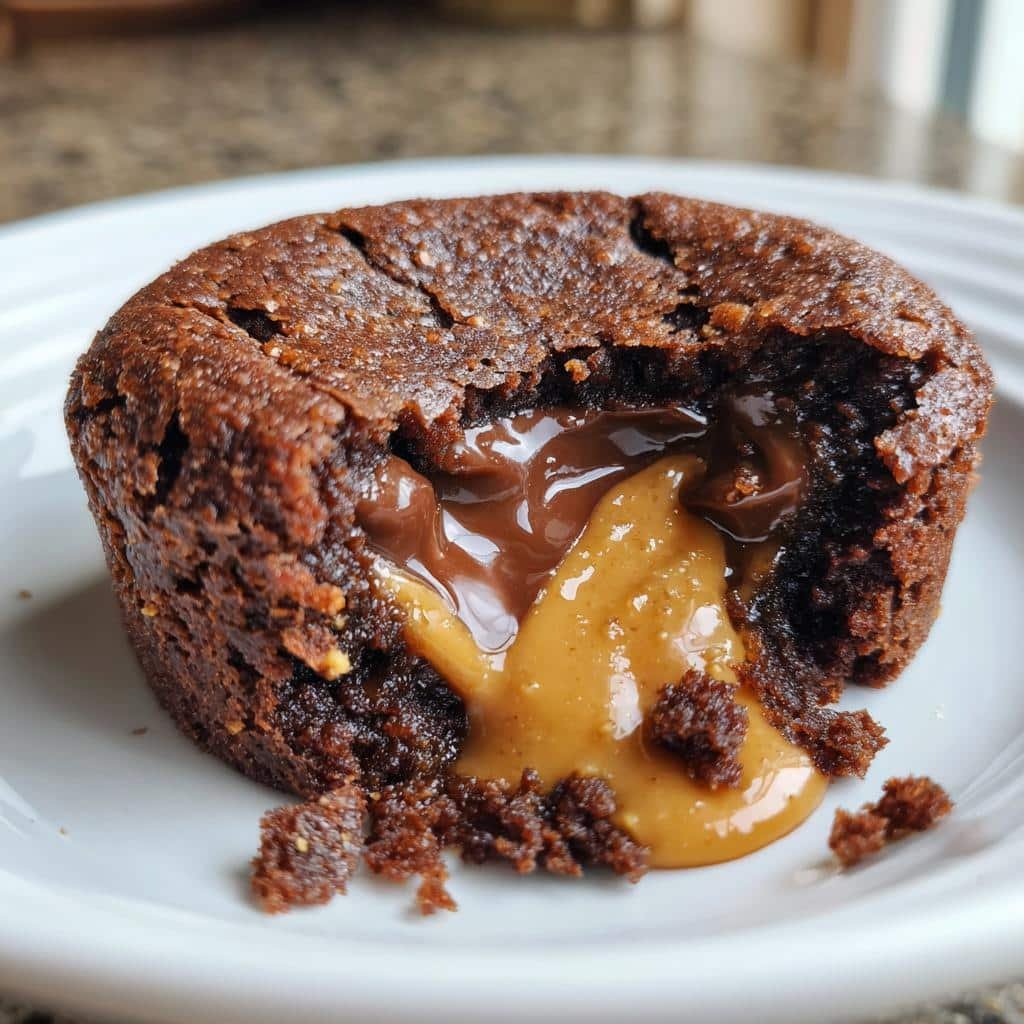
Oh my goodness, you have to try these air fryer mini peanut butter lava cakes! I stumbled upon this recipe one night when I desperately needed a quick dessert fix—you know those moments when chocolate cravings hit hard? The magic happens in under 15 minutes of air frying, and the molten peanut butter center is pure heaven. Trust me, these little cakes are game-changers for anyone who loves that perfect combo of rich chocolate and gooey peanut butter. Plus, they’re so easy to make—no fancy equipment needed, just your trusty air fryer and a couple of ramekins. Get ready to impress yourself (and anyone lucky enough to get a bite)!

Table of Contents
Why You’ll Love These Air Fryer Mini Peanut Butter Lava Cakes
Let me tell you why these little cakes will become your new obsession:
- Lightning fast: From craving to eating in under 30 minutes—faster than delivery!
- Magical molten center: That first spoonful revealing warm peanut butter lava is pure joy.
- Easy cleanup: Just two ramekins to wash—no messy cake pans or stand mixers.
- Flavor explosion: Rich chocolate cake hugging sweet, melty peanut butter—irresistible!
- Perfect portion: Small but mighty—satisfies cravings without the guilt.
Honestly, I make these at least once a week now. They’re that good!
Ingredients for Air Fryer Mini Peanut Butter Lava Cakes
Here’s everything you’ll need to make these irresistible treats – I’ve learned through trial and error that quality ingredients really make the difference here!
- 1/4 cup creamy peanut butter (use natural, the kind that separates – just stir it well before measuring)
- 2 tablespoons powdered sugar, packed lightly (this helps the filling hold its shape)
- 1/4 cup all-purpose flour (spoon and level it – don’t scoop from the bag!)
- 2 tablespoons cocoa powder (I prefer Dutch-processed for richer flavor)
- 1/4 teaspoon baking powder (make sure yours is fresh – test it if it’s been open awhile)
- 1/8 teaspoon salt (just a pinch to balance the sweetness)
- 3 tablespoons granulated sugar
- 1 large egg, at room temperature (this helps everything blend smoothly)
- 2 tablespoons milk (any kind works – I use whole milk for extra richness)
- 1 tablespoon melted butter (salted or unsalted both work here)
- 1/2 teaspoon vanilla extract (the real stuff, not imitation – trust me)
That’s it! No fancy ingredients – just simple pantry staples that come together magically in your air fryer. I always keep these basics on hand for last-minute dessert emergencies (which happen more often than I’d like to admit!).
Print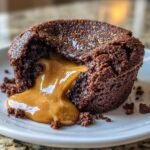
4-Minute Air Fryer Mini Peanut Butter Lava Cakes – Heavenly!
- Total Time: 32 minutes
- Yield: 2 mini cakes 1x
- Diet: Vegetarian
Description
Delicious mini peanut butter lava cakes made in an air fryer. Quick and easy dessert with a molten peanut butter center.
Ingredients
- 1/4 cup creamy peanut butter
- 2 tbsp powdered sugar
- 1/4 cup all-purpose flour
- 2 tbsp cocoa powder
- 1/4 tsp baking powder
- 1/8 tsp salt
- 3 tbsp granulated sugar
- 1 large egg
- 2 tbsp milk
- 1 tbsp melted butter
- 1/2 tsp vanilla extract
Instructions
- Mix peanut butter and powdered sugar to form small balls. Freeze for 15 minutes.
- Whisk flour, cocoa powder, baking powder, and salt in a bowl.
- In another bowl, combine sugar, egg, milk, melted butter, and vanilla.
- Fold dry ingredients into wet ingredients until smooth.
- Grease ramekins and fill halfway with batter. Add a frozen peanut butter ball to each.
- Cover with more batter and smooth the tops.
- Air fry at 320°F (160°C) for 10-12 minutes.
- Let cool for 2 minutes before serving.
Notes
- Use natural peanut butter for best results.
- Do not overbake to keep the center molten.
- Serve warm for the best texture.
- Prep Time: 20 minutes
- Cook Time: 12 minutes
- Category: Dessert
- Method: Air Fryer
- Cuisine: American
Nutrition
- Serving Size: 1 mini cake
- Calories: 280
- Sugar: 18g
- Sodium: 150mg
- Fat: 16g
- Saturated Fat: 4g
- Unsaturated Fat: 10g
- Trans Fat: 0g
- Carbohydrates: 28g
- Fiber: 2g
- Protein: 8g
- Cholesterol: 55mg
Keywords: air fryer, peanut butter lava cake, quick dessert
How to Make Air Fryer Mini Peanut Butter Lava Cakes
Okay, let’s get to the fun part – making these magical little cakes! I promise it’s easier than you think, and the results will blow your mind. Just follow these steps carefully – especially the timing parts – and you’ll have perfect lava cakes every time.
Preparing the Peanut Butter Filling
First, let’s make that glorious molten center! In a small bowl, mix together the peanut butter and powdered sugar until it forms a thick paste. Roll the mixture into two balls about 1 inch in diameter – I use a small cookie scoop for perfect portions. Pop these on a plate and freeze them for exactly 15 minutes. This step is crucial – it keeps the filling from melting too fast during cooking!
Mixing the Cake Batter
While the peanut butter balls chill, let’s make the chocolate batter. Whisk together the flour, cocoa powder, baking powder, and salt in one bowl. In another bowl, beat the egg, then add the sugar, milk, melted butter, and vanilla. Now, gently fold the dry ingredients into the wet ingredients until just combined – don’t overmix! The batter should be smooth but still slightly thick, like pancake batter.
Assembling and Air Frying
Lightly grease two 6-ounce ramekins with butter or cooking spray. Spoon about 1 tablespoon of batter into each, then place a frozen peanut butter ball right in the center. Cover completely with more batter, smoothing the tops. Air fry at 320°F (160°C) for 10-12 minutes – start checking at 10! The cakes should look set around the edges but still slightly jiggly in the center. Let them cool for 2 minutes (this is torture, I know), then run a knife around the edges and invert onto plates. Dig in immediately for that perfect molten center!
Pro tip: If your air fryer runs hot, check at 8 minutes. Overbaking is the only way to mess these up – we want that lava flow!
Tips for Perfect Air Fryer Mini Peanut Butter Lava Cakes
After making these dozens of times (yes, I have a problem), here are my can’t-miss tips:
- Natural peanut butter is key – The oilier texture melts perfectly compared to processed brands.
- Set a timer at 8 minutes – All air fryers vary, so start checking early to prevent overbaking.
- Serve immediately – That molten center waits for no one! Have plates ready.
- Use oven mitts – Those ramekins get crazy hot – learned this the hard way!
- Freeze extras – Unbaked assembled cakes keep frozen for 2 weeks – just add 2 minutes to cook time.
Follow these and you’ll get that perfect chocolate shell with rivers of peanut butter every single time!
Ingredient Substitutions for Air Fryer Mini Peanut Butter Lava Cakes
Okay, let’s talk swaps! While I swear by the original recipe, I know sometimes you’ve gotta work with what’s in the pantry. Here are my tested substitutions that still deliver delicious results:
- Almond or cashew butter instead of peanut butter – Just as dreamy when melted, though the flavor’s milder. Reduce powdered sugar by half since nut butters are naturally sweeter.
- Coconut sugar for granulated sugar – Gives a caramel-like depth, but the cakes will be slightly darker. Works 1:1, though they might take an extra minute to bake.
- Gluten-free flour blend for all-purpose – My favorite is Cup4Cup. Texture stays perfect, though the cakes might be a tad more delicate when hot.
- Melted coconut oil instead of butter – Works beautifully for dairy-free! The cakes have a subtle coconut aroma that’s actually lovely with the peanut butter.
One swap I don’t recommend? Using crunchy peanut butter – those little bits interfere with that smooth, molten flow we love. Trust me, I learned this the disappointing way!
Serving Suggestions for Air Fryer Mini Peanut Butter Lava Cakes
Oh, the possibilities! While these little cakes shine on their own, here’s how I love to serve them:
- A scoop of vanilla ice cream melting over the warm cake – pure magic!
- Fresh raspberries or sliced strawberries for a tart contrast
- A dusting of powdered sugar or cocoa powder for extra elegance
- A drizzle of melted chocolate or caramel sauce when I’m feeling fancy
- Crushed peanuts on top for that perfect crunch
Honestly? Sometimes I just grab a spoon and dig in straight from the ramekin – no shame in my game!
Storing and Reheating Air Fryer Mini Peanut Butter Lava Cakes
Okay, let’s be real – these cakes are best eaten fresh when that peanut butter center is gloriously molten. But if you somehow have leftovers (unlikely, I know!), here’s how to handle them:
Store cooled cakes in an airtight container at room temperature for up to 2 days. The chocolate cake stays surprisingly moist, but that molten center will solidify – still tasty, just different. For reheating, pop them back in the air fryer at 300°F for 2-3 minutes. They won’t be quite as lava-like, but they’ll still be delicious!
Pro tip: If you want to prep ahead, assemble the cakes (with frozen peanut butter centers) and keep them refrigerated for up to 24 hours before baking. Just add an extra minute to the cook time. I’ve even frozen unbaked assembled cakes for up to 2 weeks – wrap each ramekin tightly in plastic wrap, then foil. Bake straight from frozen, adding 3-4 minutes to the cooking time.
Air Fryer Mini Peanut Butter Lava Cakes Nutritional Information
Now, let’s talk about what’s inside these little bites of heaven – but remember, we’re here for joy, not judgement! The nutritional content will vary depending on the exact ingredients you use (like whether you go for full-fat or reduced-fat peanut butter, or if you use dairy milk vs. almond milk).
Generally speaking, each mini cake gives you a nice balance of protein from the peanut butter and egg, some quick energy from the sugars, and let’s be honest – pure happiness from that melty chocolate-peanut butter combo. The portion size is perfect for satisfying a sweet craving without going overboard.
Important note: These are treats, not health food – but that’s exactly what makes them special! Nutritional values are estimates and will vary based on the specific ingredients and brands you use. If you’re tracking closely, I recommend calculating based on your exact ingredients.
Now go enjoy your cake – you deserve it!
Frequently Asked Questions About Air Fryer Mini Peanut Butter Lava Cakes
I get so many questions about these little cakes – here are the answers to the ones that pop up most often in my kitchen!
Can I make these ahead of time?
Absolutely! Assemble the cakes (with frozen peanut butter centers) and refrigerate for up to 24 hours before baking. Add 1 minute to cook time. They also freeze beautifully for 2 weeks!
How do I prevent overcooking?
Set a timer for 8 minutes and check early – all air fryers vary! The edges should look set but the center still slightly jiggles when gently shaken. Remember, they keep cooking a bit after removing.
Can I double the recipe?
Yes! Just work in batches – don’t overcrowd your air fryer. I’ve successfully quadrupled this recipe for parties (with multiple air fryer runs). The batter holds well while waiting.
What if I don’t have ramekins?
Use oven-safe mugs or small baking dishes that fit in your air fryer. Just grease them well and adjust cooking time if they’re deeper than standard ramekins.
Can I use crunchy peanut butter?
I don’t recommend it – the peanut pieces disrupt that smooth molten flow. If you must, pulse it in a food processor first to break up the chunks.
Now I want to hear from you! Try this recipe and tell me in the comments – did you get that perfect peanut butter lava flow? Any fun variations you discovered?