
You know those nights when you’re staring into the fridge, willing something delicious to magically appear? That was me every Wednesday when my kids had soccer practice and I was too wiped to cook. Then I discovered this Air Fryer Tuna Casserole – my weeknight miracle! It’s got all the comfort of the classic baked version, but with that irresistible crispy top you get in half the time. I swear by this recipe now – it’s faster than delivery and my picky eater actually asks for seconds. The best part? That golden, crunchy breadcrumb topping that makes you forget you’re eating something that took less than 20 minutes to make!
Why You’ll Love This Air Fryer Tuna Casserole
Listen, I know what you’re thinking—another tuna casserole recipe? But trust me, this one’s different. Here’s why it’s become my go-to dinner lifesaver:
- Lightning fast: From fridge to table in under 20 minutes—faster than waiting for pizza delivery!
- That perfect crunch: The air fryer gives you that golden, crispy topping we all crave without turning on the oven.
- One-bowl wonder: Minimal cleanup means more time to actually relax after a long day.
- Endlessly adaptable: Out of breadcrumbs? Use crushed chips. No milk? A splash of broth works. This recipe forgives all my pantry shortcomings.
Seriously, I’ve made this at least twice a week since discovering how perfectly the air fryer transforms humble tuna into something magical. The kids think I’m a kitchen wizard—little do they know it’s just that good!
Ingredients for Air Fryer Tuna Casserole
Here’s the beautiful part – you probably have most of these ingredients in your pantry right now! I love how simple this shopping list is. Just grab:
- 1 can (5 oz) tuna in water, well-drained (save the oil-packed kind for salads – it makes this too greasy)
- 1 cup cooked pasta – elbows or penne are my favorites because they hold the sauce so well
- 1/2 cup shredded cheddar cheese (or whatever melty cheese you’ve got – I’ve used everything from Monterey Jack to Swiss in a pinch)
- 1/4 cup plain breadcrumbs – panko gives extra crunch if you’re feeling fancy
- 1/4 cup milk (whole milk makes it extra creamy, but I’ve used 2% when that’s all I had)
- 1 tablespoon butter, cut into little dots (this is the secret to that golden crust!)
- 1/2 teaspoon salt – adjust to taste, especially if your tuna is salty
- 1/4 teaspoon black pepper – freshly cracked if you’re feeling fancy
See? Nothing weird or hard to find. The magic happens in how we put these simple ingredients together. Oh, and don’t stress about exact measurements – I’ve eyeballed this more times than I can count when rushing between homework help and laundry. It always turns out delicious!
How to Make Air Fryer Tuna Casserole
Okay, let me walk you through my foolproof method for making the crispiest, cheesiest tuna casserole in that magical air fryer! I promise it’s so easy you could do it half-asleep (and believe me, I have). Here’s exactly how I put it together every time:
Step 1: Preheat and Prep
First things first – crank that air fryer to 375°F (190°C) and let it heat up while you prep. This is when I grab my trusty little ceramic dish that fits perfectly in the basket (any small oven-safe dish works though). I give it a quick spritz of oil – just enough to prevent sticking, but not so much that the bottom gets soggy.
Step 2: Combine Ingredients
Now the fun part! Dump your drained tuna, cooked pasta, shredded cheese, milk, salt and pepper into a mixing bowl. I use a fork to gently break up the tuna chunks – you want everything evenly distributed but not mushy. Pro tip: If the mixture seems too dry, add another splash of milk. Too wet? A sprinkle of extra breadcrumbs will fix it right up.
Step 3: Layer and Top
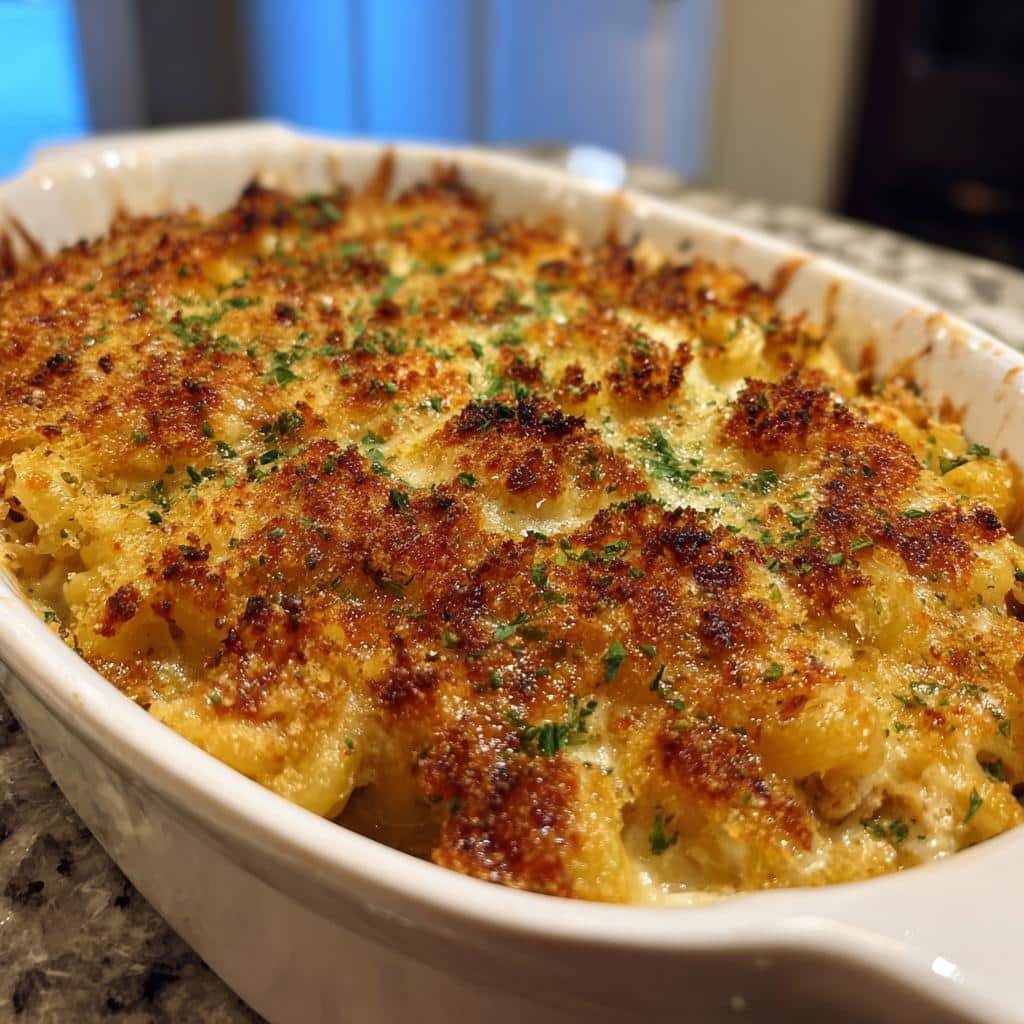
Transfer your creamy tuna mixture into that prepped dish, smoothing it out evenly. Here comes the magic – shower those breadcrumbs over the top like you’re sprinkling fairy dust! Then dot the surface with tiny butter pieces – these melt into golden pools of deliciousness. (My kids call them “flavor bombs”!)
Step 4: Air Fry to Perfection
Slide your creation into the air fryer basket and let it work its magic for 10-12 minutes. Around the 8-minute mark, I always peek to check the color – you want that glorious golden brown crust but not burned. When it’s done, the edges will be bubbling slightly and your whole kitchen will smell like cozy childhood memories. Let it sit for just a minute before serving – that cheesy center stays molten hot!
There you have it – my no-fail method for turning pantry staples into a crispy, comforting meal that beats takeout every time. Now go enjoy that crunchy topping – you’ve earned it!
Tips for the Best Air Fryer Tuna Casserole
After making this recipe more times than I can count (seriously, my air fryer might be permanently tuna-scented), I’ve picked up some game-changing tricks. These are the little things that take your casserole from “good” to “can I marry this dish?” levels of delicious:
Cook your pasta al dente – no mushy noodles!
Here’s where most tuna casseroles go wrong – overcooked pasta turns to glue in the air fryer. I always undercook my elbows or penne by 1-2 minutes since they’ll keep cooking in the hot air. Drain and rinse with cold water to stop the cooking immediately. Your future self will thank you when every bite has perfect texture!
Get creative with cheeses
While cheddar is classic, don’t be afraid to mix it up! My favorite combos:
- Half sharp cheddar, half Monterey Jack for extra creaminess
- A handful of parmesan in the breadcrumbs for umami punch
- Pepper jack when I want a little kick (the kids surprisingly love this!)
Just avoid pre-shredded bags – they contain anti-caking agents that make the sauce grainy. A quick grate of block cheese makes all the difference.
The golden rule: check early, check often
Air fryers can vary wildly in temperature, so start checking at 8 minutes. You’re looking for:
- Breadcrumbs that look like toasted gold
- Cheese bubbles around the edges
- A center that’s hot but not dried out
If the top’s browning too fast, tent with foil. Not crispy enough? Give it another minute. This visual test never fails me!
Bonus tip from my last kitchen disaster: Let it rest 2 minutes before serving. That molten cheese will burn your mouth worse than my first attempt at homemade hot sauce!
Ingredient Substitutions and Variations
One of the things I love most about this recipe is how forgiving it is! Over the years, I’ve had to get creative when the pantry was looking bare or when catering to different dietary needs. Here are all my tried-and-true swaps and fun twists that still deliver that same comforting crunch:
When you’re out of breadcrumbs
Don’t panic! I’ve used:
- Crushed potato chips (the ridges add amazing texture!)
- Panko breadcrumbs for extra crispiness
- Crushed crackers (Ritz or saltines work magic)
- Gluten-free breadcrumbs for dietary needs
My most desperate (but delicious) substitute? Crumbled up cornflakes mixed with a bit of parmesan. The kids actually requested I make it that way again!
Dairy-free? No problem!
That creamy texture doesn’t have to come from dairy:
- Almond milk or oat milk work beautifully
- Nutritional yeast instead of cheese (sounds weird, tastes amazing)
- Dairy-free butter alternatives for the topping
My lactose-intolerant neighbor swears by this version with coconut milk – says it’s even creamier than the original!
Veggie boosters
When I’m feeling fancy (or trying to sneak in extra nutrition):
- A handful of frozen peas – no need to thaw!
- Finely diced carrots for extra sweetness
- Sautéed mushrooms when I’m feeling gourmet
- A sprinkle of roasted red peppers for color
Pro tip: If adding watery veggies like zucchini, pat them dry first. Learned that the hard way after a slightly soupy casserole incident!
The beauty is that these variations all keep that essential crispy-top-and-creamy-center magic. Once you’ve mastered the basic recipe, don’t be afraid to make it your own. Some of my favorite creations have come from “what’s in the fridge?” experiments gone right!
Serving Suggestions for Air Fryer Tuna Casserole
Now that you’ve got this golden, crispy masterpiece ready, let’s talk about how to turn it into a complete meal! My family has tested every possible combo over dozens of dinners, and these are our absolute favorite ways to serve it:
The Classic Pairing: Simple Green Salad
There’s a reason this combo never gets old – that cool, crisp lettuce balances the rich casserole perfectly. I toss together whatever greens I have (romaine, spinach, or even bagged salad mix) with a quick lemon vinaigrette. Add some cherry tomatoes if I’m feeling fancy. The acidity cuts through the creaminess so you can happily go back for seconds without feeling weighed down!
Roasted Veggies for Comfort Food Nights
When we want something heartier, I’ll throw some broccoli florets or carrot coins in the air fryer right before making the casserole (same 375°F temp, about 8 minutes). The slightly charred edges pair amazingly with the tuna’s creaminess. Bonus? Only one appliance to clean! My kids call this “the crispy dinner” and fight over the last roasted carrot. Check out these crispy air fryer Brussels sprouts for another great veggie side.
Pro tip: If you’re really pressed for time, a handful of baby carrots or cucumber slices on the side works too. The goal is just something fresh to balance all that delicious richness. Now go enjoy your creation – that crispy topping waits for no one!
Storing and Reheating
Here’s my not-so-secret secret – this casserole tastes almost better as leftovers! The flavors mingle and deepen overnight. Store any extra portions (if you’re lucky enough to have any) in an airtight container in the fridge for up to 3 days. I’ve tried pressing plastic wrap directly on the surface to prevent drying out, but honestly? A good container works just fine.
Bringing back the magic: Reheating hack
Microwaving is fine in a pinch, but it turns that glorious crispy topping sad and soggy. For near-fresh perfection, pop individual servings back in the air fryer at 350°F (175°C) for 3-4 minutes. The breadcrumbs will crisp right back up, and the center gets piping hot without drying out. If it looks a bit pale after reheating, a quick 30-second blast at 400°F does wonders!
Funny story – my husband once ate the last serving cold straight from the fridge at midnight, claiming “it’s like fancy tuna dip!” Not my preferred method, but hey, to each their own. Just promise me you’ll at least try it properly reheated once – that revived crunch is life-changing!
Nutritional Information
Okay, let’s talk numbers – but keep in mind these are estimates since your ingredients might differ slightly from mine. (That extra handful of cheese you snuck in? Yeah, I do it too!) Here’s the breakdown per serving, based on using the exact ingredients listed:
- Calories: 320 – perfect for a satisfying but not overly heavy meal
- Protein: 22g – thanks to that protein-packed tuna!
- Carbohydrates: 30g – mostly from the pasta and breadcrumbs
- Fiber: 2g – add some veggies to bump this up
- Sugar: 2g – just the natural stuff from the milk
- Fat: 12g – because butter and cheese make life worth living
Remember, these numbers can change if you use different cheeses, milk varieties, or add-ins. My “everything but the kitchen sink” version with extra veggies and three cheeses once clocked in at 400 calories – and worth every bite! The beauty is you can tweak it to fit your dietary needs while keeping all that crispy, comforting goodness.
Pro tip: If you’re watching sodium, look for low-sodium tuna and skip adding extra salt. The cheese and breadcrumbs already bring plenty of flavor!
FAQs About Air Fryer Tuna Casserole
Can I use fresh tuna instead of canned?
Absolutely! I’ve done this when I had some fresh tuna steaks about to expire. Just steam or lightly poach the tuna first (about 5 minutes), then flake it into chunks. The texture will be a bit more delicate than canned, so be gentle when mixing. Pro tip: Fresh tuna needs a pinch more salt since canned tuna is already salted. My kids couldn’t even tell the difference!
Does this casserole freeze well?
Here’s the thing – it can be frozen, but that crispy topping won’t stay crispy. If you must freeze it (hello, meal prep!), do it before air frying. Assemble everything in a freezer-safe dish, wrap tightly, and freeze for up to a month. When ready, thaw in the fridge overnight, then air fry as usual – you might need an extra 2-3 minutes. The texture won’t be quite as perfect as fresh, but it’ll still beat most freezer meals!
How do I keep my casserole from drying out?
Ah, the eternal struggle! My three golden rules:
- Don’t overcook: Start checking at 8 minutes – you want bubbling edges but still a slightly jigggly center.
- Milk matters: Use whole milk if possible, and don’t skimp – the mixture should look slightly wet before baking.
- Cover if needed: If top is browning too fast but center’s still raw, tent with foil for last few minutes.
If disaster strikes and it dries out? A drizzle of warm milk or cream over individual servings works miracles. Not that I’d know from experience… *cough*
Print
Irresistible Air Fryer Tuna Casserole in 20 Minutes
- Total Time: 17 minutes
- Yield: 2 servings 1x
- Diet: Low Lactose
Description
A quick and easy tuna casserole made in the air fryer for a crispy, delicious meal.
Ingredients
- 1 can tuna, drained
- 1 cup cooked pasta
- 1/2 cup shredded cheese
- 1/4 cup breadcrumbs
- 1/4 cup milk
- 1 tbsp butter
- 1/2 tsp salt
- 1/4 tsp black pepper
Instructions
- Preheat air fryer to 375°F (190°C).
- Mix tuna, pasta, cheese, milk, salt, and pepper in a bowl.
- Transfer mixture to an air fryer-safe dish.
- Sprinkle breadcrumbs on top and dot with butter.
- Air fry for 10-12 minutes until golden and crispy.
- Serve hot.
Notes
- Use any pasta you prefer.
- Add vegetables like peas or carrots for extra nutrition.
- Adjust seasoning to taste.
- Prep Time: 5 minutes
- Cook Time: 12 minutes
- Category: Main Dish
- Method: Air Frying
- Cuisine: American
Nutrition
- Serving Size: 1/2 recipe
- Calories: 320
- Sugar: 2g
- Sodium: 480mg
- Fat: 12g
- Saturated Fat: 6g
- Unsaturated Fat: 4g
- Trans Fat: 0g
- Carbohydrates: 30g
- Fiber: 2g
- Protein: 22g
- Cholesterol: 45mg
Keywords: air fryer tuna casserole, easy tuna recipe, quick dinner