
Halloween baking just got way easier (and way creepier) with these air fryer witch finger cookies! I’ve been making spooky treats for years—think eyeball cupcakes, mummy hot dogs, and graveyard brownies—but these crispy, buttery cookies might just be my new favorite. The best part? They come together in under 30 minutes thanks to the air fryer, so you can spend less time in the kitchen and more time scaring your neighbors. Trust me, nothing gets a reaction at a Halloween party like a tray of these ghoulish fingers—especially when you add that perfect “bloody” detail with a dab of red jam.
Kids love helping shape them (and sneak-tasting the dough), and honestly? They’re so delicious, you’ll want to make them year-round. Don’t tell the ghosts!

Table of Contents
Why You’ll Love These Air Fryer Witch Finger Cookies
These creepy little fingers are about to become your new Halloween obsession—here’s why:
- Crazy easy to make – No fancy skills needed! Just mix, shape, and air fry. Even my 6-year-old niece can help (though she eats more dough than she shapes).
- That perfect crunch – The air fryer gives them this magical crispy edge while keeping the centers just slightly chewy. Way better than soggy oven-baked cookies!
- Halloween magic in minutes – From dough to done in under 30 minutes? Yes please! I’ve made three batches in one afternoon when last-minute party invites hit.
- Kids go wild for them – Shaping the “fingers” turns into the best kitchen activity. Pro tip: let kids add the “blood” – it gets gloriously messy.
- Less guilt, more goblins – Compared to deep-fried treats, these use way less oil but still taste totally indulgent. The almond “nail” even adds a tiny protein boost!
Ingredients For Your Air Fryer Witch Finger Cookies
Here’s everything you’ll need to make these delightfully creepy cookies (and yes, every single ingredient matters—I learned that the hard way when I once tried skipping the almond extract… big mistake!).
- 1 cup all-purpose flour – Spoon it lightly into your measuring cup and level it off. Packed flour makes dense fingers (and not in a good Halloween way).
- 1/2 cup butter, softened – Softened is key here! Leave it out for about 30 minutes—you should be able to press your finger in easily but it shouldn’t be melty.
- 1/4 cup powdered sugar (confectioners’ sugar) – The fine texture gives these cookies their delicate crunch. No substitutions!
- 1/4 tsp vanilla extract – Just enough to round out the flavors without overpowering.
- 1/4 tsp almond extract – My secret weapon! It gives that creepy “digested souls” flavor (kidding… mostly).
- 24 whole blanched almonds – For the fingernails. Blanched ones look most realistic, but regular almonds work in a pinch.
- 1 tbsp red jam or red decorating icing – Raspberry jam gives the best “fresh blood” effect, but strawberry works too. If using icing, the gel kind won’t make your cookies soggy.
See? Super simple pantry staples—you might already have everything except maybe the almonds. Though fair warning: after making these once, you’ll start keeping blanched almonds stocked just for Halloween emergencies!
Print
Sinfully Easy Air Fryer Witch Finger Cookies in 20 Minutes
- Total Time: 30 minutes
- Yield: 24 cookies 1x
- Diet: Vegetarian
Description
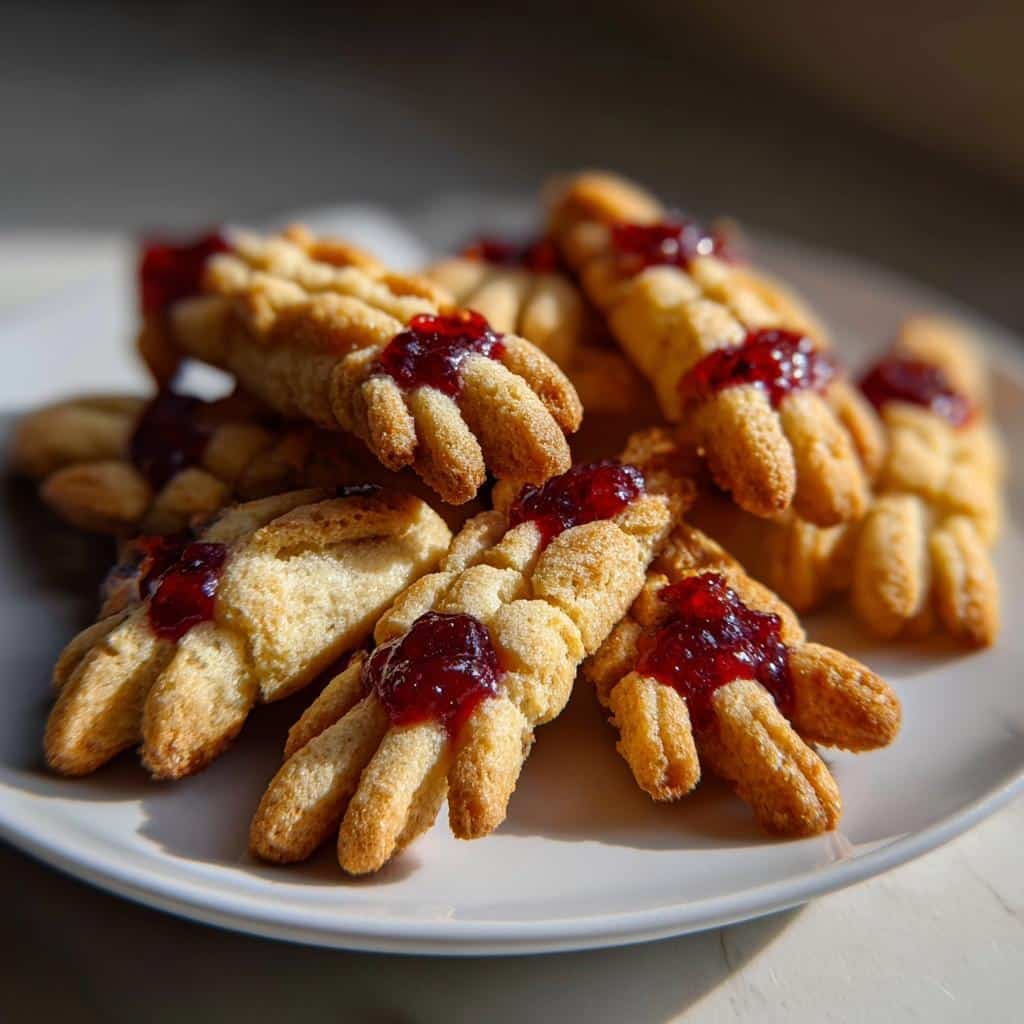
Creepy yet delicious air fryer witch finger cookies perfect for Halloween. These spooky treats are crispy, buttery, and easy to make.
Ingredients
- 1 cup all-purpose flour
- 1/2 cup butter, softened
- 1/4 cup powdered sugar
- 1/4 tsp vanilla extract
- 1/4 tsp almond extract
- 24 whole almonds (for fingernails)
- 1 tbsp red jam or icing (for bloody effect)
Instructions
- Preheat your air fryer to 320°F (160°C).
- Mix flour, butter, powdered sugar, vanilla, and almond extract into a dough.
- Shape the dough into thin finger-like shapes.
- Press an almond into one end of each cookie to resemble a fingernail.
- Use a knife to create knuckle marks on the cookies.
- Air fry for 8-10 minutes until lightly golden.
- Let cool, then add red jam or icing for a bloody effect.
Notes
- Chill dough for 30 minutes for easier shaping.
- Adjust cooking time based on your air fryer model.
- Store in an airtight container for up to 3 days.
- Prep Time: 20 minutes
- Cook Time: 10 minutes
- Category: Dessert
- Method: Air Fryer
- Cuisine: American
Nutrition
- Serving Size: 1 cookie
- Calories: 70
- Sugar: 3g
- Sodium: 25mg
- Fat: 4g
- Saturated Fat: 2.5g
- Unsaturated Fat: 1g
- Trans Fat: 0g
- Carbohydrates: 8g
- Fiber: 0.3g
- Protein: 1g
- Cholesterol: 10mg
Keywords: air fryer cookies, Halloween treats, witch fingers, spooky snacks
Essential Equipment
No fancy gadgets needed here – just grab these basics from your kitchen (you probably already have most of them!):
- A trusty mixing bowl – Any medium-sized one will do for bringing that creepy cookie dough together
- Your air fryer – Obviously! Any model works, though basket-style gives you more room for spooky fingers
- Baking sheet or parchment paper – For shaping your witch fingers before they meet their air fryer fate
- A sharp knife – The duller your knife, the sadder your knuckle marks will look (learned that the hard way)
That’s it! Though I won’t judge if you want to wear witch gloves while baking for… atmosphere. If spooky sweets are your thing, don’t miss my Maple Walnut Banana Bread Cookies Recipe next! These soft, nutty cookies bring cozy fall flavors together in one bite — perfect for enjoying alongside your creepy witch fingers!
How To Make Air Fryer Witch Finger Cookies
Okay, let’s get spooky! These witch fingers come together so easily, but I’ve learned a few tricks over countless batches (some more finger-like than others). Follow these steps and you’ll have cookies creepy enough to scare even the bravest trick-or-treaters.
Preparing The Cookie Dough
First things first – cream that butter and sugar like you’re casting a spell! In your mixing bowl, beat the softened butter and powdered sugar together until it’s light and fluffy (about 1-2 minutes). This creates tiny air pockets that’ll make your cookies crisp yet tender.
Now stir in the vanilla and almond extracts – that almond is what gives these their hauntingly good flavor. Gradually add the flour, mixing just until combined. The dough should hold together when pinched but not be sticky. If it feels too soft (especially on warm days), wrap it and pop it in the fridge for 30 minutes. Chilled dough = fingers that keep their creepy shape!
Shaping The Spooky Fingers
Here’s where the fun begins! Pinch off small pieces of dough (about 1 tablespoon each) and roll them into thin logs, tapering one end slightly like a fingertip. Don’t make them too perfect – lumpy fingers are way scarier!
Press an almond firmly into the tapered end for the nail. Now grab your knife and make 2-3 shallow indentations along the “finger” for knuckles. Gentle pressure is key – you want visible marks, not sliced-through dough! If your knife sticks, dip it lightly in flour between cuts.
Air Frying To Perfection
Preheat your air fryer to 320°F (160°C) while you shape your last few fingers. Arrange them in a single layer in the basket (they’ll need space – no overlapping or they’ll stick together!). You’ll likely need to work in batches.
Air fry for 8-10 minutes until the edges turn lightly golden. Check at 8 minutes – some air fryers run hotter than others. They’ll firm up as they cool, so don’t wait for them to brown completely unless you like extra-crispy witches!
Adding The Final Ghoulish Touch
Let your creepy creations cool completely on a wire rack – patience, my little monsters! Once cool, dab a tiny bit of red jam at the almond “nail” and smear it slightly downward for that freshly-pulled-from-the-grave look. Warming the jam for 5 seconds makes it easier to apply. Now try not to eat them all before your party!
Expert Tips For The Best Air Fryer Witch Finger Cookies
After making way too many batches of these cookies (some looking more like mutant sausages than fingers), I’ve picked up some serious witchy wisdom:
- Chill before baking – Pop those shaped fingers in the fridge for 10 minutes before air frying. Cold dough spreads less, so your cookies stay perfectly finger-like instead of turning into blob monsters.
- Wet hands = happy rolling – Keep a bowl of water nearby to dampen your fingertips while shaping. The dough won’t stick to you nearly as much, though you’ll still look like you’ve been digging graves!
- Almond adjustment – If your almonds seem too huge for dainty witch fingers, just slice them in half lengthwise. Bonus: you get double the creepy nails!
- Blood options – Raspberry jam gives the best “fresh kill” vibe, but strawberry works great too. For extra drama, mix a drop of red food coloring into light corn syrup – it stays shiny like real blood!
- Doubling trouble – Want extra-spooky fingers? Double the batch but still air fry in single layers. Overcrowding leads to sad, steamed cookies instead of crispy creepy ones.
Trust me, these little tricks turn good witch fingers into absolutely terrifying (and delicious) ones! For even more Halloween-inspired desserts and creative air fryer bakes, make sure to follow us on Pinterest! You’ll find endless ideas for festive cookies, spooky snacks, and fun treats to share with family and friends all season long.
Answering Your Air Fryer Witch Finger Cookies Questions
Can I make the dough ahead of time?
Absolutely! The dough actually benefits from a little rest. You can wrap it tightly in plastic and chill it for up to 2 days before shaping. When you’re ready, let it sit at room temperature for about 10 minutes – just until it’s soft enough to roll but still cold. I’ve even frozen the dough for Halloween emergencies (because nothing’s scarier than realizing you forgot to make treats for the school party tomorrow morning!).
My cookies spread a little. How can I prevent this?
Oh, I’ve battled the dreaded cookie spread too! The three magic words: don’t melt your butter. Softened means you can leave a fingerprint in it, not that it’s greasy or shiny. Also, that quick 10-minute chill for shaped cookies works wonders. And don’t overcrowd the air fryer basket – give those fingers space to spook without bumping into each other!
How should I store these cookies?
Once completely cooled (seriously, no cheating or they’ll get soggy!), layer them in an airtight container with parchment between layers. They’ll stay crisp for up to 3 days at room temperature. Pro tip: Add the “blood” just before serving – jam can make stored cookies a bit sticky otherwise. I learned this after creating a batch of fused-together zombie hands!
Can I use something other than almonds?
Of course! Slivered almonds work great if you want a more “manicured” witch look. For extra creep factor, try pumpkin seeds – they give a great yellowed, decayed nail effect. Once I even used tiny wedges of white chocolate for a ghostly pale look (though they melted slightly – bonus haunting points!). Just avoid anything too heavy that might make your fingers topple over in the air fryer.
Serving Your Spooky Creation
These witch fingers deserve a dramatic presentation! I love arranging them on a black platter with dry ice for a graveyard vibe, or sticking them upright in a bowl of “dirt” (mix crushed Oreos into chocolate pudding – kids lose their minds!). For party favors, bundle 3-4 in cellophane bags tied with orange ribbon. Pro tip: Add a few plastic spider rings for extra screams!
Nutritional Information
Just a quick note: The nutritional values provided are estimates only and can vary based on the specific ingredients and brands you use. This information isn’t intended as dietary advice—it’s just here to give you a general idea. Enjoy your creepy cookies guilt-free (or not, it’s Halloween after all)!
Share Your Halloween Creations
I can’t wait to see your creepy cookie masterpieces! Did yours turn out perfectly ghoulish? Did the kids go wild shaping them? Drop a comment below with your experience (or hilarious kitchen disasters – we’ve all been there!), and don’t forget to tag me @YourKitchenWitch when you share photos of your air fryer witch fingers on social media. Nothing makes me happier than seeing my recipes bring spooky smiles to your Halloween!