
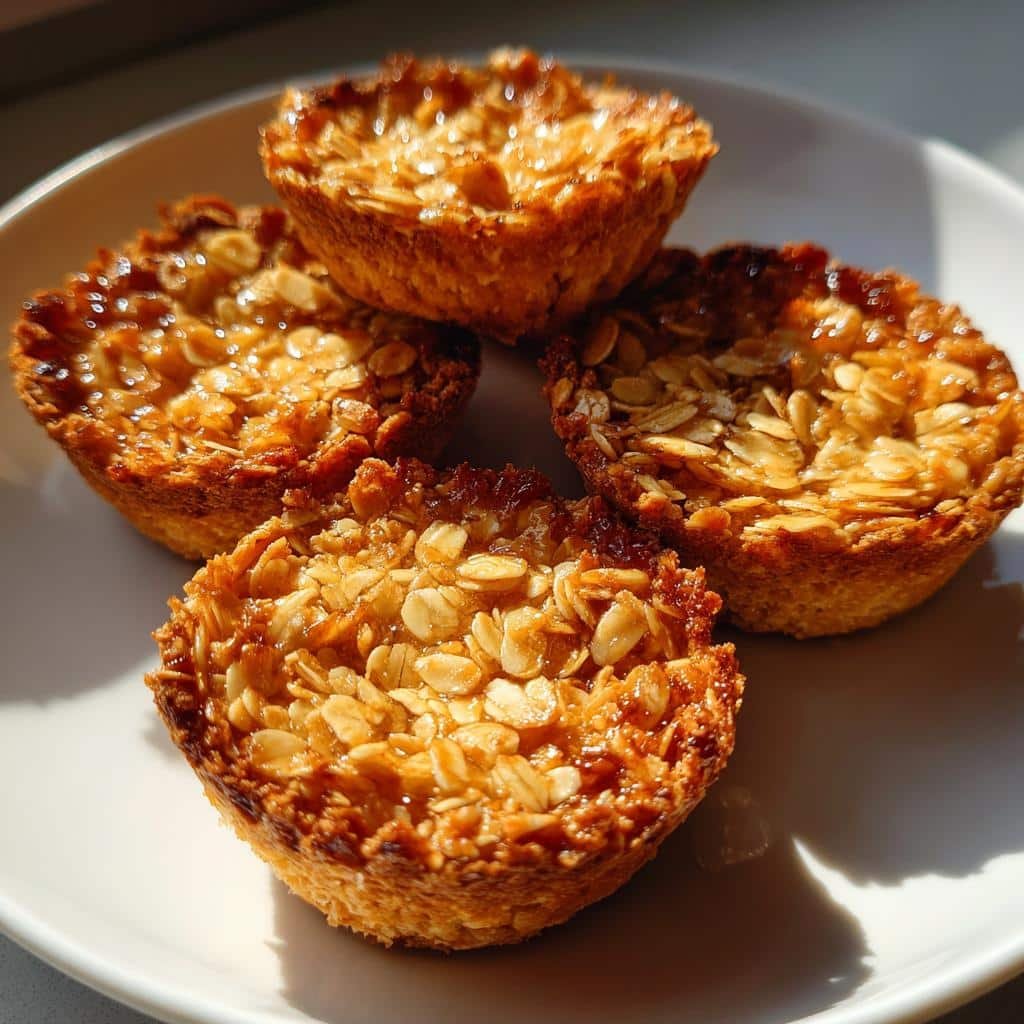
You know those mornings when you’re racing out the door but still want something wholesome? That’s where these budget air fryer granola cups swoop in to save the day! I stumbled upon this idea during one of those crazy weeks when time and money were tight. Who knew tossing a few pantry staples into silicone cups could create such magic? These little gems bake up crispy in minutes, cost pennies per serving, and actually make you feel good about breakfast. My kids go crazy for them filled with yogurt and berries, and I love that they’re not loaded with sugar like store-bought granola. Trust me, once you try making granola cups in your air fryer, you’ll wonder how you ever survived hectic mornings without them!
Why You’ll Love These Budget Air Fryer Granola Cups
Listen, I know breakfast can be a battle—especially when you’re short on time and cash. That’s why these little cups are my go-to. Here’s why you’ll adore them:
- Crazy quick: From bowl to air fryer in under 5 minutes—no baking pans, no fuss.
- Pantry staples: Oats, honey, peanut butter… chances are, you’ve got everything already.
- Secretly healthy: No weird additives, just real ingredients you can pronounce (take that, expensive cereal boxes!).
- Endlessly fun: Top with yogurt, dunk in milk, or eat like cookies—they’re your blank canvas.
- Kid-proof: Even picky eaters can’t resist the crunch. Bonus: they’ll never guess it’s good for them.
Seriously, these might just become your new morning superhero.
Ingredients for Budget Air Fryer Granola Cups
Here’s the beautiful part—you probably have most of this stuff in your kitchen right now! I love recipes that don’t require a special grocery run. Just gather these simple ingredients (and yes, I’ll tell you exactly how to pick the best ones):
- 1 cup rolled oats (not instant—those get mushy! Old-fashioned gives the perfect chew)
- 1/4 cup honey (local if you can—it adds the most amazing floral notes)
- 2 tbsp peanut butter (creamy or crunchy, whatever’s open in your fridge—I used the last drippy bits from the jar)
- 1 tbsp coconut oil (melted, but don’t stress if yours is solid—just warm it for 10 seconds)
- 1/4 tsp cinnamon (the cheap stuff works fine, but Vietnamese cinnamon? *chef’s kiss*)
- 1/4 tsp vanilla extract (imitation is fine here—we’re being budget-friendly, remember?)
- Pinch of salt (literally just a two-finger sprinkle—it makes all the flavors pop)
See? Nothing fancy. Just honest ingredients that come together like magic. Now let’s make some granola cups!
Equipment You’ll Need
Okay, let’s talk tools—and don’t worry, this isn’t one of those recipes that requires fancy gadgets! Here’s all you really need:
- Air fryer (any size works—I use my tiny 3-quart one when my counter space is cluttered)
- Silicone muffin cups (the real MVPs—no sticking, no scrubbing, just pop ‘em out!)
- Mixing bowl (I grab whatever’s clean, even if it’s my kid’s cereal bowl)
- Spoon or spatula (wooden, silicone, whatever’s within arm’s reach)
That’s it! No special pans, no weird attachments—just grab these basics and let’s get cooking.
How to Make Budget Air Fryer Granola Cups
Alright, let’s get these crispy little beauties going! I promise it’s easier than folding fitted sheets—just follow these simple steps, and you’ll be munching on homemade granola cups before your coffee gets cold.
Step 1: Mix the Ingredients
Grab that mixing bowl and toss in everything—oats, honey, peanut butter, coconut oil, cinnamon, vanilla, and that pinch of salt. Now here’s the key: stir like you mean it! You want every single oat coated in that sticky, sweet goodness. The mixture should hold together when you pinch it—if it’s too dry, add a teeny bit more honey (like half a teaspoon). Too wet? Sprinkle in a few more oats. Trust your gut—you’ll know it’s right when it looks like edible playdough.
Step 2: Shape the Cups
Time to get handsy! Spoon the mixture into your silicone muffin cups (about 2 heaping tablespoons per cup). Now press down HARD with the back of a spoon—I mean really pack it in there. This isn’t the time to be gentle! Firm pressure = cups that won’t crumble later. Pro tip: wet your fingers slightly to smooth the tops without sticking. Aim for about 1/4-inch thickness on the bottom and sides—thick enough to hold toppings but thin enough to stay crispy.
Step 3: Air Fry to Perfection
Preheat that air fryer to 320°F (160°C)—yes, preheating matters here! It’s like giving your granola cups a head start. Carefully place the filled silicone cups in the basket (they might wiggle, so go slow). Cook for 8 minutes first, then peek—they should look golden at the edges. Need more crunch? Give them another 1-2 minutes (but watch closely—honey burns fast!). They’ll smell like cinnamon toast heaven when they’re done.
Step 4: Cool and Serve
Resist the urge to pop them out immediately! Let them cool in the molds for at least 10 minutes—this sets their shape. Then gently push up from the bottom of the silicone cups. If they’re being stubborn, a butter knife around the edges helps. Now the fun part: fill ‘em with yogurt, drizzle with extra honey, or just grab one and crunch away. They’ll be slightly soft when warm but crisp up perfectly as they cool completely.
Tips for Perfect Budget Air Fryer Granola Cups
Okay, let me spill all my hard-earned granola cup secrets—the little tricks that took me from crumbly disasters to crispy perfection. These aren’t just tips; they’re your insurance policy for foolproof cups every single time!
Press like you mean it: That first press into the molds? Go full Hulk mode. I literally use my body weight—leaning over the counter to really compact the mixture. Loose packing = granola crumbs, not cups.
The 8-minute peek: Set a timer! At 8 minutes, do a quick check. The edges should be golden-brown like a perfectly toasted marshmallow. If they’re still pale, give them another minute—but honey turns from golden to burnt fast, so babysit them those last 60 seconds.
Silicone saviors: No silicone molds? No panic! Cut parchment paper into squares and press them into regular muffin tins (spray first with a quick spritz of oil). They won’t hold shape quite as neatly, but they’ll still taste amazing.
Cooling is key: I know it’s tempting to dig in immediately, but walk away for 10 minutes. Those cups need time to firm up—think of it like letting a grilled cheese rest so the cheese doesn’t ooze out.
Storage smarts: Keep them in an airtight container with a folded paper towel underneath to absorb any moisture. They’ll stay crisp for days—if they last that long in your house!
Ingredient Substitutions and Variations
Look, I get it—sometimes you’re staring into your pantry thinking, “Nope, don’t have that!” No worries, friend. This recipe is crazy flexible. Here’s how to wing it when life (or your grocery budget) throws you a curveball:
Sweetener swaps: Out of honey? These work like a charm:
- Maple syrup (the real stuff—it gives a lovely caramel depth)
- Agave nectar (go light—it’s sweeter than honey)
- Brown rice syrup (stickiest option—great for extra crunch)
Nut butter alternatives: Peanut allergies or just bored of PB? Try:
- Almond butter (my fave for fancy days—adds a subtle marzipan vibe)
- Sunflower seed butter (nut-free and turns the cups a cool greenish hue)
- Tahini (sounds wild, but the sesame pairs amazingly with honey)
Mix-in madness: Now for the fun part! Toss in a handful of any of these before shaping:
- Chopped nuts (walnuts for earthiness, pecans for buttery crunch)
- Mini chocolate chips (because duh—just press them in after air frying so they don’t burn)
- Dried fruit (raisins, cranberries, or my secret weapon—chopped apricots)
- Seeds (chia for nutrition, pumpkin seeds for salty crunch)
Spice it up: Feeling adventurous? Add a pinch of:
- Cardamom (tastes like chai tea—so good with almond butter)
- Ginger (just a dash—zings up maple syrup beautifully)
- Orange zest (brightens everything—about 1/2 tsp does the trick)
The beauty? You can make these a dozen different ways without messing up the basic recipe. Last week I used cashew butter and tossed in coconut flakes—my neighbor swore I’d bought them at some fancy bakery. Little does she know it’s just oats and pantry scraps working magic!
Serving and Storing Budget Air Fryer Granola Cups
Now for the best part—playing with your food! These little cups are like edible bowls just waiting to be filled with all sorts of deliciousness. Here’s how my family loves them (and how to keep them crispy for days):
Breakfast bliss: My absolute favorite way? Spoon Greek yogurt into each cup and top with fresh berries—it’s like nature’s Pop-Tart, but way better. The yogurt softens the cup slightly while keeping that satisfying crunch underneath. Drizzle with a little extra honey if you’re feeling fancy (or just really need that morning sugar rush).
Snack attack: When the 3pm slump hits, I grab one straight from the container—no toppings needed. The peanut butter and honey make them sweet enough to feel like a treat, but the oats keep you full until dinner. My kids call them “breakfast cookies” and sneak them into their backpacks.
Dessert mode: For something indulgent, fill them with vanilla ice cream and a sprinkle of cinnamon. The warm cups slightly melt the ice cream—it’s like an instant mini pie à la mode. Warning: You might eat three before realizing it.
Storage secrets: These keep shockingly well! Just toss them in an airtight container with a paper towel at the bottom (it absorbs any sneaky moisture). They’ll stay crisp for up to 5 days at room temperature—if they last that long! No need to refrigerate unless you’ve added fresh fruit inside. And reheating? Don’t bother—they’re meant to be eaten at room temp for that perfect crunch.
Pro tip: Make a double batch on Sunday and you’ve got breakfast handled for the whole week. I line them up in my container like little edible soldiers ready for morning chaos. Who knew something so simple could make life so much easier?
Budget Air Fryer Granola Cups FAQs
I get it—you’ve got questions! After making these dozens of times (and fielding texts from friends who tried them), here are the answers to everything you might wonder:
Can I bake these in a regular oven instead?
Absolutely! Just press the mixture into a lined muffin tin and bake at 325°F (160°C) for 12-15 minutes. They won’t get quite as crispy as the air fryer version, but they’ll still taste delicious. Pro tip: rotate the pan halfway through for even browning.
Are these granola cups gluten-free?
Yes—if you use certified gluten-free oats! Regular oats are often cross-contaminated, so check the label if that’s a concern. All the other ingredients are naturally gluten-free (just be sure your peanut butter doesn’t have sneaky additives).
Why did mine fall apart?
Two likely culprits: not pressing firmly enough (really cram that mixture in there!) or pulling them out too soon. Letting them cool completely in the molds is non-negotiable—they firm up as they cool. If disaster strikes, crumble them over yogurt as granola chunks!
Can I freeze these?
You bet! Freeze them unfilled in a single layer first, then transfer to a bag. They’ll keep for a month—just thaw at room temperature when snack time hits. They lose a bit of crispness but still taste great with a quick 2-minute air fryer refresh.
What’s the best way to clean sticky silicone molds?
Hot soapy water does the trick, but for stubborn bits, soak them upside-down on a baking sheet filled with warm water. The honey dissolves faster that way. Never use abrasive scrubbers—those cute molds will last years with gentle care!
Nutritional Information
Okay, let’s talk nutrition—but keepin’ it real, folks! These granola cups are way better for you than that sugary cereal lurking in your pantry, but I’m not about to pretend they’re health food. Here’s the scoop (with a big ol’ disclaimer that these numbers dance around depending on your exact ingredients):
Each cup gives you a nice hit of fiber from those trusty oats, some plant-based protein from the peanut butter, and just enough natural sweetness to make mornings happier. The coconut oil adds good fats that keep you full, while cinnamon brings antioxidants to the party. They’re vegetarian-friendly and can easily go vegan if you swap the honey for maple syrup.
Important note: Nutritional values swing wildly based on your ingredient brands and how heavy-handed you are with the honey! My rough estimate per cup (using generic ingredients) lands somewhere around:
- 120-150 calories
- 5-7g sugar (mostly from the honey—nature’s candy!)
- 2-3g fiber (thanks, oats!)
- 3-4g protein (peanut butter power!)
But honestly? I don’t count calories when I’m shoving one in my mouth while running out the door. What matters is that they’re made with real ingredients, keep me full till lunch, and make breakfast feel like a treat rather than a chore. Now go enjoy your granola cups guilt-free—life’s too short to stress over every carb!
Print
5-Minute Budget Air Fryer Granola Cups – Crispy & Irresistible
- Total Time: 15 mins
- Yield: 6 cups 1x
- Diet: Vegetarian
Description
Crispy and delicious granola cups made in an air fryer. Perfect for a quick breakfast or snack.
Ingredients
- 1 cup rolled oats
- 1/4 cup honey
- 2 tbsp peanut butter
- 1 tbsp coconut oil
- 1/4 tsp cinnamon
- 1/4 tsp vanilla extract
- Pinch of salt
Instructions
- Mix all ingredients in a bowl until well combined.
- Press the mixture into silicone muffin cups or molds.
- Preheat the air fryer to 320°F (160°C).
- Place the cups in the air fryer basket and cook for 8-10 minutes.
- Let them cool before removing from the molds.
Notes
- Use a spoon to press the mixture firmly into the molds.
- Store in an airtight container for up to 5 days.
- Add dried fruit or nuts for extra texture.
- Prep Time: 5 mins
- Cook Time: 10 mins
- Category: Breakfast
- Method: Air Fryer
- Cuisine: American
Nutrition
- Serving Size: 1 cup
- Calories: 120
- Sugar: 8g
- Sodium: 25mg
- Fat: 5g
- Saturated Fat: 2g
- Unsaturated Fat: 2g
- Trans Fat: 0g
- Carbohydrates: 17g
- Fiber: 2g
- Protein: 3g
- Cholesterol: 0mg
Keywords: air fryer, granola cups, healthy breakfast, budget recipe