
Nothing says holidays like the scent of peppermint wafting through the kitchen while rolling out candy cane cookies! These festive treats have been my family’s Christmas tradition since I was little – my mom would let me twist the red and white dough into crooked canes while she told stories about making them with her grandmother. Now I carry on the ritual with my own kids, laughing as their tiny hands create lopsided masterpieces.
The magic of candy cane cookies isn’t just their adorable striped appearance – it’s how simple ingredients transform into something special. That first bite takes me right back to childhood Christmases every time. The peppermint zing paired with buttery sweetness makes these more than just cookies – they’re edible holiday memories. Whether you’re continuing family traditions or starting new ones, these cheerful cookies belong on every December baking list.
Why You’ll Love These Candy Cane Cookies
Trust me, once you try these candy cane cookies, they’ll become your new holiday obsession. Here’s why:
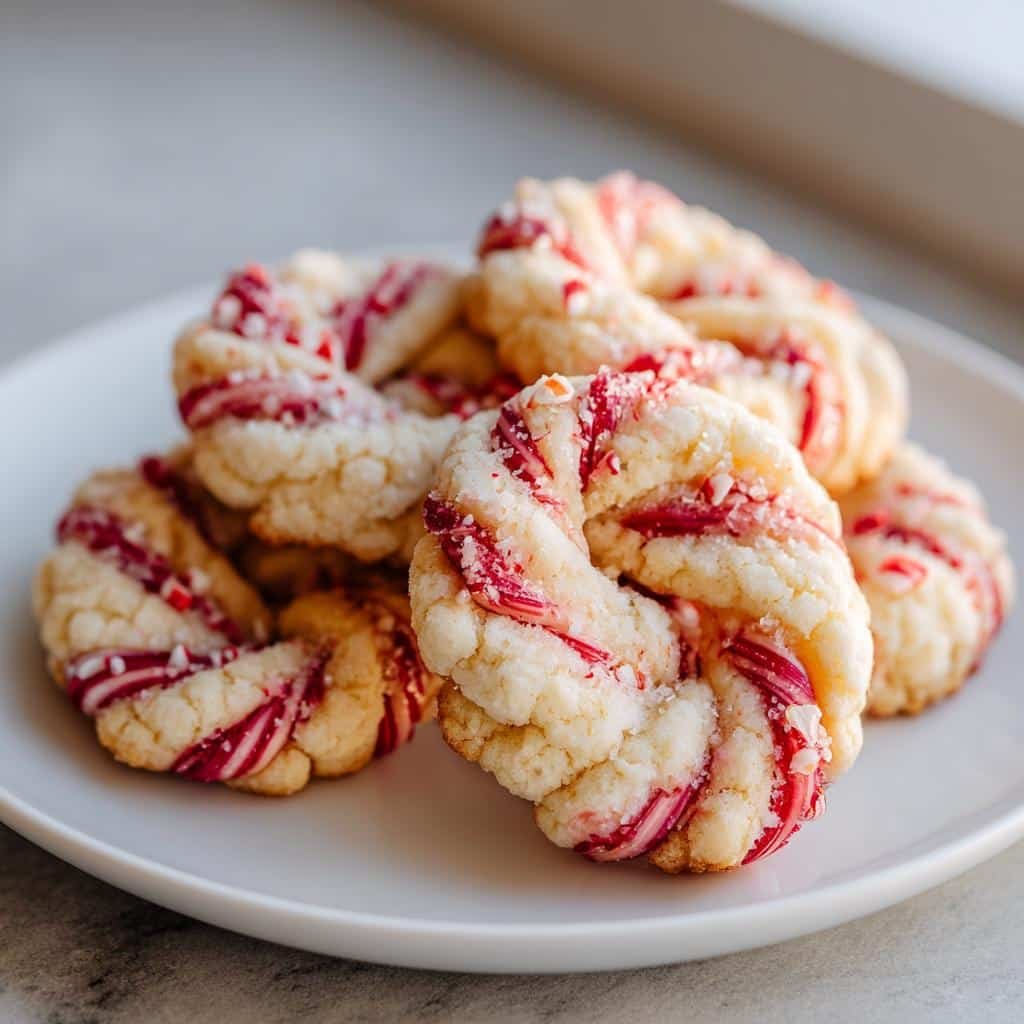
- They’re pure holiday magic: Those cheerful red-and-white stripes instantly put everyone in the festive spirit. I swear, just seeing them on a plate makes people smile!
- The peppermint punch: That cool, refreshing flavor cuts through all the rich holiday treats – it’s like a winter breeze in cookie form.
- So fun to make: Rolling and twisting the dough feels like playing with edible playdough. Even my most kitchen-averse friends get into shaping these.
- They smell incredible: Your whole house will smell like a candy shop while these bake. Pro tip – make extra dough just to keep in the fridge for the aroma!
Seriously, these aren’t just cookies – they’re little edible holiday decorations that happen to taste amazing. The hardest part? Not eating them all straight off the baking sheet!
Ingredients for Candy Cane Cookies
Gather these simple ingredients – you probably have most in your pantry already! The magic happens when they come together:
- 1 cup unsalted butter, softened (leave it out for 30 minutes – it should dent slightly when pressed)
- 1 cup powdered sugar, packed (press it gently into your measuring cup for accuracy)
- 1 large egg (room temperature blends better – I just set mine in warm water for 5 minutes)
- 1 tsp peppermint extract (the good stuff makes all the difference – don’t skimp!)
- 2 1/2 cups all-purpose flour (fluff it before measuring – no dense flour lumps!)
- 1/2 tsp salt (balances the sweetness perfectly)
- 1/2 tsp red gel food coloring (liquid works in a pinch, but gel gives those vibrant stripes)
Ingredient Notes & Substitutions
Baking is personal – here’s how to make these candy cane cookies your own:
- Swap peppermint for almond extract if you prefer – the dough turns into lovely “marzipan canes”
- Use beet powder instead of food coloring for natural red stripes (they’ll be more pinkish but still pretty)
- Out of powdered sugar? Blend regular sugar in a spice grinder until powdery – just sift it well
- For extra sparkle, roll the shaped cookies in coarse sugar before baking – they’ll glitter like real candy canes!
The best part? Even with substitutions, these cookies stay deliciously festive. Just don’t tell Grandma I said that!
Equipment You’ll Need
Don’t worry – you don’t need fancy gadgets to make these candy cane cookies shine! Here’s what I always pull from my kitchen:
- Large mixing bowl (my trusty ceramic one has seen countless batches – size matters when creaming butter!)
- Hand mixer or stand mixer (you can mix by hand, but your arms will thank you for the electric help)
- Baking sheets (two is ideal – I line mine with parchment so the cookies slide right off)
- Cooling racks (crucial unless you like soggy-bottomed cookies – ask me how I know!)
- Measuring cups and spoons (for once, eyeballing measurements won’t cut it)
Now for the fun extras that take these from great to “wow!”:
- Piping bags or plastic bags (for super precise stripes if you’re feeling fancy)
- Small offset spatula (my secret weapon for transferring delicate canes without breaking)
- Cookie spatula (wide enough to move multiple cookies at once when you’re in a holiday rush)
- Dough scraper (helps divide that sticky dough evenly – plus cleanup’s a breeze)
Pro tip from my many candy cane cookie disasters: Clear your workspace first! Nothing worse than realizing you’re out of clean bowls mid-recipe while your hands are covered in red dough. Not that I’d know anything about that…
How to Make Candy Cane Cookies
Okay, let’s get to the fun part – transforming these simple ingredients into magical candy cane cookies! I’ve made hundreds of batches over the years, and these steps never fail me:
- Preheat your oven to 375°F (190°C) – trust me, that precise temperature makes all the difference for perfect cookies that hold their shape.
- Cream butter and powdered sugar until fluffy (about 2 minutes). This is where the magic starts – don’t rush it! The mixture should look like pale yellow clouds.
- Beat in the egg and peppermint extract until fully incorporated. The scent at this point is heavenly – like a winter wonderland in your mixing bowl!
- Gradually add flour and salt, mixing just until the dough comes together. Overmixing makes tough cookies – stop when you no longer see dry flour patches.
- Divide dough in half. Knead red food coloring into one portion until evenly colored. I wear gloves for this unless I want pink hands for days!
Shaping and Baking Tips
Here’s where many first-timers panic – but don’t worry! These tips will have you shaping candy cane cookies like a pro:
- Roll ropes about 4 inches long – any longer and they’ll droop when bending. Pro tip: Roll between palms instead of on the counter to prevent sticking.
- Twist one red and one white rope gently – don’t press too hard or the colors will muddy. I like to give them just 2-3 twists for perfect stripes.
- Bend into cane shapes carefully – use both hands to support the whole length as you curve it. If they , just pinch the dough back together – no one will notice after baking!
- Space cookies 2 inches apart – they don’t spread much, but you want room for even browning. I can usually fit about 12 per standard baking sheet.
- Bake for exactly 8-10 minutes – set a timer! They’re done when the bottoms just start to golden. Overbaked candy cane cookies lose that lovely soft texture.
My secret? I always bake one test cookie first to check oven accuracy. Every oven lies a little – mine runs hot, so I lower the temp by 25 degrees. Your first batch might be experimental, but soon you’ll be churning out perfect candy cane cookies by the dozen!
Storage & Reheating Instructions
Here’s the beautiful thing about candy cane cookies – they stay fresh and festive for days! I always make a double batch because they disappear fast at holiday parties. Here’s how I keep them tasting just-baked:
Airtight is everything: Once completely cooled, store these in an airtight container with parchment between layers. They’ll stay perfect for up to a week at room temperature. My grandma’s old cookie tin works magic, but any sealed container does the trick.
Freeze like a pro: These freeze beautifully for up to 3 months! I arrange unbaked canes on parchment-lined trays, freeze until solid, then transfer to freezer bags. When holiday guests surprise you, just pop frozen cookies straight onto a baking sheet and add 1-2 extra minutes to the bake time.
No reheating needed: Unlike some cookies, candy cane cookies taste best at room temperature. That peppermint flavor really shines when they’re cool. If you must refresh them, 5 seconds in the microwave max – any longer and they’ll lose their signature crisp-yet-tender texture.
Pro tip from my many Christmases: Tuck a few in decorative tins as last-minute gifts. They stay fresh, look adorable, and everyone loves homemade treats. Just be prepared for recipe requests!
Serving Suggestions for Candy Cane Cookies
Oh, the fun part – showing off these adorable candy cane cookies! After all that careful twisting and baking, let’s make them the stars they deserve to be. Here’s how I love to serve them:
Classic milk pairing: There’s something magical about dunking a peppermint-striped cookie into icy cold milk. The way the flavors mingle takes me right back to childhood Christmases. For adults, try pairing with a frothy latte – the coffee and peppermint combo is divine!
Hot cocoa companions: Float a mini candy cane cookie on top of steaming hot chocolate for instant holiday cheer. The cookie softens just enough to release its peppermint essence into the cocoa. Bonus points if you add a candy cane stirrer!
Cookie platter perfection: These look stunning arranged with other holiday treats. I alternate them with chocolate crinkles and gingerbread men for a festive mix. The red-and-white stripes make everything around them look more special too – it’s like cookie magic!
Gift-giving gold: Nothing says “happy holidays” like homemade candy cane cookies. I wrap them in cellophane bags tied with red ribbon, or nestle them in decorative tins between layers of tissue paper. For neighbors and teachers, I’ll even hang a few from mini ornament hooks on a small tree branch – instant edible decoration!
My favorite trick? Using them as place card holders at holiday dinners. Just write names on small cards and tuck them into the curve of each cookie. Guests get a sweet welcome and instant conversation starter. Warning: They might disappear before dessert!
Nutritional Information
Let’s be real – we’re not eating candy cane cookies for their health benefits! But since everyone asks, here’s the scoop on what’s in these festive treats. Remember, these numbers are estimates – your exact amounts might vary depending on ingredients and cookie size.
- Serving Size: 1 cookie (about 2-inch cane)
- Calories: 120
- Sugar: 8g
- Sodium: 30mg
- Fat: 7g (4g saturated)
- Carbohydrates: 12g
- Protein: 1g
- Cholesterol: 20mg
Now, before you panic about numbers, remember – holiday cookies are about joy, not macros! I like to think of each bite as a little celebration. Everything in moderation, right? That’s why I always share my candy cane cookies – spreading the cheer (and the calories) makes them even sweeter!
Candy Cane Cookies FAQ
Over the years, I’ve gotten so many questions about these festive treats – here are the ones that come up most often with my tried-and-true answers:
Can I make candy cane cookie dough ahead?
Absolutely! The dough keeps beautifully in the fridge for up to 3 days (wrap it tight in plastic). For longer storage, freeze the dough balls or shaped canes for up to 3 months. Just thaw in the fridge overnight when you’re ready to bake. Pro tip: Let chilled dough sit at room temp for 10 minutes before shaping – it’ll be much easier to work with!
Help! My dough is too sticky – what now?
Don’t panic – sticky dough happens to all of us! Sprinkle just a tablespoon of flour onto your work surface and knead it gently into the dough. If it’s still sticking to your hands, pop it in the fridge for 20 minutes. The butter firms up and suddenly, perfect twistable dough! Remember – better slightly sticky than dry and crumbly.
Can I use liquid food coloring instead of gel?
You can, but gel gives those vibrant stripes without adding extra liquid to the dough. If using liquid, start with just a few drops – you can always add more. Warning: Your hands will stain more with liquid coloring! I keep baby wipes nearby for quick cleanups between batches.

Magical Candy Cane Cookies That Will Steal Your Heart
- Total Time: 30 minutes
- Yield: 24 cookies 1x
- Diet: Vegetarian
Description
Candy cane cookies are festive treats perfect for the holiday season. These sweet, peppermint-flavored cookies are shaped like candy canes and decorated with red and white stripes.
Ingredients
- 1 cup unsalted butter, softened
- 1 cup powdered sugar
- 1 egg
- 1 tsp peppermint extract
- 2 1/2 cups all-purpose flour
- 1/2 tsp salt
- 1/2 tsp red food coloring
Instructions
- Preheat your oven to 375°F (190°C).
- Cream butter and powdered sugar until smooth.
- Beat in the egg and peppermint extract.
- Mix in flour and salt until dough forms.
- Divide dough in half. Add red food coloring to one half.
- Roll each color into small ropes.
- Twist one red and one white rope together, then bend into a candy cane shape.
- Place on a baking sheet and bake for 8-10 minutes.
- Let cool before serving.
Notes
- Use gel food coloring for brighter stripes.
- Chill dough for 30 minutes if too soft to shape.
- Store in an airtight container for up to a week.
- Prep Time: 20 minutes
- Cook Time: 10 minutes
- Category: Dessert
- Method: Baking
- Cuisine: American
Nutrition
- Serving Size: 1 cookie
- Calories: 120
- Sugar: 8g
- Sodium: 30mg
- Fat: 7g
- Saturated Fat: 4g
- Unsaturated Fat: 2g
- Trans Fat: 0g
- Carbohydrates: 12g
- Fiber: 0g
- Protein: 1g
- Cholesterol: 20mg
Keywords: candy cane cookies, holiday treats, peppermint cookies, festive baking