
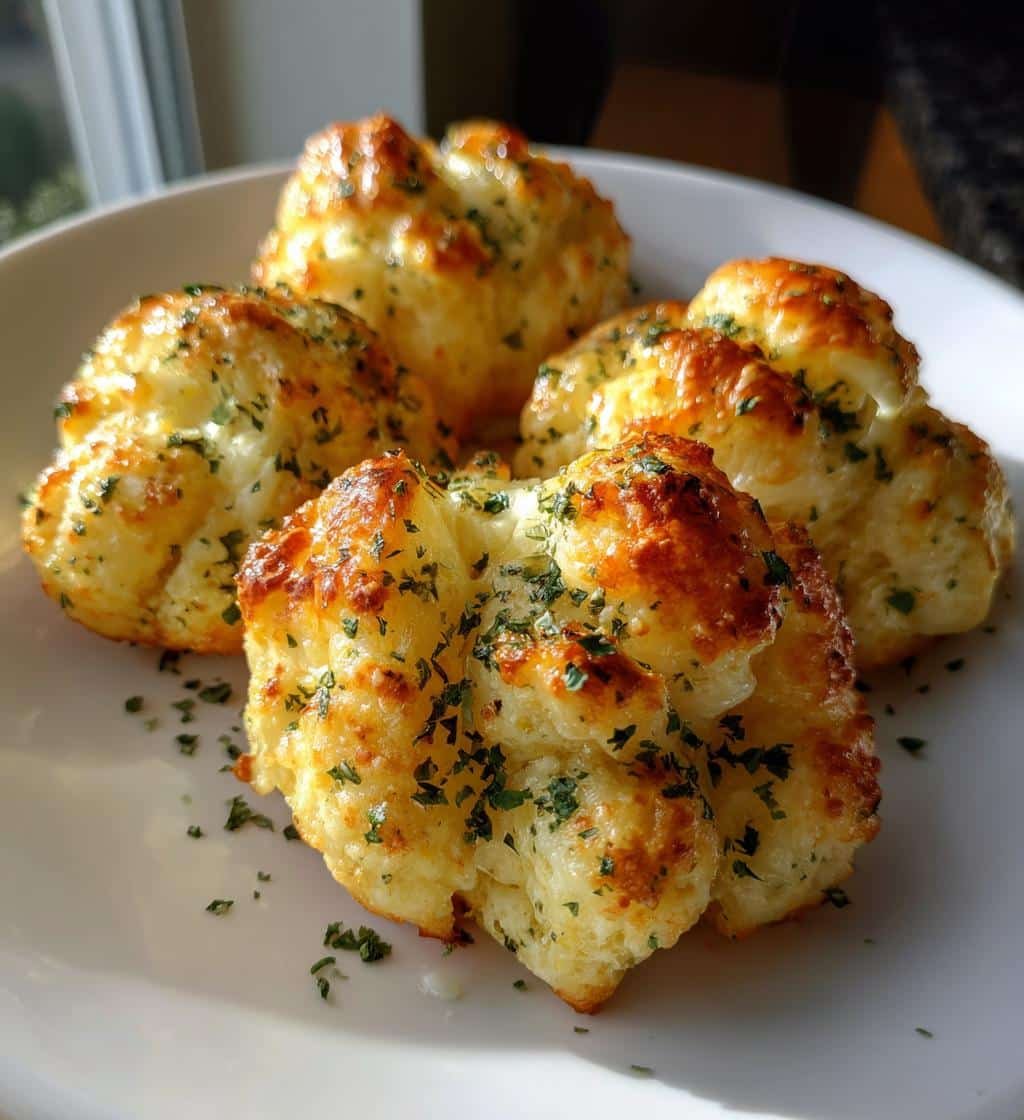
Oh my goodness, let me tell you about these homemade garlic butter cheese bombs – they’re like little pockets of heaven! I still remember the first time I made these for a game night with friends. The moment they came out of the oven, golden and bubbling, everyone crowded around the kitchen. That incredible garlicky, buttery aroma had us all drooling before we even tasted them. Now they’re my go-to appetizer for any gathering – so simple to throw together, yet so impressive. The best part? That ooey-gooey cheese center that bursts out when you take that first glorious bite. Trust me, once you try these, you’ll be hooked!
Why You’ll Love These Homemade Garlic Butter Cheese Bombs
Listen, these little beauties are about to become your new obsession – and here’s why:
- They’re ridiculously easy – Seriously, if you can open a can of biscuits and stir some ingredients together, you’re golden. Even my kitchen-challenged cousin can make these!
- Ready in under 30 minutes – From fridge to table faster than you can say “cheese explosion”
- That garlic butter combo – It’s like garlic bread and mozzarella sticks had a delicious baby
- Always a crowd favorite – I’ve never brought these to a party without someone begging for the recipe
- Endless customization – Add some pepperoni, swap cheeses, or kick up the heat with red pepper flakes
The first time I made these, I knew I’d stumbled onto something special. That moment when you pull them out of the oven – golden brown with little cheesy volcanoes threatening to erupt – pure magic!
Ingredients for Homemade Garlic Butter Cheese Bombs
Okay, let’s gather our goodies! Here’s exactly what you’ll need to make these irresistible cheese bombs:
- 1 cup shredded mozzarella cheese – The stringy, melty star of our show
- 1/2 cup grated Parmesan cheese – For that salty, nutty kick
- 1/4 cup softened butter – Leave it out for 30 minutes first (trust me, it mixes better)
- 2 cloves minced garlic – Fresh is best, but I won’t judge if you use pre-minced in a pinch
- 1 tsp dried parsley – For that pop of color and freshness
- 1/2 tsp garlic powder – Because double garlic is always better
- 1/2 tsp onion powder – The secret flavor booster
- 1/4 tsp salt – Just enough to make all the flavors sing
- 1/4 tsp black pepper – Freshly ed if you’re feeling fancy
- 1 can refrigerated biscuit dough – The classic flaky kind works best
Ingredient Notes & Substitutions
Now, I know sometimes you’re mid-recipe and realize you’re out of something. Don’t panic! Here’s how to adapt:
- Cheese swaps: Try provolone instead of mozzarella for a sharper bite, or mix in some cheddar for extra tang
- Fresh vs dried herbs: If you’ve got fresh parsley, use 1 tablespoon chopped instead of dried
- Garlic alternatives: No fresh garlic? Use 1/2 teaspoon of garlic paste or increase garlic powder to 1 teaspoon
- Biscuit options: The flaky layers in regular biscuits work best, but buttermilk biscuits will do in a pinch
The key is that butter-cheese-garlic trio – as long as you’ve got those, you’re golden! Everything else just makes it extra special.
Equipment You’ll Need
Don’t worry – you don’t need any fancy gadgets for these cheesy wonders! Here’s what I grab from my kitchen:
- Mixing bowl – Medium-sized works perfectly for combining all that garlicky goodness
- Baking sheet – Standard half-sheet pan is my go-to
- Measuring spoons – Because eyeballing garlic measurements never ends well
- Wooden spoon or spatula – For mixing the filling (I prefer wooden – feels more rustic!)
- Knife and cutting board – For mincing that fresh garlic
Nice-to-haves but not essential:
- Silicone baking mat or parchment paper – Makes cleanup a breeze
- Pastry brush – If you want to brush extra garlic butter on top (highly recommended!)
- Small cookie scoop – Helps portion the filling evenly
See? Nothing crazy! I’ve even made these camping with just a bowl and a cast iron skillet over the fire. The simpler the tools, the more magical these cheese bombs feel when they turn out perfectly!
How to Make Homemade Garlic Butter Cheese Bombs
Alright, let’s get these cheesy beauties rolling! I promise it’s easier than you think – just follow these steps and you’ll be snacking on garlicky, melty perfection in no time.
Step 1: Prepare the Cheese Mixture
First things first – let’s make that irresistible filling! Grab your mixing bowl and toss in:
- The shredded mozzarella
- Grated Parmesan
- Softened butter
- Minced garlic
- All those wonderful spices
Now, here’s my little trick – mix it with your hands! Sounds messy, but trust me, it helps everything incorporate perfectly. Squish it between your fingers until you’ve got a uniform, slightly sticky mixture. You’ll know it’s ready when you can’t resist sneaking a taste (I won’t tell!).
Step 2: Assemble the Cheese Bombs
Time to transform those biscuits into cheesy pockets of joy!
- Pop open that biscuit can (that little “poof” never gets old!)
- Separate the biscuits and gently flatten each one between your palms – aim for about 3 inches across
- Scoop about 1 tablespoon of filling into the center (a cookie scoop works great here)
- Now the important part – sealing! Pull the edges up and pinch them together tightly. Roll gently between your palms to form a smooth ball. If you see any filling peeking out, pinch that spot again!
Pro tip: If your dough starts sticking, dust your hands lightly with flour. But don’t overdo it – we want these to stay tender!
Step 3: Bake to Perfection
Almost there! Here’s how to get that golden-brown perfection:
- Preheat your oven to 375°F (190°C) – no cheating on this step!
- Arrange your cheese bombs on a baking sheet about 2 inches apart
- Bake for 12-15 minutes until they’re beautifully golden
- Let them rest for 5 minutes before serving (I know it’s hard, but this prevents cheese lava burns!)
Watch for that magical moment when they puff up like little pillows – that’s when you know they’re ready. Some cheese might sneak out the top, creating crispy, cheesy edges that are honestly my favorite part!
Tips for Perfect Homemade Garlic Butter Cheese Bombs
After making these cheesy wonders more times than I can count, I’ve picked up some tricks that’ll take your garlic butter cheese bombs from good to “oh-my-gosh-give-me-the-recipe” amazing:
Fresh garlic is your best friend – I know it’s tempting to reach for that jar of pre-minced garlic, but trust me, fresh makes all the difference. That pungent, aromatic punch when you mince it yourself? That’s the magic right there. Just be sure to mince it finely so you don’t get any harsh bites.
Let the dough rest – If you’ve got an extra 5 minutes, let your assembled cheese bombs sit at room temperature before baking. This helps relax the gluten in the biscuit dough so they puff up beautifully instead of getting tough.
Space them out – I learned this the hard way when my first batch baked together into one giant cheese monster. Give each bomb about 2 inches of breathing room on the baking sheet for even browning and perfect round shapes.
The golden brown test – Don’t just rely on the timer! Peek at them around the 12-minute mark. You want that perfect golden-brown color – if they’re getting too dark too fast, your oven might run hot (mine does!).
Brush with extra garlic butter – Want to take these over the top? Melt a tablespoon of butter with a minced garlic clove and brush it over the hot bombs right when they come out of the oven. It’s like garlic bread meets cheese pull heaven!
Serving Suggestions for Homemade Garlic Butter Cheese Bombs
Oh, the possibilities with these garlic butter cheese bombs! I’ve served them every which way imaginable, and let me tell you – they never disappoint. Here’s how to make them shine:
Classic dipping situation: Warm marinara sauce is my go-to – that tangy tomato flavor cuts through the richness perfectly. But don’t stop there! Ranch dressing, garlic aioli, or even a spicy arrabbiata sauce take these to new heights. Last game night, I served them with three different dips and watched them disappear faster than the chips!
Party platter perfection: These little guys are born entertainers. Arrange them on a wooden board with some cured meats, olives, and fresh veggies for an instant crowd-pleaser. I always make a double batch when hosting – they’re the first thing to vanish every time!
Soup’s best friend: Dunk these bombs into tomato soup or a creamy broccoli cheddar for the ultimate comfort food combo. It’s like grilled cheese upgraded – the crispy exterior holds up beautifully against the soup without getting soggy too fast.
Salad sidekick: Who says salads have to be boring? Pair these with a crisp Caesar or Greek salad for that perfect balance of fresh and indulgent. My sister swears they make her actually look forward to eating greens!
Breakfast twist: Hear me out – these are amazing with morning coffee! I’ll sometimes make them smaller (using half a biscuit each) and serve them alongside fresh fruit for a brunch spread that’ll have everyone talking. The garlic-cheese combo somehow works just as well at 10am as it does at 10pm!
The best part? These garlic butter cheese bombs are endlessly adaptable. Last Christmas, I added a sprinkle of rosemary and served them with cranberry sauce for a festive twist. Your imagination (and taste buds) are the only limits!
Storage & Reheating Instructions
Okay, let’s talk leftovers – though honestly, these garlic butter cheese bombs rarely last long enough to need storing in my house! But just in case you miraculously have some left (or want to make them ahead), here’s how to keep them tasting fresh:
Storing: Once completely cooled, pop them in an airtight container. They’ll keep in the fridge for about 3 days – though the texture is absolute perfection on day one. If you must freeze them (brave soul!), wrap each bomb individually in plastic wrap first, then store in a freezer bag for up to 2 months.
Reheating magic: Here’s the secret – never microwave these beauties unless you want sad, soggy bombs! Instead, reheat them in a 350°F oven for 5-7 minutes until warmed through and crispy again. If they’re frozen, no need to thaw – just add a few extra minutes. I sometimes brush them with a little melted butter before reheating to bring back that fresh-from-the-oven glory.
Pro tip: If you’re making these ahead for a party, assemble them completely but don’t bake. Store the raw bombs on a parchment-lined tray in the fridge for up to 8 hours, then bake as usual when guests arrive. The smell of them baking will have everyone hovering in the kitchen!
Nutritional Information for Homemade Garlic Butter Cheese Bombs
Now, let’s be real – we’re not eating these garlic butter cheese bombs for their health benefits! But I know some folks like to keep track, so here’s the scoop on what’s in each delicious bite. Remember, these numbers are estimates – your exact counts might vary depending on specific ingredients and portion sizes.
Per cheese bomb (makes about 8):
- Calories: 180
- Fat: 12g (6g saturated)
- Protein: 6g
- Carbohydrates: 14g
- Fiber: 1g
- Sugar: 2g
- Sodium: 380mg
A few notes from my kitchen experiments:
- Using low-fat cheeses can reduce calories and fat, but honestly? The full-fat versions taste so much better and give that perfect melty texture.
- If sodium is a concern, you can reduce the added salt – the cheeses already bring plenty of flavor!
- These pack a decent protein punch thanks to all that glorious cheese – almost as much as an egg per bomb!
My philosophy? Everything in moderation! These garlic butter cheese bombs are perfect for treating yourself or sharing at gatherings. After all, life’s too short to skip the good stuff – especially when it’s this delicious!
FAQs About Homemade Garlic Butter Cheese Bombs
I get asked about these garlic butter cheese bombs ALL the time – seems like everyone wants to know the secrets after they taste them! Here are the most common questions I hear (and my tried-and-true answers):
“Can I freeze these cheesy wonders?”
Absolutely! I freeze them two ways: either fully baked (let them cool completely first) or as assembled-but-unbaked bombs. For baked ones, reheat frozen at 350°F for about 10 minutes. For unbaked, just add 2-3 extra minutes to the baking time. The texture stays surprisingly good – though nothing beats fresh-from-the-oven!
“Fresh herbs vs dried – does it matter?”
Both work, but fresh herbs give a brighter flavor. I love using fresh parsley or basil when I have it – just triple the amount (1 tablespoon fresh instead of 1 teaspoon dried). The color pops beautifully too! Dried herbs are more concentrated though, so don’t go overboard swapping them.
“How far ahead can I make these?”
You’ve got options! The filling keeps refrigerated for 2 days (just give it a good stir before using). Assembled-but-unbaked bombs can chill overnight – the dough actually benefits from the rest. Already baked? They’re best eaten within 3 days, though I doubt they’ll last that long!
“Help! My cheese leaked out everywhere!”
Oh honey, we’ve all been there! Two tricks: 1) Make sure your edges are PINCHED tight – no cheese peeking through! 2) Don’t overfill – that tablespoon measure isn’t just a suggestion. If some does escape? Those crispy cheese bits are my favorite “mistake” anyway!
“Can I make these without canned biscuits?”
Sure thing! Homemade biscuit dough works great if you’re feeling ambitious. Or try pizza dough rolled thin – just adjust baking time since it’s thicker. Puff pastry makes fancy, flaky versions too! The possibilities are endless with that garlic butter cheese filling.
Got more questions? Hit me up anytime – I could talk about these garlic butter cheese bombs all day! After making hundreds (yes, really), I’ve probably encountered every possible variation and solution. Happy baking!
Print
Irresistible 8-Minute Homemade Garlic Butter Cheese Bombs
- Total Time: 25 minutes
- Yield: 8 cheese bombs 1x
- Diet: Vegetarian
Description
Delicious homemade garlic butter cheese bombs that are easy to make and perfect for any occasion.
Ingredients
- 1 cup shredded mozzarella cheese
- 1/2 cup grated Parmesan cheese
- 1/4 cup softened butter
- 2 cloves minced garlic
- 1 tsp dried parsley
- 1/2 tsp garlic powder
- 1/2 tsp onion powder
- 1/4 tsp salt
- 1/4 tsp black pepper
- 1 can refrigerated biscuit dough
Instructions
- Preheat oven to 375°F (190°C).
- Mix mozzarella, Parmesan, butter, garlic, parsley, garlic powder, onion powder, salt, and pepper in a bowl.
- Separate biscuit dough into individual pieces.
- Flatten each biscuit and place a spoonful of cheese mixture in the center.
- Fold dough over filling and seal edges.
- Place bombs on a baking sheet and bake for 12-15 minutes until golden brown.
- Serve warm.
Notes
- Use fresh garlic for best flavor.
- Let bombs cool slightly before serving.
- Store leftovers in an airtight container.
- Prep Time: 10 minutes
- Cook Time: 15 minutes
- Category: Appetizer
- Method: Baked
- Cuisine: American
Nutrition
- Serving Size: 1 cheese bomb
- Calories: 180
- Sugar: 2g
- Sodium: 380mg
- Fat: 12g
- Saturated Fat: 6g
- Unsaturated Fat: 5g
- Trans Fat: 0g
- Carbohydrates: 14g
- Fiber: 1g
- Protein: 6g
- Cholesterol: 25mg
Keywords: garlic butter cheese bombs, homemade appetizers, easy cheese bombs