
Oh my gosh, you have to try this honeycomb pasta cake – it’s my absolute favorite dish to make when I want something that looks fancy but is secretly super easy! The first time I made it, my friends thought I’d spent hours in the kitchen, but really, it comes together in no time. What makes this honeycomb pasta cake so special is how the pasta forms these gorgeous little pockets that hold all the cheesy, eggy goodness. And here’s the best part – it works for literally any occasion! Brunch with the girls? Check. Potluck dinner? Perfect. Even just a cozy night in when you want something comforting but a little different from your usual pasta routine.
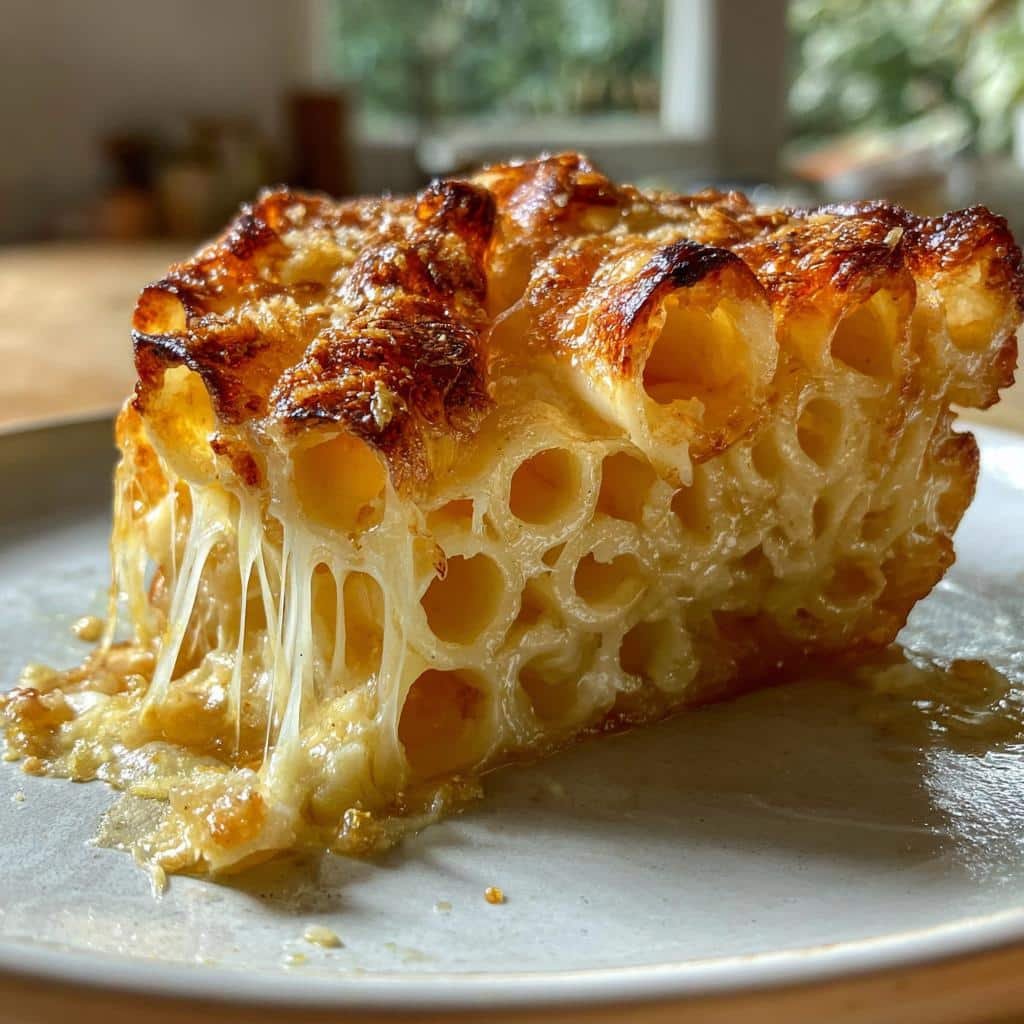
Table of Contents
Ingredients for Honeycomb Pasta Cake
Let me tell you exactly what you’ll need to make this gorgeous honeycomb pasta cake – I’ve learned through trial and error that using the right ingredients makes all the difference! First up, you’ll need 500g of pasta – I usually go with penne or rigatoni because those tube shapes create the perfect little pockets in the finished cake. For the cheesy goodness, grab 200g of grated cheese – a mix of mozzarella for stretchiness and sharp cheddar for flavor is my go-to combo.
Now for the magic binder: 4 large eggs and 100ml of whole milk whisked together create that beautiful custard-like texture. Don’t forget 50g of unsalted butter for greasing the pan – it gives the edges that irresistible golden crispiness. And of course, salt and freshly ground black pepper to taste – I’m generous with both because they really bring all the flavors together!
Pro tip: Make sure your eggs and milk are at room temperature – they blend much more smoothly with the pasta this way. And if you want to get fancy, keep some extra grated cheese aside for sprinkling on top before baking – it creates the most delicious golden crust!
How to Make Honeycomb Pasta Cake
Okay, let’s get cooking! First things first – preheat your oven to 180°C (350°F). Trust me, giving your oven time to properly heat makes all the difference in getting that perfect golden crust. While that’s warming up, grab a large pot and cook your 500g of pasta until it’s just al dente – about a minute less than the package says. You don’t want it mushy because it’ll keep cooking in the oven!
Now here’s where the magic happens. In a big mixing bowl, whisk together your 4 eggs and 100ml milk until they’re completely blended. I like to add a generous pinch of salt and pepper right into this mixture. Then, drain your pasta (don’t rinse it!) and while it’s still warm, toss it with the egg mixture and 200g grated cheese. The warmth helps the cheese melt slightly so everything sticks together beautifully.
Take your 50g butter and generously grease a 9-inch round baking dish – really get into all the corners! Pour in your pasta mixture and press it down gently. Pop it in the oven for about 30 minutes, until the top is that perfect golden brown and the edges look crispy. Your kitchen will smell amazing!
Print
Easy 5-Ingredient Honeycomb Pasta Cake That Wows Every Time
- Total Time: 45 minutes
- Yield: 6 servings 1x
- Diet: Vegetarian
Description
A delicious and visually appealing honeycomb pasta cake, perfect for any occasion.
Ingredients
- 500g pasta
- 4 eggs
- 200g grated cheese
- 100ml milk
- 50g butter
- Salt and pepper to taste
Instructions
- Boil the pasta until al dente, then drain.
- Mix eggs, milk, salt, and pepper in a bowl.
- Combine pasta with the egg mixture and grated cheese.
- Grease a baking dish with butter and pour in the pasta mixture.
- Bake at 180°C for 30 minutes or until golden brown.
- Let it cool slightly before slicing and serving.
Notes
- Use a non-stick baking dish for easy removal.
- Add herbs or spices for extra flavor.
- Serve warm for the best texture.
- Prep Time: 15 minutes
- Cook Time: 30 minutes
- Category: Main Course
- Method: Baking
- Cuisine: Italian
Nutrition
- Serving Size: 1 slice
- Calories: 350
- Sugar: 2g
- Sodium: 300mg
- Fat: 15g
- Saturated Fat: 8g
- Unsaturated Fat: 5g
- Trans Fat: 0g
- Carbohydrates: 40g
- Fiber: 3g
- Protein: 15g
- Cholesterol: 120mg
Keywords: honeycomb pasta cake, baked pasta, vegetarian pasta dish
The hardest part? Waiting 10 minutes before slicing! But this resting time lets everything set so you get those perfect wedge-shaped slices that hold their shape. And oh, when you cut into it – those gorgeous honeycomb pockets of cheesy goodness will have everyone at the table oohing and aahing!
Tips for Perfect Honeycomb Pasta Cake
- Non-stick is your friend: Even better than butter alone – line your pan with parchment paper for foolproof removal
- Patience pays off: Let it rest at least 10 minutes before slicing – it’ll hold together so much better
- Herb it up: Add a teaspoon of dried oregano or basil to the egg mixture for extra flavor
- Check for doneness: The cake should be set in the center – if it jiggles, give it 5 more minutes
- Leftover magic: This reheats beautifully – just pop slices in the toaster oven to crisp them back up
For another show-stopping dish with a touch of sweetness, try our Cider Caramel Poke Cake Recipe — it’s rich, gooey, and guaranteed to impress at any gathering.
Why You’ll Love This Honeycomb Pasta Cake
Once you try this honeycomb pasta cake, it’ll become your new go-to dish for so many reasons! Here’s why everyone in my family begs me to make it:
- Unbelievably easy – With just 6 simple ingredients and one bowl, you can whip this up even on busy weeknights. No fancy skills required!
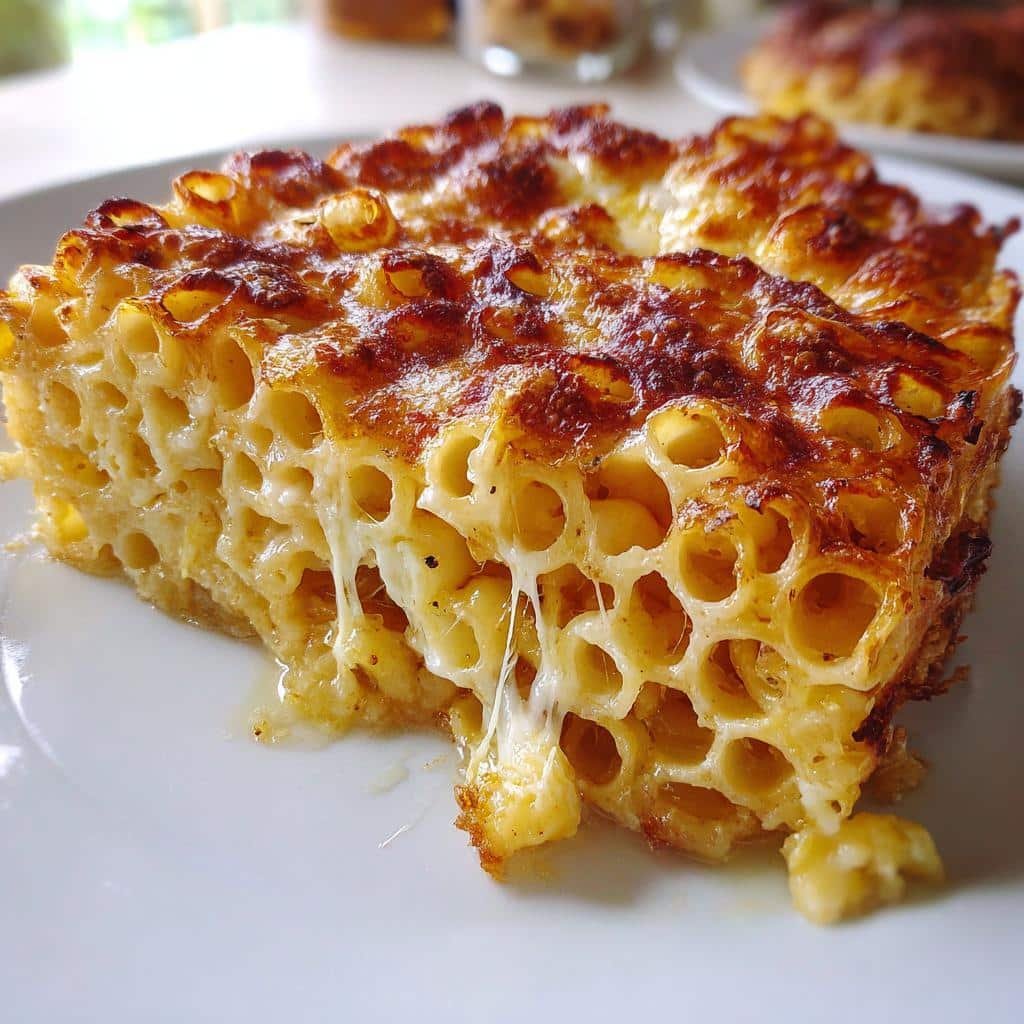
- Crowd-pleasing magic – The stunning honeycomb pattern never fails to impress, making it perfect for potlucks or dinner parties where you want to wow.
- Endlessly customizable – Swap cheeses, add veggies, or toss in cooked bacon – this recipe loves adaptations while keeping its signature texture.
- Perfect texture combo – Crispy golden crust gives way to creamy, cheesy pasta pockets in every bite. It’s comfort food at its best!
Seriously, this dish solves the “what to make” dilemma every time – it’s always a hit!
Honeycomb Pasta Cake Variations
One of the best things about this honeycomb pasta cake is how easily you can make it your own! Here are some of my favorite twists on the classic recipe that I’ve discovered through countless kitchen experiments:
Veggie-Loaded Version: Toss in a cup of sautéed veggies before baking – I adore a mix of caramelized onions, wilted spinach, and roasted red peppers. Just make sure to squeeze out any excess moisture from the greens so your cake doesn’t get soggy. The colors peeking through the golden crust make it almost too pretty to eat!
Cheese Explorer’s Dream: Swap the mozzarella-cheddar combo for different cheeses based on what’s in your fridge. Gouda gives a lovely smokiness, while feta adds a salty tang. My friend swears by mixing in ricotta for extra creaminess – just dollop it between pasta layers before baking.
Meat Lover’s Delight: For heartier meals, fold in crispy pancetta, cooked sausage crumbles, or shredded rotisserie chicken. Pro tip: Pre-cook any meats and pat them dry to prevent oiliness. My uncle adds pepperoni slices on top before baking for a “pasta pizza” effect that kids go crazy for!
Serving Suggestions for Honeycomb Pasta Cake
This honeycomb pasta cake is practically begging to be the star of your table! For brunches, I love pairing thick slices with a bright arugula salad tossed with lemon vinaigrette – the peppery greens cut through the richness perfectly. Dinner parties? Serve wedges alongside roasted veggies and garlic bread for the ultimate comfort food spread. And here’s my secret: drizzle warm marinara sauce over individual portions for an instant “pasta bake” upgrade. It’s equally delicious at room temperature too, making it ideal for picnics when you want something special that travels well!
Storing and Reheating Honeycomb Pasta Cake
Here’s the great news – this honeycomb pasta cake keeps like a dream! After it cools completely (I know, waiting is hard), wrap any leftovers tightly in foil or store them in an airtight container in the fridge for up to 3 days. For longer storage, you can freeze individual slices wrapped in plastic then foil for about 1 month – just thaw overnight in the fridge before reheating.
Now, the key to reviving that glorious texture? Skip the microwave! Instead, pop slices in a toaster oven or regular oven at 180°C (350°F) for 10-15 minutes until warmed through. This keeps the edges crispy instead of soggy. If you’re in a rush, a quick sear in a buttered skillet works wonders too – you’ll get that golden crust all over again!
Honeycomb Pasta Cake Nutrition Information
Now, let’s talk about what’s in this delicious honeycomb pasta cake – because let’s be real, we all want to know what we’re eating! Nutritional values are estimates and will vary based on your specific ingredients and portion sizes. But here’s the general breakdown per generous slice:
Each serving (about 1/6th of the cake) comes out to roughly:
- 350 calories – Perfect for a satisfying main dish
- 15g fat (8g saturated) – Mostly from the cheese and butter
- 40g carbohydrates – The pasta gives you that energy boost
- 3g fiber – Especially if you use whole wheat pasta
- 15g protein – Thanks to the eggs and cheese combo
A little note from my kitchen to yours: If you’re watching your sodium, you might want to go easy on salting the pasta water since the cheese already brings plenty of flavor. And for my gluten-free friends – yes! This works beautifully with your favorite gluten-free pasta too, just check those nutrition labels since values will change.
What I love is that this honeycomb pasta cake gives you that perfect balance – it’s hearty enough to keep you full, but not so heavy that you’ll need a nap afterward. And remember, these numbers are just guidelines – your cake might be a little different depending on the exact cheeses and pasta you use!
Craving more eye-catching recipes? Browse our collections on Pinterest where you’ll find creative ideas that turn simple ingredients into viral-worthy creations.
Frequently Asked Questions About Honeycomb Pasta Cake
I get so many questions about this honeycomb pasta cake whenever I serve it – and I love sharing all my little kitchen secrets! Here are the most common things people ask me, along with the answers I’ve discovered through lots of trial and (delicious) error:
Can I use gluten-free pasta for this recipe?
Absolutely! I’ve made this with rice-based and corn-based gluten-free pastas with great success. Just be extra careful not to overcook the pasta before baking – gluten-free varieties can get mushy faster. And here’s a pro tip: let the gluten-free version rest a full 15 minutes before slicing to help it set properly.
How do I prevent the pasta cake from sticking to the pan?
Oh, I learned this the hard way after my first few stuck-to-the-pan disasters! My foolproof method is to butter the pan generously, then line the bottom with parchment paper cut to fit. The butter helps the sides release, while the parchment guarantees the bottom comes out perfectly every time. If you’re using a fancy Bundt pan, really get that butter into all the crevices!
Can I make this honeycomb pasta cake ahead of time?
You totally can! I often assemble it up to a day in advance – just cover the unbaked dish tightly with plastic wrap and refrigerate. When you’re ready, pop it straight from fridge to oven (add 5-10 minutes to the baking time since it’s cold). The texture might be slightly denser, but still delicious!
Why does my pasta cake sometimes turn out dry?
This usually happens if the pasta absorbs too much liquid. My tricks: 1) Don’t overcook the pasta initially – al dente is key! 2) Make sure your egg-milk mixture completely coats every piece of pasta. 3) If your oven runs hot, tent with foil after 20 minutes to prevent over-browning. And remember – resting time lets moisture redistribute!
What’s the best way to reheat leftovers without drying them out?
My favorite method is the toaster oven at 160°C (325°F) for about 10 minutes – it revives that crispy crust beautifully. If you must use a microwave, do 30-second bursts with a damp paper towel over the slice to add moisture. But honestly? Cold leftovers straight from the fridge make an amazing snack too!