
Oh my goodness, you have to try these Italian cannoli inspired thumbprint cookies! They’re my latest obsession—imagine all the creamy, dreamy flavors of traditional cannoli stuffed into a buttery little cookie you can pop in your mouth. I came up with these after a trip to Sicily where I ate my weight in cannoli (no regrets!), and I desperately wanted to recreate that magic at home without the fuss of deep-frying shells.
These cookies are my happy accident—they started as a simple thumbprint recipe but turned into something spectacular when I added ricotta filling. The best part? They come together in under 30 minutes with ingredients you probably already have. No fancy piping bags or special equipment needed—just your hands, a mixing bowl, and a serious love for Italian desserts.
Every bite gives you that perfect contrast—crisp edges with a tender center, sweet ricotta filling with just a hint of cinnamon, and those little chocolate chips that make it truly cannoli-worthy. Trust me, once you try these, regular thumbprint cookies will seem downright boring!
Why You’ll Love These Italian Cannoli Inspired Thumbprint Cookies
Let me tell you why these little guys have become my go-to cookie recipe:
- Instant crowd-pleaser: They disappear faster than I can make them at parties—the perfect blend of familiar comfort and Italian flair
- Pantry-friendly ingredients: No specialty items needed (that drained ricotta in your fridge? Perfect!)
- Quick magic: From bowl to plate in under 30 minutes—ideal for last-minute cravings or surprise guests
- Customizable cuteness: Make them mini for tea parties or jumbo for dramatic dessert moments
Seriously, what’s not to love?
Ingredients for Italian Cannoli Inspired Thumbprint Cookies
Here’s everything you’ll need to make these little bites of heaven – and yes, every single ingredient matters! I’ve learned through trial and error (mostly error) that skipping steps like draining the ricotta or using cold butter can really change the game.
- 1 1/2 cups all-purpose flour – spooned and leveled, please! Packing it gives you tough cookies
- 1/2 cup unsalted butter – softened but still cool to the touch (leave it out for about 30 minutes)
- 1/4 cup granulated sugar – just enough sweetness to let the ricotta filling shine
- 1 large egg yolk – save the white for an omelet!
- 1/2 tsp vanilla extract – the good stuff, not imitation
- 1/2 cup ricotta cheese – well-drained (I let mine sit in a fine mesh strainer for 30 minutes)
- 2 tbsp powdered sugar – plus extra for that beautiful snowy dusting at the end
- 1/4 tsp cinnamon – just a whisper to give it that authentic cannoli vibe
- 1/4 cup mini chocolate chips – because what’s cannoli without chocolate?
See? Nothing weird or fancy – just simple ingredients that transform into something magical when combined the right way. Now let’s get mixing!
How to Make Italian Cannoli Inspired Thumbprint Cookies
Okay, let’s get to the fun part—making these little bites of heaven! I promise it’s easier than you think, but there are a few tricks I’ve learned after making these about a hundred times (not exaggerating—my neighbors keep requesting them). Follow these steps, and you’ll have perfect cannoli-inspired cookies every time.
Preparing the Cookie Dough
First things first—preheat that oven to 350°F (175°C) and line your baking sheet with parchment paper. Trust me, you’ll thank me later when the cookies slide right off!
Now, grab your mixing bowl and let’s make magic happen. Combine the flour, softened butter (not melted—that’s crucial!), granulated sugar, egg yolk, and vanilla extract. Mix until it comes together into a soft dough that holds its shape when you pinch it. If it feels too sticky, add a tablespoon more flour—but don’t overdo it!
Roll the dough into 1-inch balls—I use a small cookie scoop for consistency, but your hands work just fine. Place them about 2 inches apart on the baking sheet. Here comes the fun part: press your thumb (clean, please!) gently into the center of each ball to make a well. Don’t press all the way through—you want a nice little pocket for that luscious filling later.
Baking and Cooling
Pop those beauties in the oven for 12-14 minutes. You’ll know they’re ready when the edges turn that perfect golden color—like a summer tan on a cookie! The centers might still look soft, but that’s exactly what you want.
Now, here’s where patience comes in—let them cool completely on the baking sheet. I know it’s tempting to fill them right away, but warm cookies + ricotta filling = messy disaster. Ask me how I know! Give them at least 15 minutes to set up properly.
Making the Cannoli Filling
While the cookies cool, let’s make that dreamy filling. Remember that ricotta you drained earlier? Toss it in a bowl with powdered sugar and cinnamon. Mix until smooth—no lumps allowed! Then gently fold in those mini chocolate chips. Pro tip: save a few chips to sprinkle on top for that picture-perfect finish.
When your cookies are completely cool, spoon about a teaspoon of filling into each well. Don’t overfill—these aren’t cannoli shells, and we want that pretty powdered sugar dusting to stick to the cookie edges. Speaking of which… grab that powdered sugar shaker and give them a generous snowy coating right before serving. Bellissimo!
Tips for Perfect Italian Cannoli Inspired Thumbprint Cookies
After burning through more batches than I’d like to admit, here are my hard-won secrets for cannoli cookie success:
- Drain that ricotta like your cookies depend on it – I let mine sit in a fine mesh strainer over a bowl for at least 30 minutes, pressing out excess liquid with a spoon. Wet filling = soggy cookies!
- Parchment paper is non-negotiable – These delicate cookies stick like crazy to bare pans. The parchment also helps them bake evenly.
- Thumbprint depth matters – Press just deep enough to hold filling without breaking through. I use the back of a 1/4 teaspoon measure for perfect wells.
- Taste as you go – Love sweeter cannoli? Add an extra tablespoon of powdered sugar to the filling. Prefer tang? Reduce it!
Follow these, and you’ll avoid all my messy mistakes!
Variations and Substitutions
One of the best things about these cookies is how easily you can tweak them to suit your taste! Here are my favorite twists:
- Mascarpone magic: Swap the ricotta for equal parts mascarpone if you want an ultra-creamy, richer filling. It’s like cannoli meets cheesecake!
- Zesty upgrade: Add a teaspoon of orange or lemon zest to the filling for a bright pop of flavor—my Sicilian aunt approves this move.
- Dairy-free delight: Use vegan butter and a thick coconut yogurt (drained!) instead of ricotta. Not traditional, but still delicious.
- Nutty variation: Fold chopped pistachios into the filling or sprinkle on top for that classic cannoli crunch.
The possibilities are endless—make them your own!
Serving and Storing Italian Cannoli Inspired Thumbprint Cookies
Here’s the best part – watching people’s faces light up when you bring these out! Hold off on the powdered sugar dusting until right before serving – it keeps that beautiful snowy look fresh. I like to arrange them on a vintage cake stand (Grandma’s trick) with extra chocolate chips scattered around for drama.
Storage is easy – just pop them in an airtight container in the fridge for up to 3 days. The ricotta filling means they can’t sit out too long. If you need to revive them, 10 seconds in the microwave brings back that just-baked magic. Though let’s be honest… they rarely last long enough to need storing!
Nutritional Information
Just so you know what you’re indulging in (no judgment here!), here’s the nutritional scoop per cookie – keep in mind these are estimates since ingredients can vary:
- Calories: 85
- Fat: 4g (2.5g saturated)
- Sugar: 5g
- Carbs: 10g
- Protein: 1g
Not bad for a little taste of Italy, right? Everything in moderation… except maybe powdered sugar dusting – go wild with that!
FAQs About Italian Cannoli Inspired Thumbprint Cookies
Can I freeze these cookies? Absolutely! Freeze the baked (but unfilled) cookies in an airtight container for up to 2 months. Thaw at room temperature before filling. The ricotta mixture is best made fresh, though—freezing turns it grainy.
Help! My filling is runny—what went wrong? Oh honey, I’ve been there! Two culprits: not draining the ricotta enough (aim for 30+ minutes) or filling warm cookies. Always let them cool completely—the heat makes the filling weep. If it’s too late, pop them in the fridge to firm up.
Can I make these without chocolate chips? Of course! While the chips give that classic cannoli vibe, you could use chopped candied orange peel or skip add-ins altogether. Just promise me you’ll still dust them with powdered sugar—it’s non-negotiable!
Why do my cookies spread too much? Three likely reasons: butter was too soft (should be cool to touch), oven wasn’t hot enough (use an oven thermometer!), or you skipped chilling the dough balls for 10 minutes before baking. My golden rule? Patience pays off!
Can I pipe the filling instead of spooning it? Smart thinking! For fancy swirls, use a piping bag with a star tip—just make sure your ricotta mixture is thick enough. Pro tip: add an extra tablespoon of powdered sugar to stiffen it up for piping.
Print
Irresistible Italian Cannoli Inspired Thumbprint Cookies
- Total Time: 27 minutes
- Yield: 24 cookies 1x
- Diet: Vegetarian
Description
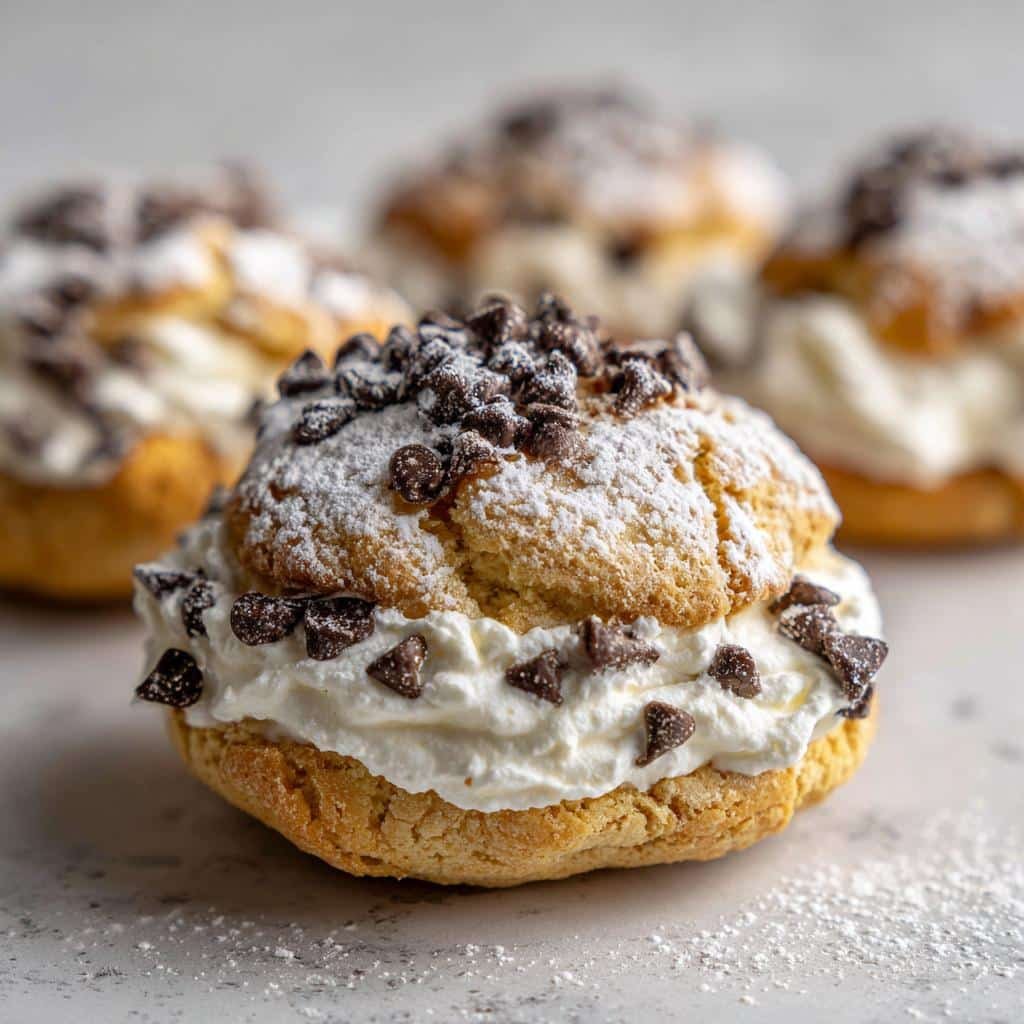
Italian cannoli-inspired thumbprint cookies combine the rich flavors of traditional cannoli in a bite-sized cookie. These cookies feature a buttery base, a sweet ricotta filling, and a dusting of powdered sugar.
Ingredients
- 1 1/2 cups all-purpose flour
- 1/2 cup unsalted butter, softened
- 1/4 cup granulated sugar
- 1 large egg yolk
- 1/2 tsp vanilla extract
- 1/2 cup ricotta cheese, drained
- 2 tbsp powdered sugar
- 1/4 tsp cinnamon
- 1/4 cup mini chocolate chips
Instructions
- Preheat oven to 350°F (175°C). Line a baking sheet with parchment paper.
- In a bowl, mix flour, butter, granulated sugar, egg yolk, and vanilla until a dough forms.
- Roll dough into 1-inch balls and place on the baking sheet.
- Press your thumb into the center of each ball to create a well.
- Bake for 12-14 minutes until edges are lightly golden. Let cool.
- In another bowl, mix ricotta, powdered sugar, cinnamon, and chocolate chips.
- Fill each cookie well with the ricotta mixture. Dust with powdered sugar before serving.
Notes
- Drain ricotta well to prevent a runny filling.
- Store cookies in an airtight container in the fridge for up to 3 days.
- For extra flavor, add orange zest to the ricotta filling.
- Prep Time: 15 minutes
- Cook Time: 12 minutes
- Category: Dessert
- Method: Baking
- Cuisine: Italian
Nutrition
- Serving Size: 1 cookie
- Calories: 85
- Sugar: 5g
- Sodium: 10mg
- Fat: 4g
- Saturated Fat: 2.5g
- Unsaturated Fat: 1g
- Trans Fat: 0g
- Carbohydrates: 10g
- Fiber: 0g
- Protein: 1g
- Cholesterol: 15mg
Keywords: italian cookies, cannoli cookies, thumbprint cookies, ricotta dessert, easy cookies