
Oh my goodness, you have to try this mini egg cheesecake! It’s become my go-to Easter treat, and honestly, I could eat it year-round. I first made these little beauties when I needed a last-minute dessert for a spring brunch – talk about a lifesaver! No oven required, just a few simple ingredients, and you’ve got these adorable, creamy cheesecakes with that perfect crunch from the biscuit base. The best part? Those colorful mini eggs folded into the filling and scattered on top make every bite feel like a celebration. Trust me, once you taste how the rich cream cheese filling pairs with the chocolatey eggs, you’ll be hooked just like I was!
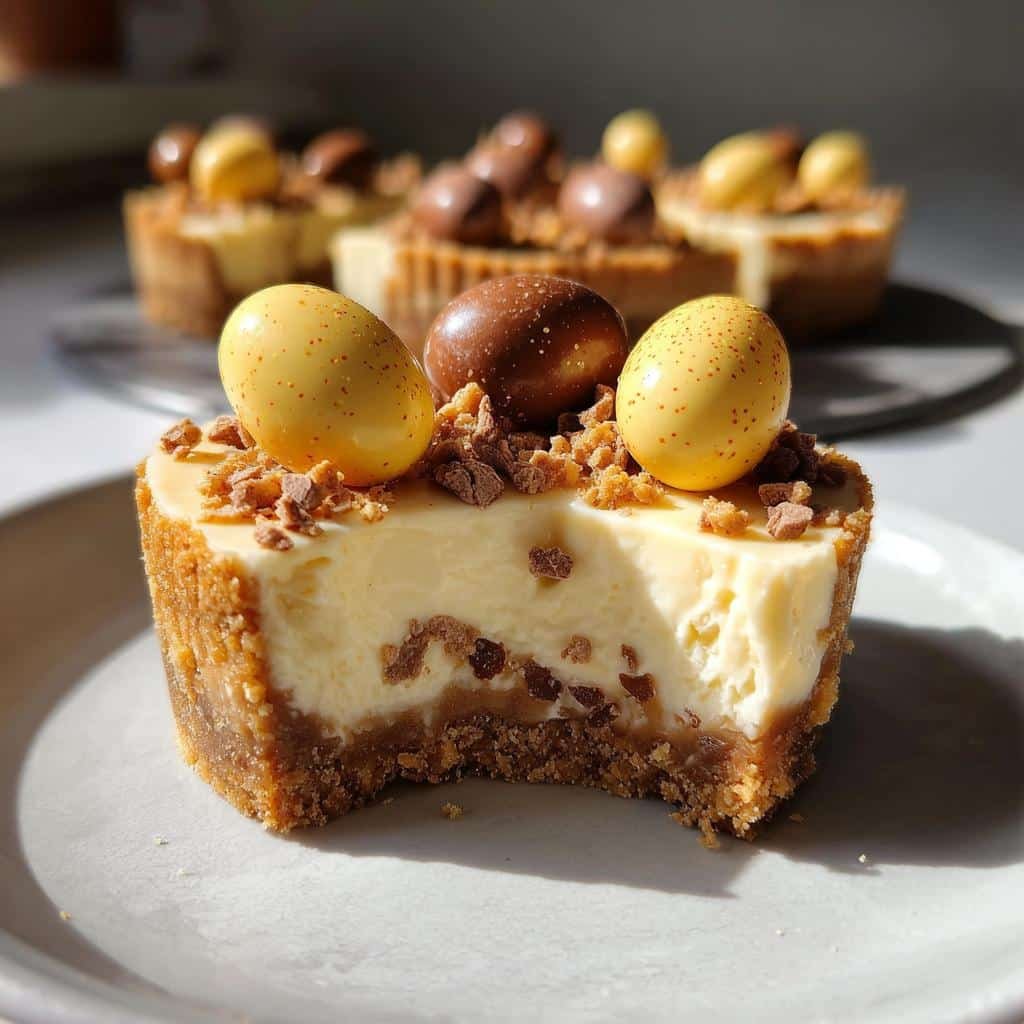
Table of Contents
Why You’ll Love This Mini Egg Cheesecake
Let me tell you why this recipe is absolutely magical:
- No-bake bliss: No oven? No problem! These set perfectly in the fridge while you relax.
- Quick & easy: From mixing bowl to table in under 20 minutes (plus chilling time, of course).
- Creamy dreamy texture: That smooth, velvety filling with little bursts of chocolate egg crunch? Heaven.
- Instant celebration: Those colorful mini eggs make every bite feel like a party.
Honestly, it’s the perfect treat when you need something special without the fuss!
Ingredients for Mini Egg Cheesecake
Here’s everything you’ll need to make these adorable little cheesecakes. I promise it’s all simple stuff – nothing fancy required! I always measure everything out first so I can just grab and go when mixing.
For the crust:
- 1 1/2 cups digestive biscuits, crushed into fine crumbs (graham crackers work too in a pinch!)
- 1/4 cup unsalted butter, melted and slightly cooled (this helps it hold together perfectly)
For the filling:
- 1 cup full-fat cream cheese, softened to room temperature (this is KEY for smooth mixing)
- 1/4 cup powdered sugar (sifted if yours is lumpy)
- 1 tsp pure vanilla extract (go for the good stuff!)
- 1/2 cup heavy whipping cream, whipped to soft peaks
- 1/2 cup mini chocolate eggs, roughly crushed (save some pretty ones for topping!)
See? Told you it was simple! Now let’s get mixing.
Print
Mini Egg Cheesecake in 20 Minutes Flat
- Total Time: 2 hours 15 minutes
- Yield: 6 mini cheesecakes 1x
- Diet: Vegetarian
Description
A delicious no-bake mini egg cheesecake with a creamy filling and crunchy base.
Ingredients
- 1 1/2 cups crushed digestive biscuits
- 1/4 cup melted butter
- 1 cup cream cheese
- 1/4 cup powdered sugar
- 1 tsp vanilla extract
- 1/2 cup whipped cream
- 1/2 cup mini chocolate eggs, crushed
- Extra mini eggs for decoration
Instructions
- Mix crushed biscuits with melted butter and press into mini cheesecake molds.
- Beat cream cheese, powdered sugar, and vanilla until smooth.
- Fold in whipped cream and crushed mini eggs.
- Spoon filling over the biscuit base and smooth the top.
- Chill for at least 2 hours.
- Decorate with extra mini eggs before serving.
Notes
- Use full-fat cream cheese for best texture.
- Chill for at least 2 hours for firmness.
- Store leftovers in the fridge for up to 3 days.
- Prep Time: 15 minutes
- Cook Time: 0 minutes
- Category: Dessert
- Method: No-Bake
- Cuisine: American
Nutrition
- Serving Size: 1 mini cheesecake
- Calories: 280
- Sugar: 18g
- Sodium: 180mg
- Fat: 19g
- Saturated Fat: 11g
- Unsaturated Fat: 6g
- Trans Fat: 0g
- Carbohydrates: 24g
- Fiber: 1g
- Protein: 4g
- Cholesterol: 45mg
Keywords: mini egg cheesecake, no-bake cheesecake, Easter dessert
Equipment You’ll Need
Gather these kitchen essentials – I bet you already have most of them! You’ll need:
- Mini cheesecake pan with removable bottoms (or a muffin tin lined with parchment squares)
- Mixing bowls – one for the crust, one for the filling
- Electric mixer (or strong arms and a whisk!)
- Spatula for scraping every last bit of that delicious filling
- Glass or measuring cup to press down the crust
That’s it! No fancy gadgets required for these little beauties.
How to Make Mini Egg Cheesecake
Okay, let’s get to the fun part! I’ll walk you through each step – it’s so easy you’ll be amazed at how professional these look when they’re done. Just follow along and resist the urge to peek in the fridge too often while they set!
Preparing the Crust
First things first – that buttery biscuit base! Mix your crushed digestives with the melted butter until it looks like wet sand. Now here’s my trick: spoon it into your molds, then use the bottom of a glass to press it down firmly and evenly. You want it packed tight so it holds together when you take your first glorious bite. Pop these in the fridge for 10 minutes while you make the filling – this helps them stay crisp.
Making the Filling
Now for the creamy magic! Beat your softened cream cheese until it’s completely smooth – no lumps allowed! Then add the powdered sugar and vanilla, mixing just until combined. Here’s where you need to be gentle: fold in the whipped cream slowly with a spatula, lifting rather than stirring, to keep all that airy lightness. Finally, gently mix in most of your crushed mini eggs (save some for topping!). The filling should be thick but still fluffy – overmixing will make it dense.
Assembling and Chilling
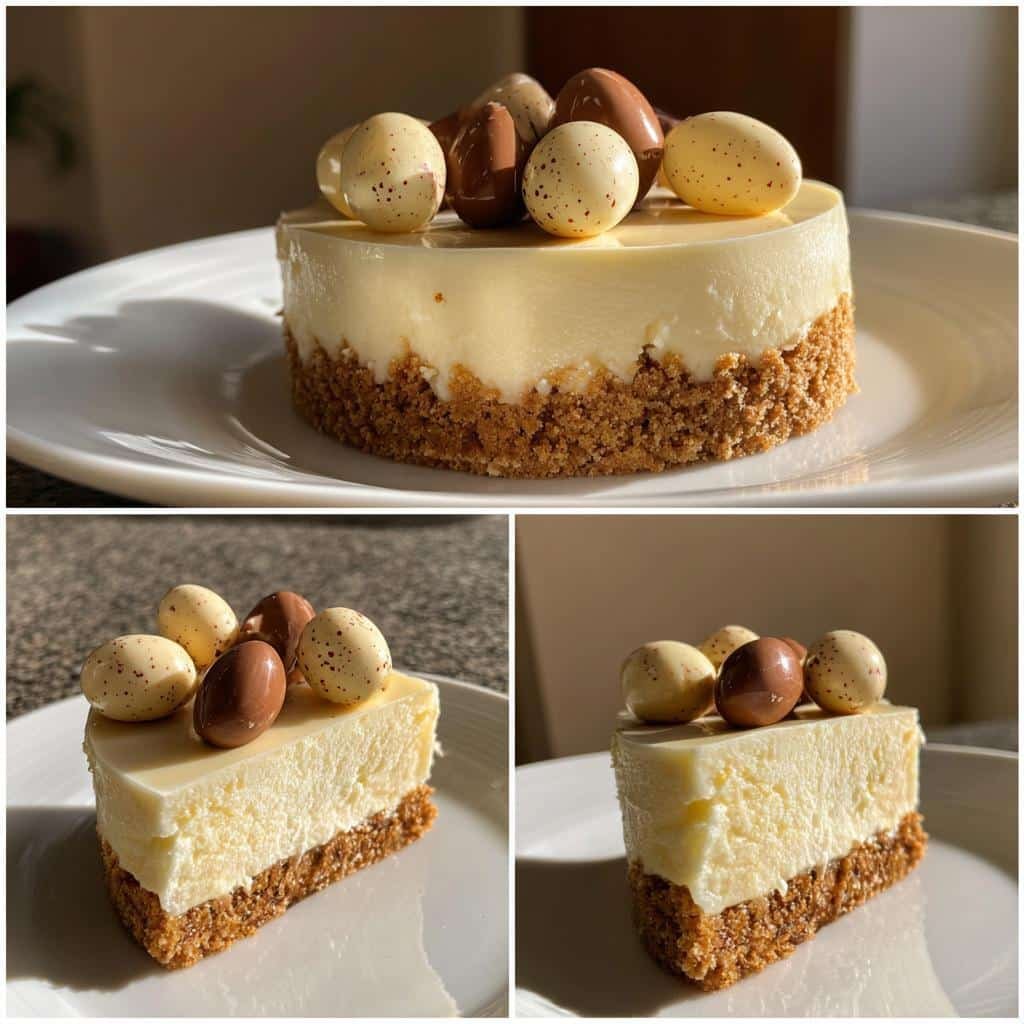
Spoon your dreamy filling onto the chilled bases, smoothing the tops with the back of a spoon. Scatter those reserved mini eggs on top for that festive look. Now the hardest part – walk away! These need at least 2 hours in the fridge to set properly. I know it’s tempting, but trust me, waiting means you’ll get that perfect sliceable texture. When you can’t stand it anymore, gently remove them from the molds and prepare for cheesecake heaven!
Tips for the Perfect Mini Egg Cheesecake
After making these dozens of times (okay, maybe hundreds – I’m obsessed!), here are my best tricks for mini egg cheesecake success:
- Cold cream cheese is the enemy! Let it soften completely at room temperature – about 30 minutes. Cold cream cheese will leave you battling lumps no matter how long you mix.
- Crush those eggs right: I put them in a bag and gently whack with a rolling pin – you want small bits, not powder. Big chunks make slicing messy.
- Don’t overmix the filling: Once you add the whipped cream, be gentle! Overworking it makes the texture dense instead of light and creamy.
- Patience is key: I know it’s hard, but let them chill the full 2 hours. The wait makes all the difference between a perfect slice and a delicious mess!
Follow these simple tips and you’ll be a mini egg cheesecake master in no time!
Mini Egg Cheesecake Variations
Oh, the fun you can have with this recipe! Once you’ve mastered the classic version, try these easy twists:
- Cookie swap: Use crushed Oreos instead of digestives for a chocolatey crust that pairs perfectly with the mini eggs.
- White chocolate dream: Melt some white chocolate into the filling for extra richness – just reduce the powdered sugar slightly.
- Seasonal spin: Swap mini eggs for crushed candy canes at Christmas or Cadbury Mini Eggs for Easter.
See? Endless possibilities with this versatile little cheesecake!
Serving and Storage
These mini egg cheesecakes taste best straight from the fridge – that cool, creamy texture is everything! I like to add the final mini egg decorations right before serving so they stay picture-perfect. Any leftovers (ha – as if!) keep beautifully in the fridge for up to 3 days if you cover them tightly. Just resist nibbling on them every time you open the fridge!
Mini Egg Cheesecake Nutrition
Now, let’s be real – we’re not eating mini egg cheesecakes for their health benefits! But if you’re curious about what you’re enjoying (or sharing with friends), here’s the scoop. Like any dessert, the exact nutrition will vary depending on your specific ingredients – especially if you tweak the recipe with different cookies or chocolates.
These little treats pack all the indulgence you’d expect from a cheesecake, with that delightful crunch from the biscuit base and creamy richness from the filling. The mini eggs add extra sweetness and chocolatey goodness, making each bite pure happiness. Remember, portion size matters – that’s why I love making them mini! You get all the satisfaction without going overboard.
Nutrition values are always estimates, so take them with a grain of salt (though maybe not literally in this case!). The most important thing? Savor every delicious bite and enjoy the moment – that’s what treats like these are all about!
Frequently Asked Questions
I’ve gotten so many questions about these mini egg cheesecakes since I first shared the recipe – here are the answers to the ones people ask most often!
Can I freeze mini egg cheesecakes?
Absolutely! They freeze beautifully for up to a month. Just wrap them tightly in plastic wrap once they’re fully set. Thaw in the fridge overnight when you’re ready to enjoy. The texture stays perfect – just add fresh mini eggs on top after thawing for that pretty finish.
Can I use regular eggs instead of mini eggs?
Oh honey, no! We’re talking about those candy-coated chocolate mini eggs here, not chicken eggs. Using regular eggs would be… well, let’s just say it wouldn’t end well! If you can’t find mini eggs, any small chocolate candies will work in a pinch.
My filling isn’t setting – what went wrong?
Usually this means either your cream cheese wasn’t full-fat (low-fat versions don’t set as well) or you didn’t chill them long enough. Give them another hour in the fridge – patience is key! Also make sure you whipped your cream to proper peaks before folding it in.
Can I make one big cheesecake instead of minis?
Of course! Just use a 6-inch springform pan and press the crust up the sides a bit. You’ll need to chill it longer – about 4 hours minimum. The slices will be gorgeous with all those colorful egg pieces throughout!
Try this recipe and share your results in the comments! I’d love to hear how yours turn out and see your creative variations.